Creative Woodworks & crafts 2002-11, страница 17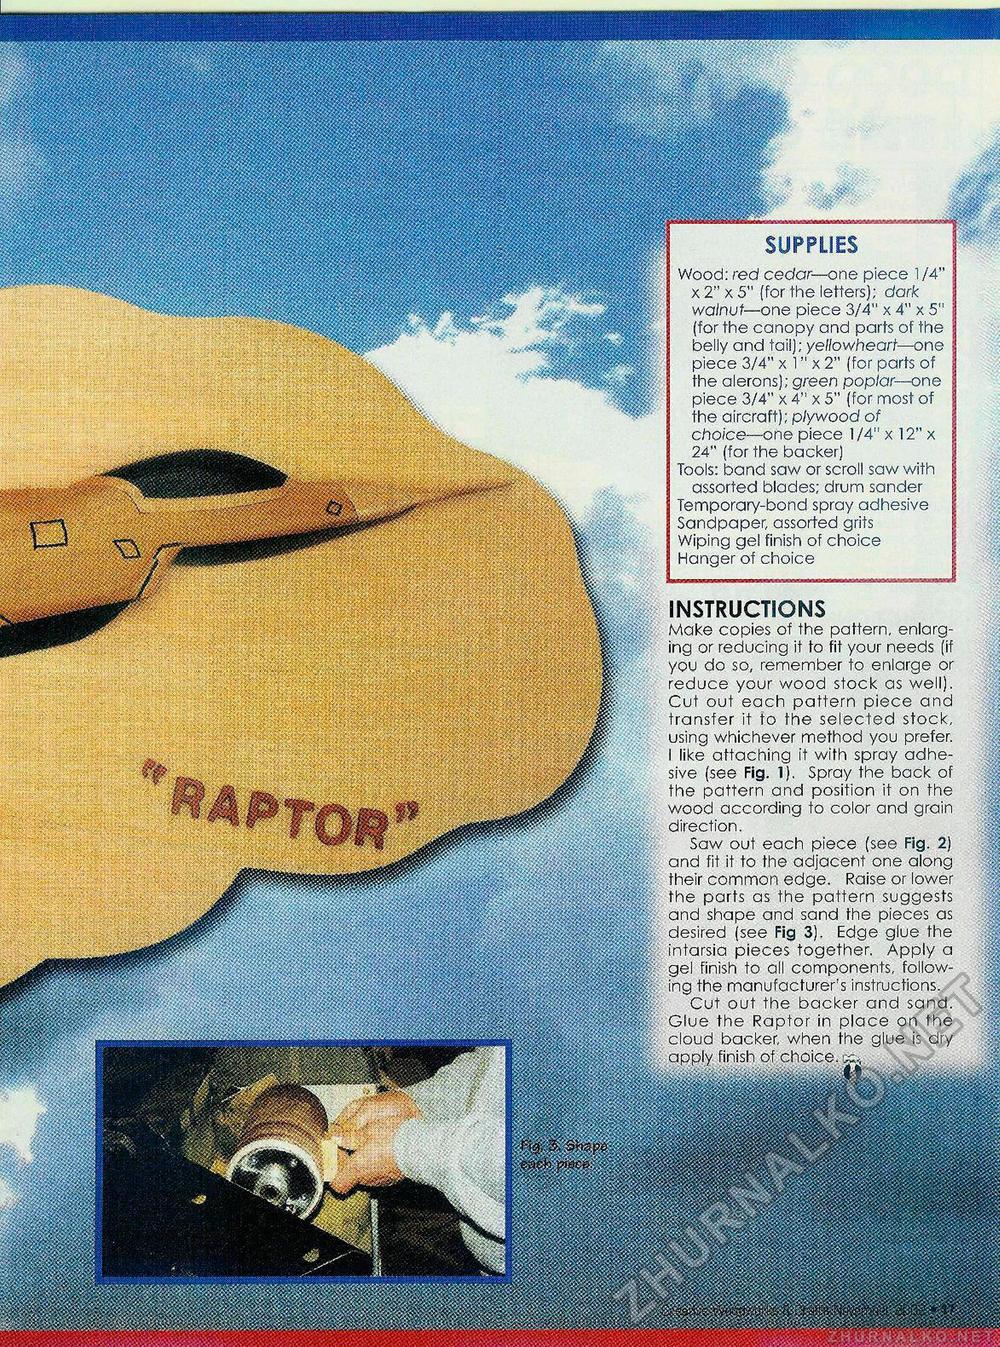
SUPPLIES Wood: red cedar— one piece 1/4" x 2" x 5" (for the letters); dork walnut—one piece 3/4" x 4" x 5" (for the canopy and parts of the beiiy and tail); yellowheart—one piece 3/4" x 1" x 2" (for parts of the alerons); green poplar—one piece 3/4" x 4" x 5" (for most of the aircraft); plywood of choice—one piece 1/4" x 12" x 24" (for the backer) Tools: band saw or scroll saw with assorted blades; drum sander Temporary-bond spray adhesive Sandpaper, assorted grits Wiping gel finish of choice Hanger of choice illPft ti'M- INSTRUCTIONS Make copies of the pattern, enlarging or reducing it to fit your needs (if you do so, remember to enlarge or reduce your wood stock as well). Cut out each pattern piece and transfer it to the selected stock, using whichever method you prefer. I like attaching it with spray adhesive (see Fig. 1). Spray the back of the pattern and position it on the wood according to color and grain direction. Saw out each piece (see Fig. 2) and fit it to the adjacent one along their common edge. Raise or lower the parts as the pattern suggests and shape and sand the pieces as desired (see Fig 3). Edge glue the intarsia pieces together. Apply a gel finish to all components, following the manufacturer's instructions. Cut out the backer and sand. Glue the Raptor in place on the cloud backer, when the glue is dry apply finish of choice, kv tfliil |


