Creative Woodworks & crafts 2002-11, страница 47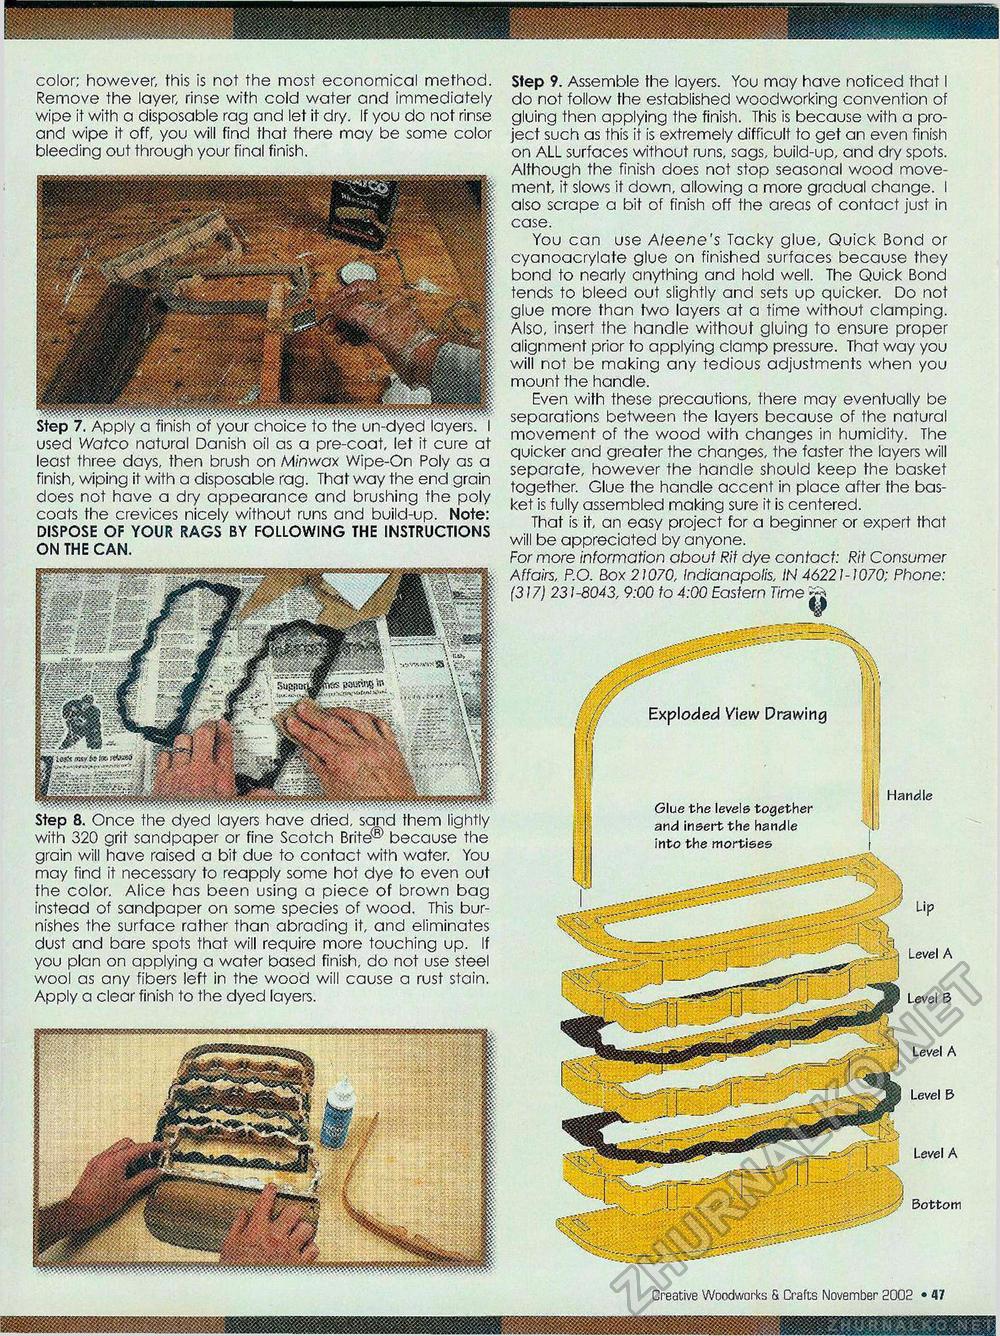
color; however, this is not the most economical method. Remove the layer, rinse with cold water and immediately wipe it with a disposable rag and let it dry. If you do not rinse and wipe it off, you will find that there may be some color bleeding out through your final finish. Step 7. Apply a finish of your choice to the un-dyed layers. I used Watco natural Danish oil as a pre-coat, let it cure at least three days, then brush on Minwax Wipe-On Poly as a finish, wiping it with a disposable rag. That way the end grain does not have a dry appearance and brushing the poly coats the crevices nicely without runs and build-up. Note: DISPOSE OF YOUR RAGS BY FOLLOWING THE INSTRUCTIONS ON THE CAN. Step 8. Once the dyed layers have dried, sand them lightly with 320 grit sandpaper or fine Scotch Brite® because the grain will have raised a bit due to contact with water. You may find it necessary to reapply some hot dye to even out the color. Alice has been using a piece of brown bag instead of sandpaper on some species of wood. This burnishes the surface rather than abrading it, and eliminates dust and bare spots that will require more touching up. If you plan on applying a water based finish, do not use steel wool as any fibers left in the wood will cause a rust stain. Apply a clear finish to the dyed layers. Step 9. Assemble the layers. You may have noticed that I do not follow the established woodworking convention of gluing then applying the finish. This is because with a project such as this it is extremely difficult to get an even finish on ALL surfaces without runs, sags, build-up, and dry spots. Although the finish does not stop seasonal wood movement, it slows it down, allowing a more gradual change. I also scrape a bit of finish off the areas of contact just in case. You can use A/eene's Tacky glue. Quick Bond or cyanoacrylate glue on finished surfaces because they bond to nearly anything and hold well. The Quick Bond tends to bleed out slightly and sets up quicker. Do not glue more than two layers at a time without clamping. Also, insert the handle without gluing to ensure proper alignment prior to applying clamp pressure. That way you will not be making any tedious adjustments when you mount the handle. Even with these precautions, there may eventually be separations between the layers because of the natural movement of the wood with changes in humidity. The quicker and greater the changes, the faster the layers will separate, however the handle should keep the basket together. Glue the handle accent in place after the basket is fully assembled making sure it is centered. That is it, an easy project for a beginner or expert that will be appreciated by anyone. For more information about Rit dye contact: Rit Consumer Affairs, P.O. Box 21070, Indianapolis, IN 46221-1070; Phone: (317) 231-8043, 9:00 to 4:00 Eastern Time yj ¥ Glue the levels together and insert the handle into the mortises "Sitxk Exploded View Drawing Handle ^ Lip Level A Level 5 Level A Level B Level A Bottom Creative Woodworks S. Crafts November 2002 • 29 |


