Creative Woodworks & crafts 2003-03, страница 17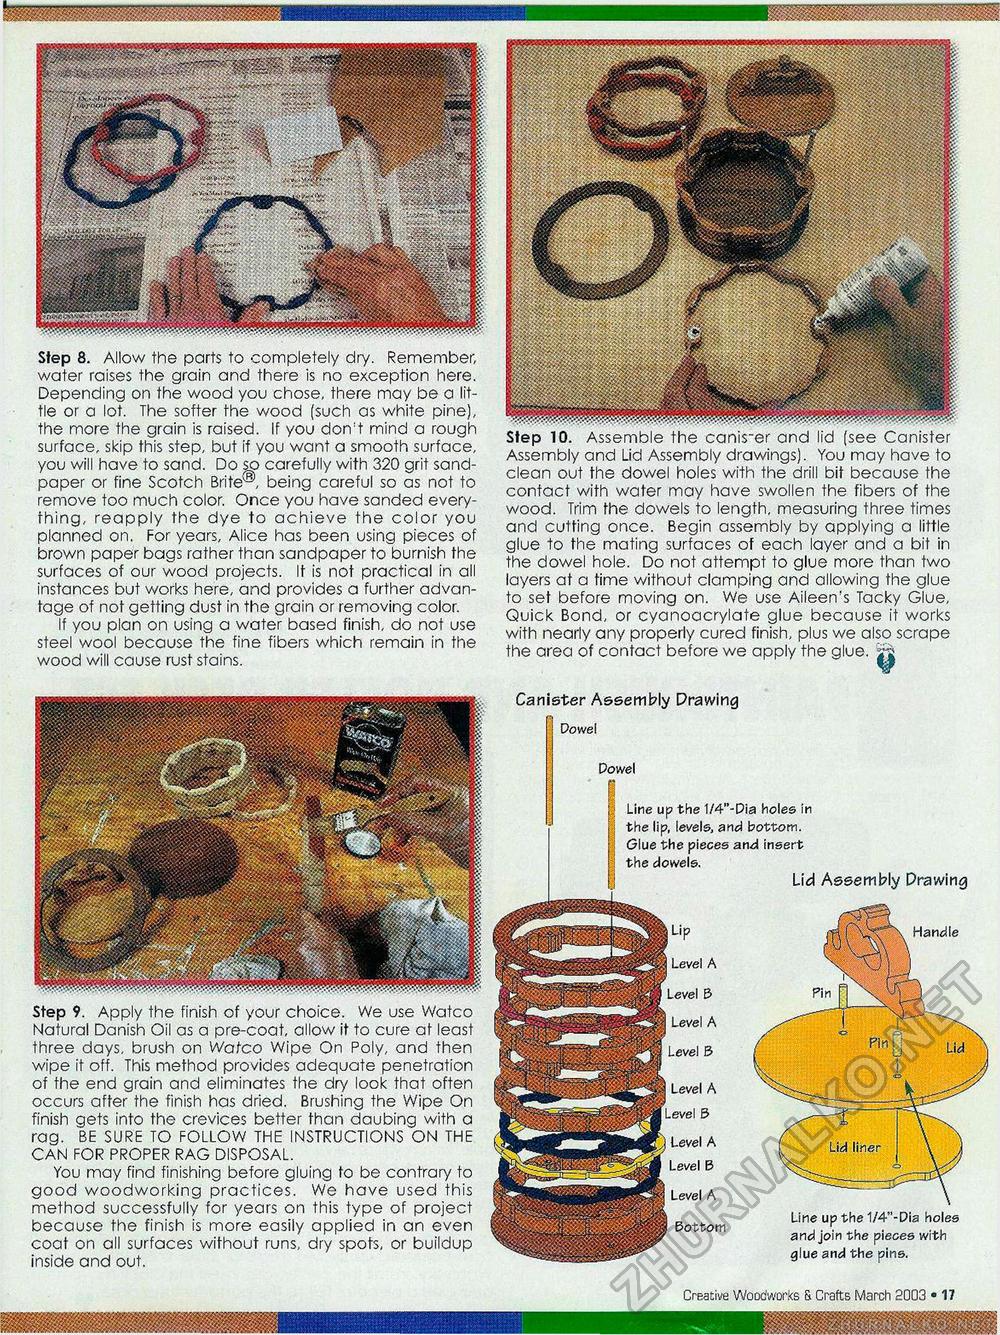
Step 8. Allow the parts to completely dry. Remember, water raises the grain and there is no exception here. Depending on the wood you chose, there may be a little or a lot. The softer the wood (such as white pine), the more the grain is raised. If you don't mind a rough surface, skip this step, but if you want a smooth surface, you will have to sand. Do so carefully with 320 grit sandpaper or fine Scotch Brite®, being careful so as not to remove too much color. Once you have sanded everything, reapply the dye to achieve the color you planned on. For years, Alice has been using pieces of brown paper bags rather than sandpaper to burnish the surfaces of our wood projects. It is not practical in all instances but works here, and provides a further advantage of not getting dust in the grain or removing color. If you plan on using a water based finish, do not use steel wool because the fine fibers which remain in the wood will cause rust stains. Step 10. Assemble the canis_er and lid [see Canister Assembly and Lid Assembly drawings). You may have to clean out the dowel holes with the drill bit because the contact with water may have swollen the fibers of the wood. Trim the dowels to length, measuring three times and cutting once. Begin assembly by applying a little glue to the mating surfaces of each layer and a bit in the dowel hole. Do not attempt to glue more than two layers at a time without clamping and allowing the glue to set before moving on. We use Aileen's Tacky Glue, Quick Bond, or cyanoacrylate glue because it works with nearly any properly cured finish, plus we also scrape the area of contact before we apply the glue. jj Canister Assembly Drawing Dowel Dowel Line up the 1/4"-Dia holes in the lip, levels, and bottom. Glue the pieces and insert the dowels. Lid Assembly Drawing Lip Level A Handle Step 9. Apply the finish of your choice. We use Watco Natural Danish Oil as a pre-coat, allow it to cure at least three days, brush on Watco Wipe On Poly, and then wipe it off. This method provides adequate penetration of the end grain and eliminates the dry look that often occurs after the finish has dried. Brushing the Wipe On finish gets into the crevices better than daubing with a rag. BE SURE TO FOLLOW THE INSTRUCTIONS ON THE CAN FOR PROPER RAG DISPOSAL. You may find finishing before gluing to be contrary to good woodworking practices. We have used this method successfully for years on this type of project because the finish is more easily applied in an even coat on all surfaces without runs, dry spots, or buildup inside and out. Level A B Level A B Level A Level B Level A „ ^ Line up the 1/4 -Dia holes Bottom j. . . ,.. and join the pieces with glue and the pins. 12 • Creative Woodworks & Crafts March 2003 Base |


