Creative Woodworks & crafts 2003-03, страница 20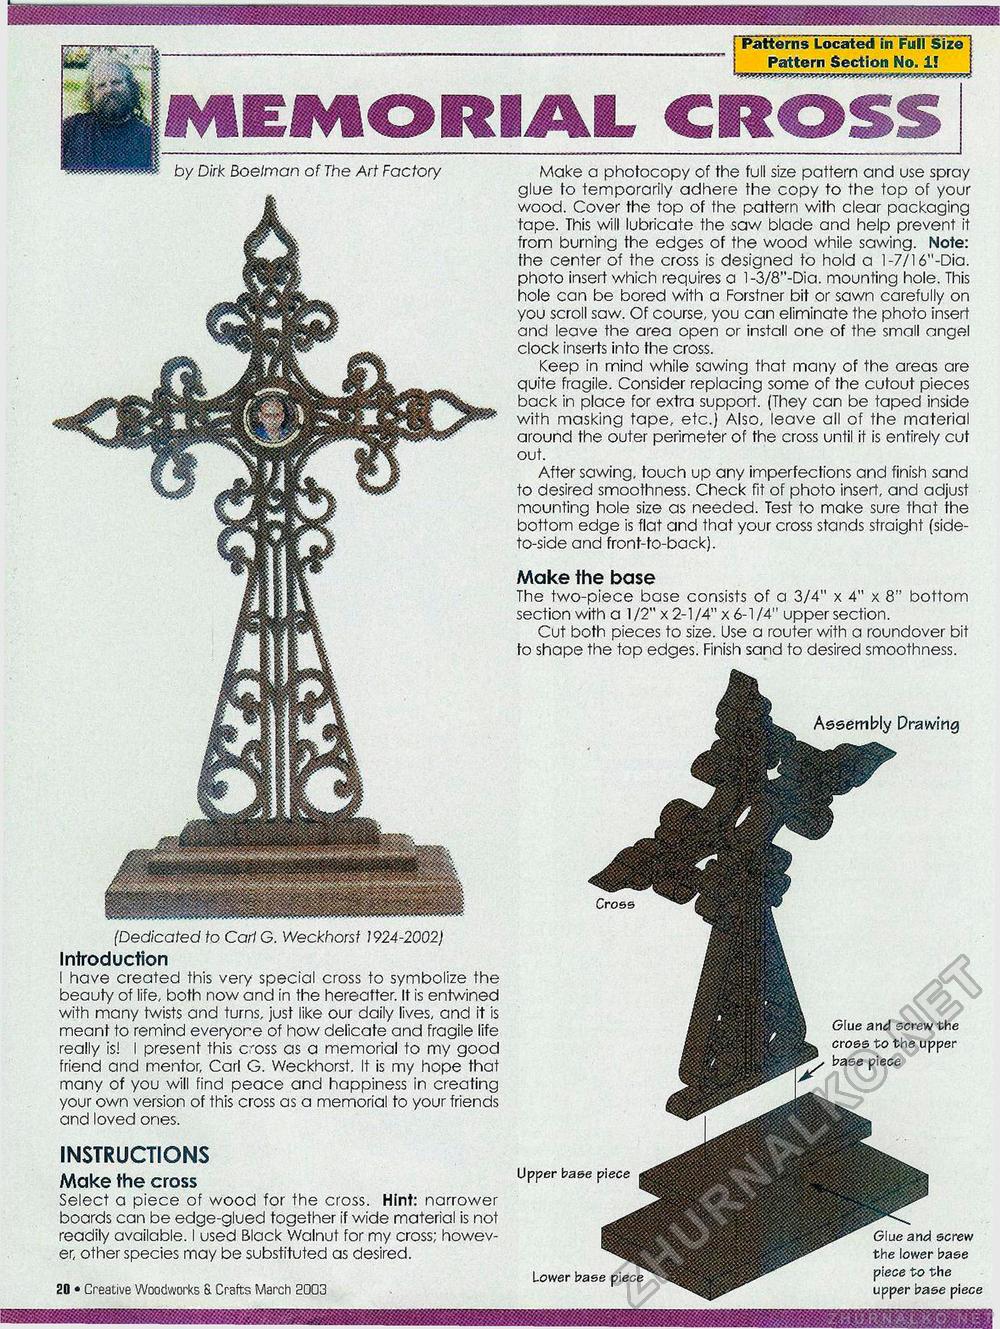
by Dirk Boelman of The Art Factory Make a photocopy of the full size pattern and use spray glue to temporarily adhere the copy to the top of your wood. Cover the top of the pattern with clear packaging tape. This will lubricate the saw blade and help prevent it from burning the edges of the wood while sawing. Note: the center of the cross is designed to hold a 1-7/16"-Dia. photo insert which requires a l-3/8"-Dia. mounting hole. This hole can be bored with a Forstner bit or sawn carefully on you scroll saw. Of course, you can eliminate the photo insert and leave the area open or install one of the small angel clock inserts into the cross. Keep in mind while sawing that many of the areas are quite fragile. Consider replacing some of the cutout pieces back in place for extra support. (They can be taped inside with masking tape, etc.) Also, leave all of the material around the outer perimeter of the cross until it is entirely cut out. After sawing, touch up any imperfections and finish sand to desired smoothness. Check fit of photo insert, and adjust mounting hole size as needed. Test to make sure that the bottom edge is flat and that your cross stands straight (side-to-side and front-to-back). Make the base The two-piece base consists of a 3/4" x 4" x 8" bottom section with a 1/2" x 2-1/4" x 6-1/4" upper section. Cut both pieces to size. Use a router with a roundover bit to shape the top edges. Finish sand to desired smoothness. Assembly Drawing Cross (Dedicated to Carl G. Weckhorst 1924-2002) Introduction I have created this very special cross to symbolize the beauty of life, both now and in the hereafter. It is entwined with many twists and turns, just like our daily lives, and it is meant to remind everyore of how delicate and fragile life really is! I present this coss as a memorial to my good friend and mentor, Carl G. Weckhorst. It is my hope that many of you will find peace and happiness in creating your own version of this cross as a memorial to your friends and loved ones. Glue and screw the lower base piece to the upper base piece INSTRUCTIONS Make the cross Select a piece of wood for the cross. Hint: narrower boards can be edge-glued together if wide material is not readily available. I used Black Walnut for my cross; however, other species may be substituted as desired. 12 • Creative Woodworks & Crafts March 2003 Base Glue and screw the cross to the upper base piece Upper base piece Lower base piece |


