Creative Woodworks & crafts 2003-03, страница 23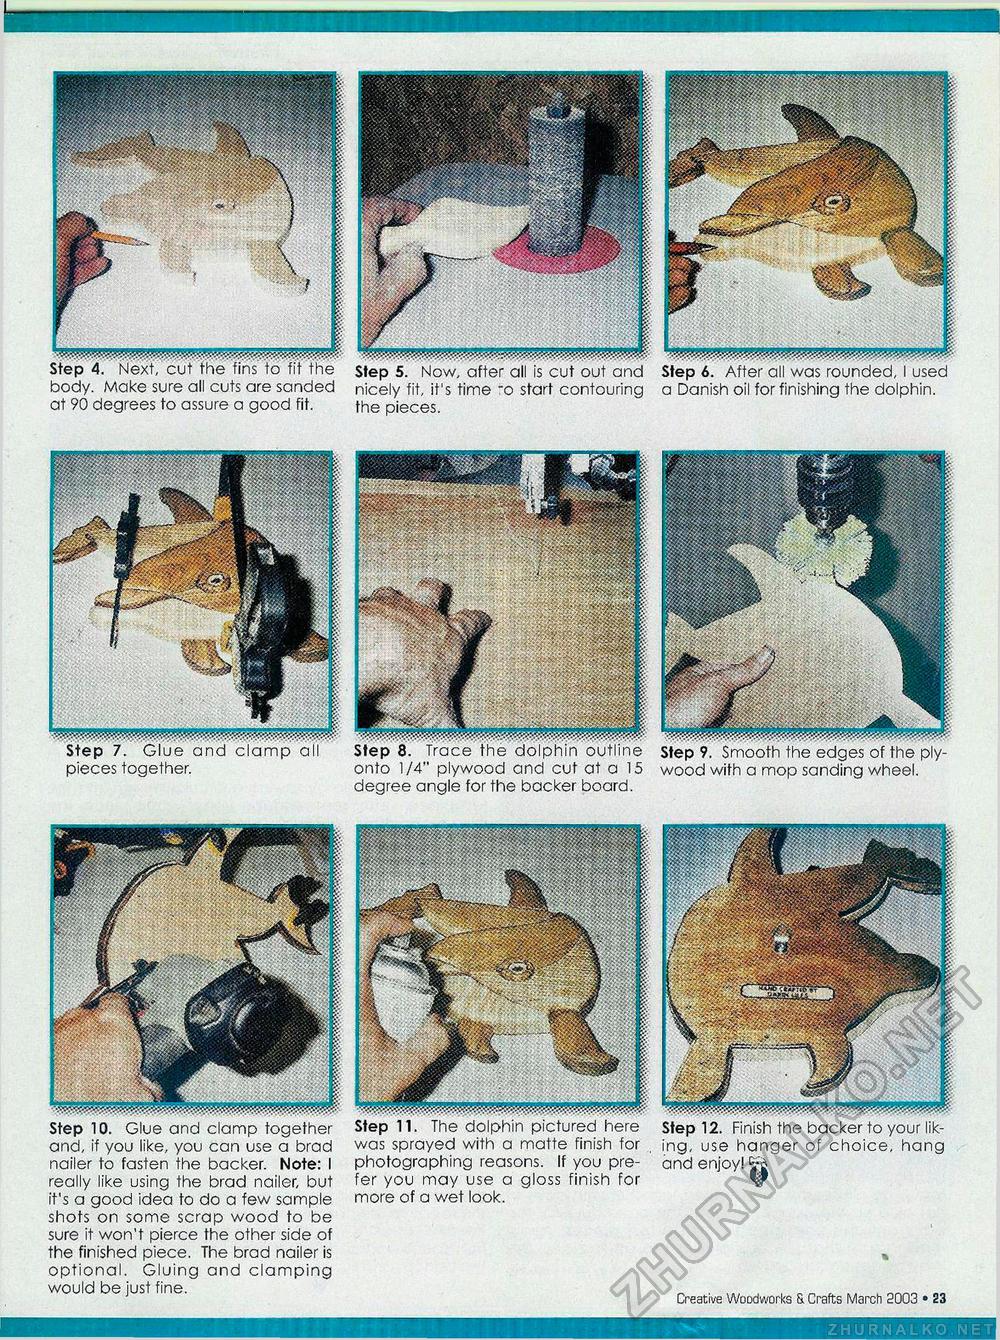
L body. Make sure all cuts are sanded at 90 degrees to assure a good fit. Step 5. Now, after all is cut out and nicely fit, it's time :o start contouring the pieces. Step 6. After all was rounded, I used a Danish oil for finishing the dolphin. Step 7. Glue and clamp all pieces together. ......... _ Step 8. Trace the dolphin outline onto 1/4" plywood and cut at a 15 degree angle for the backer board. wood with a mop sanding wheel. Step 11. The dolphin pictured here was sprayed with a matte finish for photographing reasons. If you prefer you may use a gloss finish for more of a wet look. 12 • Creative Woodworks & Crafts March 2003 Base Step 10. Glue and clamp together and, if you like, you can use a brad nailer to fasten the backer. Note: I really like using the brad nailer, but it's a good idea to do a few sample shots on some scrap wood to be sure it won't pierce the other side of the finished piece. The brad nailer is optional. Gluing and clamping would be just fine. Step 12. Finish the backer to your liking, use hanger of choice, hang and enjoy! |


