Creative Woodworks & crafts 2003-03, страница 26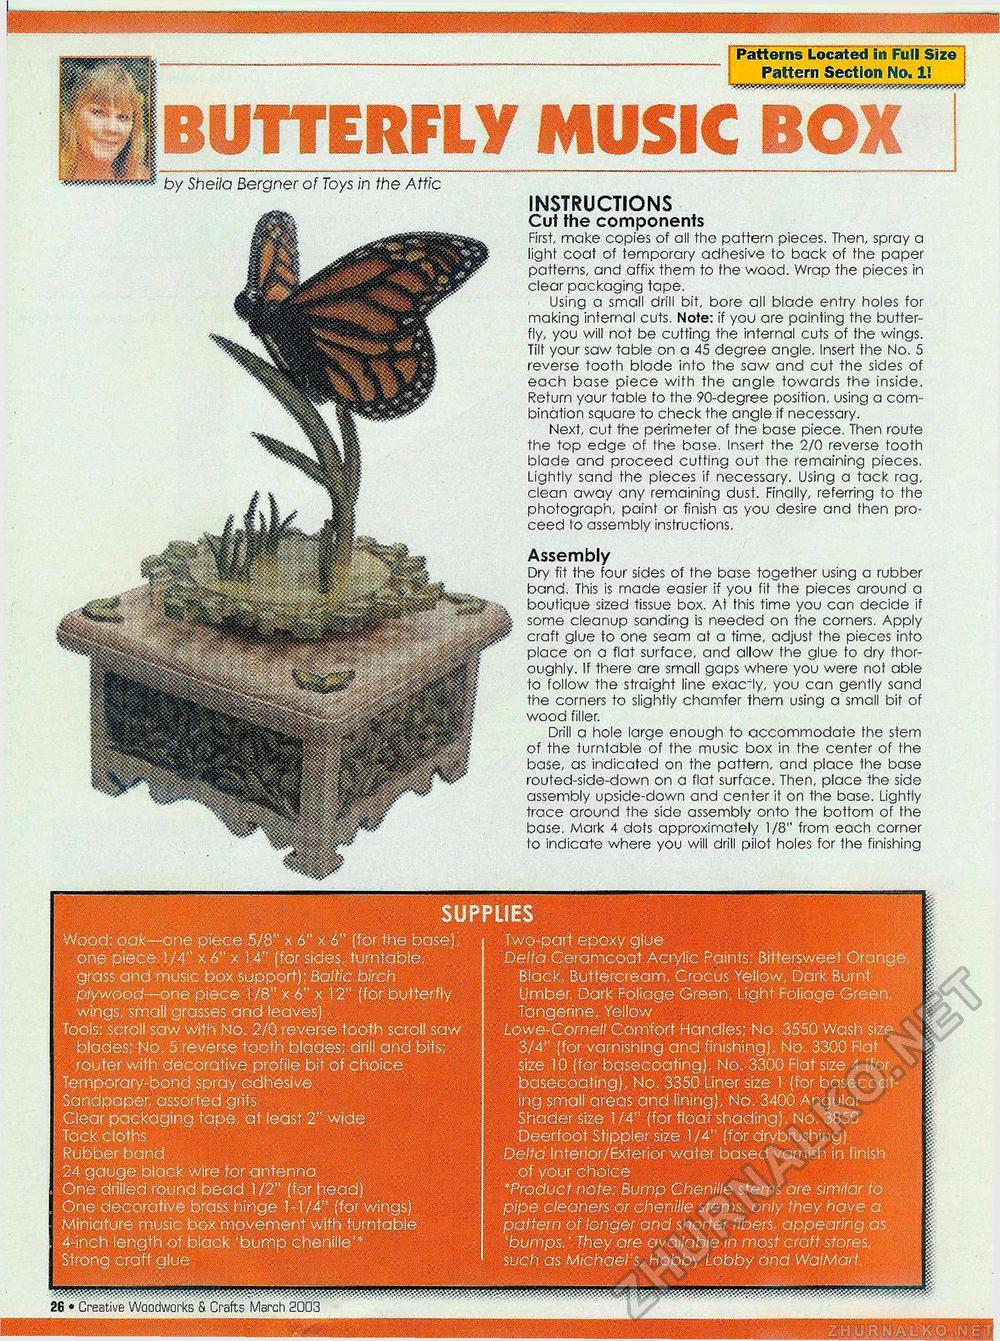
Patterns Located in Full Size Pattern Section No. 1! by Sheila Bergner of Toys in the Attic INSTRUCTIONS Cut the components First, make copies of all the pattern pieces. Then, spray a light coat of temporary adhesive to back of the paper patterns, and affix them to the wood. Wrap the pieces in clear packaging tape. Using a small drill bit, bore all blade entry holes for making infernal cuts. Note: if you are painting the butterfly, you will not be cutting the internal cuts of the wings. Tilt your saw table on a 45 degree angle. Insert the No. 5 reverse tooth blade into the saw and cut the sides of each base piece with the angle towards the inside. Return your table to the 90-degree position, using a combination square to check the angle if necessary. Next, cut the perimeter of the base piece. Then route the top edge of the base. Insert the 2/0 reverse tooth blade and proceed cutting out the remaining pieces. Lightly sand the pieces if necessary. Using a tack rag, clean away any remaining dust. Finally, referring to the photograph, paint or finish as you desire and then proceed lo assembly instructions. Assembly Dry fit the four sides of the base together using a rubber band. This is made easier if you fit the pieces around a boutique sized tissue box. At this time you can decide if some cleanup sanding is needed on the comers. Apply craft glue to one seam at a time, adjust the pieces into place on a flat surface, and allow fhe glue to dry thoroughly. If there are small gaps where you were not able to follow the straight line exaciy, you can genlly sand the corners to slightly chamfer them using a small bit of wood filler. Drill a hole large enough to accommodate the stem of the turnlable of the music box in the center of the base, as indicated on the pattern, and place the base routed-side-down on a flat surface. Then, place the side assembly upside-down and center it on the base. Lightly trace around the side assembly onto the bottom of the base. Mark 4 dots approximately 1/8" from each corner to indicate where you will drill pilot holes for fhe finishing SUPPLIES Wood: oak—one piece 5/8" x 6" x 6" {for the base), one piece 1 /4" x 6" x 1.4" (for sides, turntable, grass and music box support); Baltic birch plywood—one piece 1/8" x 6" x 12" (for butterfly wings, small grasses and leaves) Tools: scroll saw with No. 2/0 reverse tooth scroll saw blades: No. 5 reverse tooth blades; drill and bits; router with decorative, profile bit of choice; Temporary-bond spray adhesive : Sandpap assorted gilts Clear packaging tape, at least 2" wide. Tack cloths Rubber band 24 gauge block wire for antenna One drilledxound bead 1/2" (for bead! One decorative brass hinge 1-1/4" (for wings) Miniature music box movement with turntable 4-inch length of black 'bump chenille'* Strong craft glue . V Two-part epoxy glue - ; Delta Ceramcoat Acrylic Paints: Bittersweet Orange, Black, Buttercream. Crocus Yellow, Dark Burnt Umber, Dark Foliage Green, Light Foliage Green, Tangerine, Yellow Lowe-Cornell Comfort Handles; No. 3550 Wash size ; 3/4" (for varnishing and finishing). No. 3300 Flat size 10 (for basecoating), No. ;3300 Flat size 4 (for baseccating). No. 3350 Liner size 1 (for basecoating small areas and lining), No 3400 Anguldr. : Shades* size 1 /4" (for float shading), No. 3850: Deerfoot Sfippler size 1/4" (for drybrushing) Delia Inferior/Exterior wafer based varnish in finish of your choice *Product note; Bump Chenille stems are similar to pipe cleaners or chenille stems, only they have a pattern of longer and shorter fibers, appearing as 'bumps. ' They are available in most craft stores, such as Michael's, Hobby Lobby and WalMdrt. 12 • Creative Woodworks & Crafts March 2003 Base |


