Creative Woodworks & crafts 2003-03, страница 48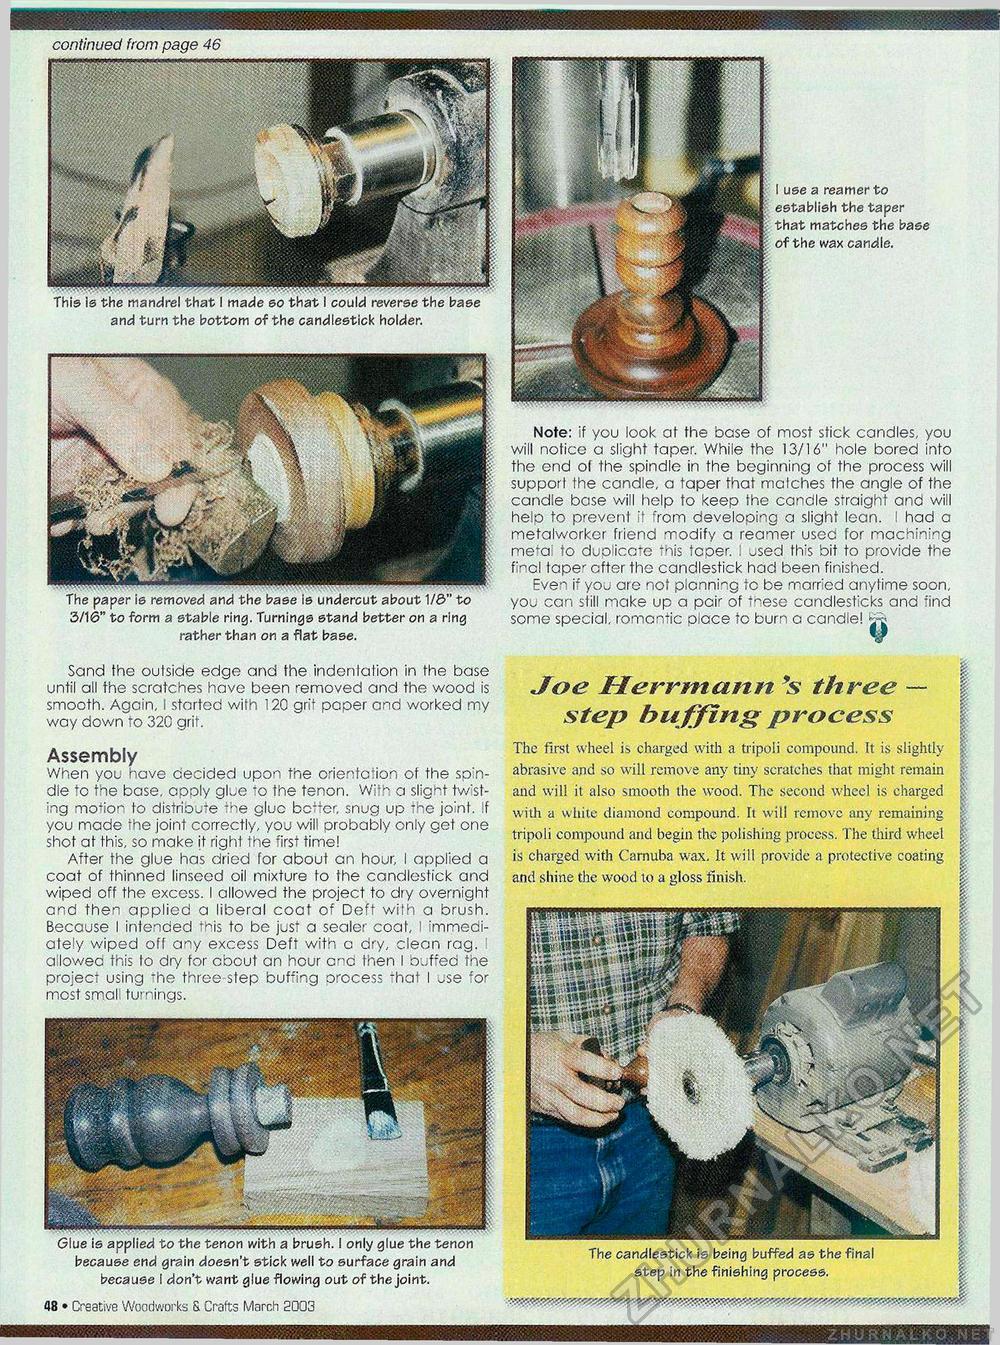
continued from page 48 I use a reamer to establish the taper that matches the base of the wax candle. and turn the bottom of the candlestick holder. 3/16" to form a stable ring. Turnings stand better on a ring rather than on a flat base. Note: if you look at the base of most stick candles, you will notice a slight taper. While the 13/16" hole bored into the end of the spindle in fhe beginning of the process will support the candle, a taper that matches the angle of the candle base will help to keep the candle straight and will help to prevent if from developing a slight lean. I had a metalworker friend modify a reamer used for machining me*a: to dup iccre this tcper. ! jsed firs bit to provide the final tape- after the candlestick had been finished. Even if you are not plcnnhg to be married anytime soon, you can still make up a pcir of t^ese candlesticks and find some special, romantic place to burn a candle! % because end grain doesn't stick well to surface grain and because I don't want glue flowing out of the joint. «8 • Creative Woodworks & Crafts March 2003 The candlestick is being buffed as the final step in the finishing process. ■'SjS Sand the oulside edge and the indenlalion in the base until all the scratches have been removed and the wood is smooth. Again, I started with 120 grit paper and worked my way down to 320 grit. Joe Herrmann s three — j step bu ffing process Assembly When you have decided upon the orientation of the spindle to the base, cpoly glue to the tenon. With a slight twisting motion to distribute the glue better, snug up The joint. If you made the joint correctly, you will probably only get one shot at this, so make it right the first time! After the glue has dried for about an hour, I applied a coat of thinned linseed oil mixture fo the candlestick and wiped off the excess. I allowed the project to dry overnight and then applied a liberal coat of Deft with a brush. Because I intended this to be just a sealer coal, 1 immediately wiped off any excess Deft with a dry, clean rag. allowed this to dry for cbcut an hour arid then I buffed the project using "he three step buffing orccess "hat I ~se "ror most small turnings. The first wheel is charged with a tripoli compound. It is slightly abrasive and so will remove any tiny scratches that might remain and will it also smooth the wood. The second wheel is charged with a white diamond compound. It will remove any remaining tripoli compound and begin the polishing process. The third wheel is charged with Camuba wax, It will provide a protective coating and shine the wood to a gloss finish. |


