Creative Woodworks & crafts 2003-04, страница 33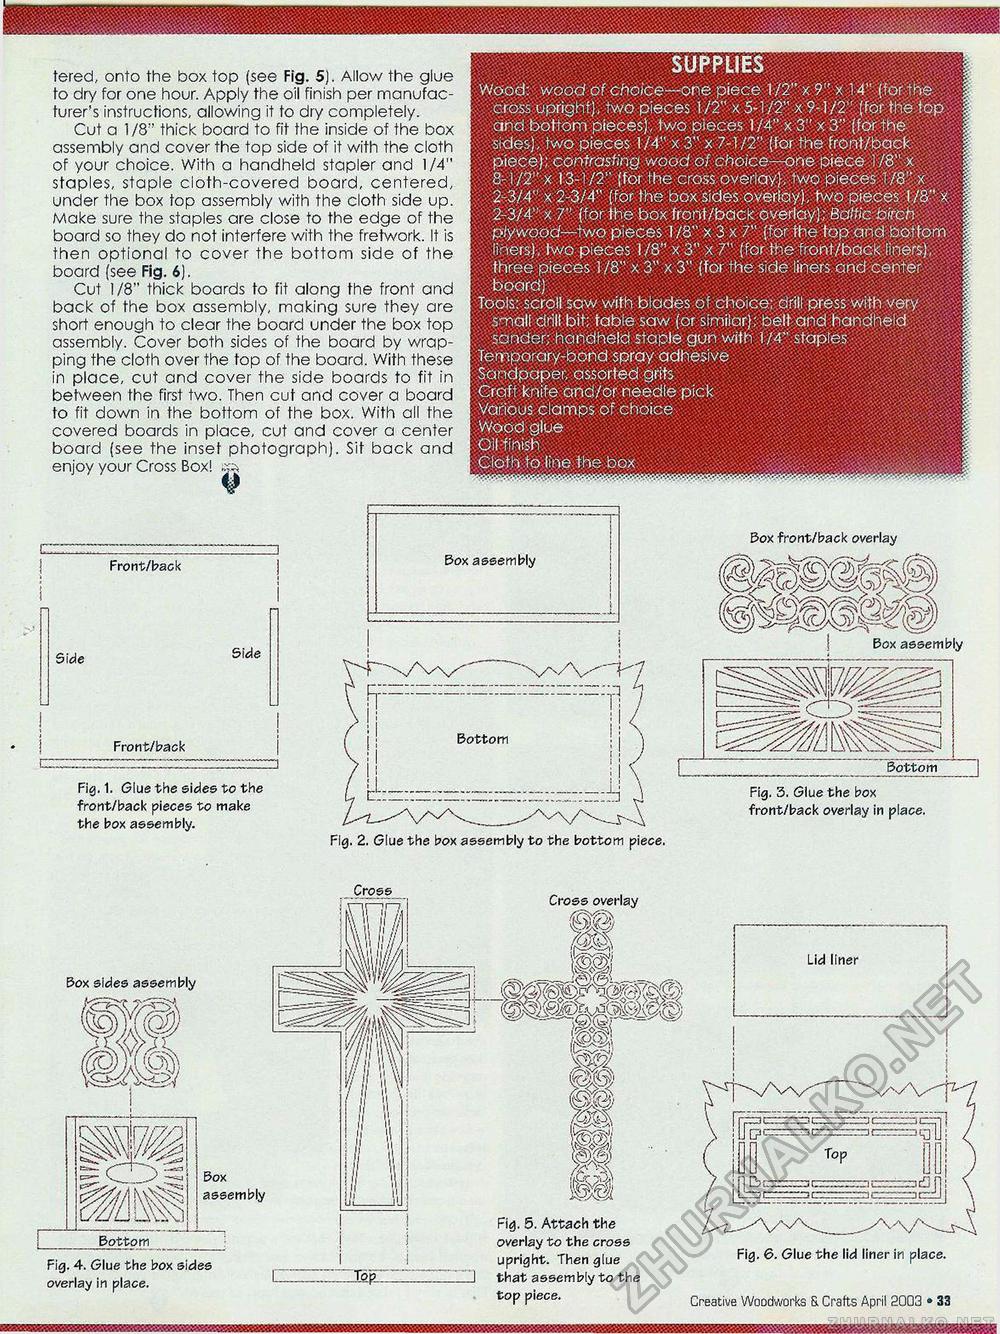
tered, onto the box top (see Fig. 5). Allow the glue to dry for one hour. Apply the oil finish per manufacturer's instructions, allowing it to dry completely. Cut a 1 /8" thick board to fit the inside of the box assembly and cover the top side of it with the cloth of your choice. With a handheld stapler and 1/4" staples, staple ciofh-covered board, centered, under the box top assembly with the cloth side up. Make sure the staples are close to the edge of the board so they do not interfere with the fretwork. It is then optional to cover the bottom side of the board (see Fig. 6). Cut 1/8" thick boards to fit along the front and back of the box assembly, making sure they are short enough to clear the board under the box top assembly. Cover both sides of the board by wrapping the cloth over the top of the board. With these in place, cut and cover the side boards to fit in between the first two. Then cut and cover a board to fit down in the bottom of the box. With all the covered boards in place, cut and cover a center board (see the inset photograph). Sit back and enjoy your Cross Box! s» Front/back Side Side Front/back czz Fig, 1. Glue the sides to the front/back pieces to make the box assembly. = Fig. 2. Glue the box assembly to the bottom piece. Box front/back overlay 'm&m m Box assembly Bottom Fig. 3. Glue the box front/back overlay in place. Box assembly Bottom Fig. 4. Glue the box sides overlay in place. Cross overlay Fig. 5. Attach the overlay to the cross upright. Then glue that assembly to the top piece. Lid liner Fig. 6. Glue the lid liner in place. Creative Woodworks S. Crafts April 2003 • 19 |


