Creative Woodworks & crafts 2003-04, страница 60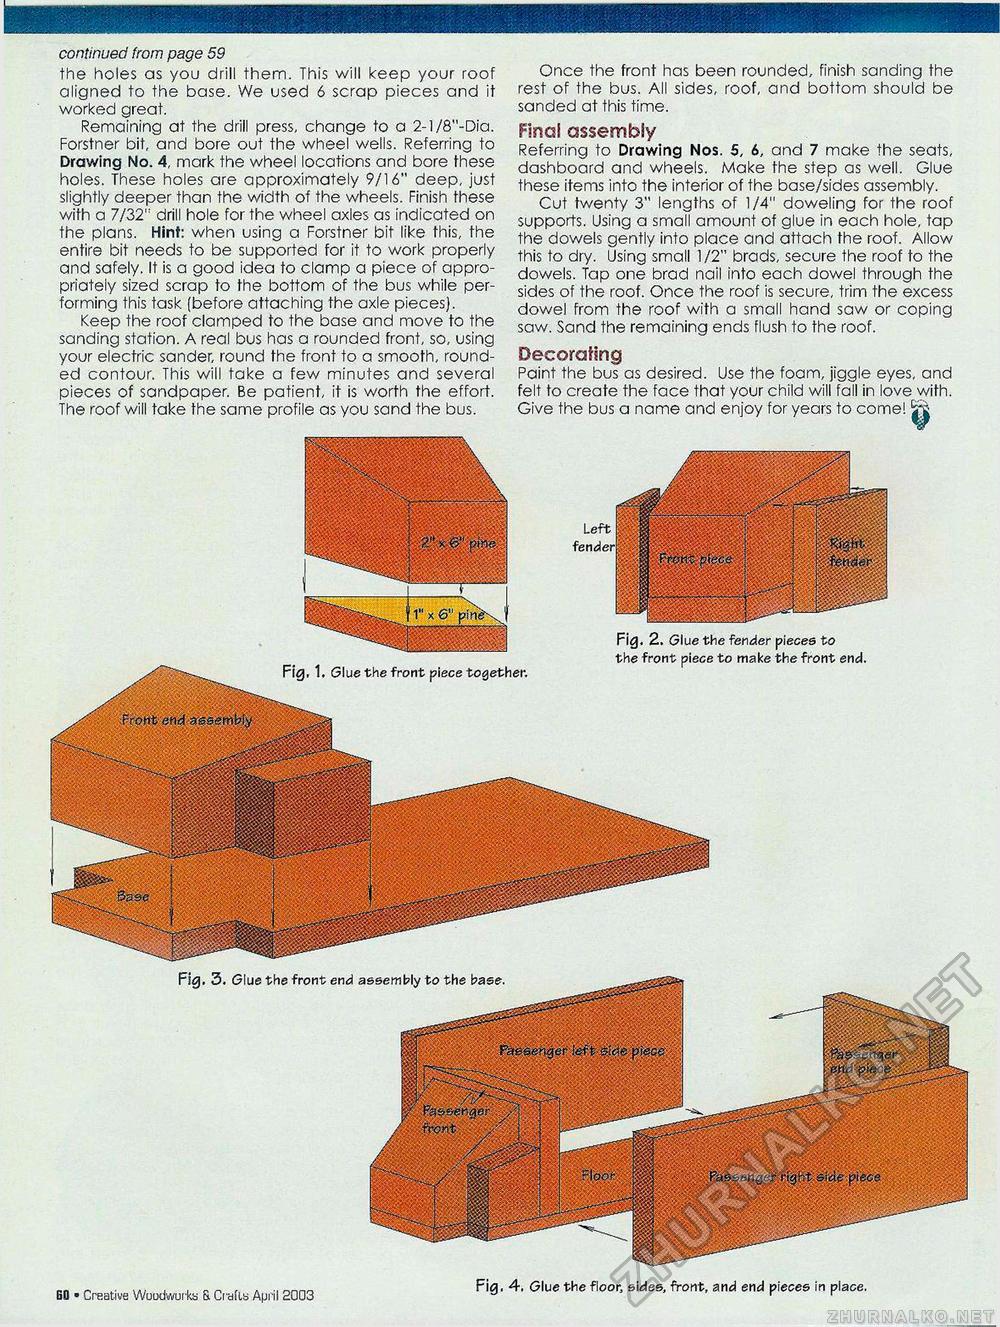
continued from page 59 the holes as you drill them. This will keep your roof aligned to the base. We used 6 scrap pieces and it worked great. Remaining at the drill press, change to a 2-l/8"-Dia. Forstner bit, and bore out the wheel wells. Referring to Drawing No. 4, mark the wheel locations and bore these holes. These holes are approximately 9/16" deep, just slightly deeper than the width of the wheels. Finish these with a 7/32" drill hole for the wheel axles as indicated on the plans. Hint: when using a Forstner bit like this, the entire bit needs to be supported for it to work properly and safely. It is a good idea to clamp a piece of appropriately sized scrap to the bottom of the bus while performing this task (before attaching the axle pieces). Keep the roof clamped to the base and move to the sanding station. A real bus has a rounded front, so, using your electric sander, round the front to a smooth, rounded contour. This will take a few minutes and several pieces of sandpaper. Be patient, it is worth the effort. The roof will take the same profile as you sand the bus. Once the front has been rounded, finish sanding the rest of the bus. All sides, roof, and bottom should be sanded at this time. Final assembly Referring to Drawing Nos. 5, 6, and 7 make the seats, dashboard and wheels. Make the step as well. Glue these items into the interior of the base/sides assembly. Cut twenty 3" lengths of 1/4" doweling for the roof supports. Using a small amount of glue in each hole, tap the dowels gently into place and attach the roof. Allow this to dry. Using small 1/2" brads, secure the roof to the dowels. Tap one brad nail into each dowel through the sides of the roof. Once the roof is secure, trim the excess dowel from the roof with a small hand saw or coping saw. Sand the remaining ends flush to the roof. Decorating Paint the bus as desired. Use the foam, jiggle eyes, and felt to create the face that your child will fall in love with. Give the bus a name and enjoy for years to come! Fig, 1. Glue the front piece together. Fig. 2. Glue the fender pieces to the front piece to make the front end. Fig. 3. Glue the front end .„ „ .. ... , , „ 0 . . ,. ____ Fig, 4, Glue the floor, sides, front, and end pieces in place. 60 • Creative Wuudwurks & Crafts April 2003 • • • r r |


