Creative Woodworks & crafts 2003-04, страница 58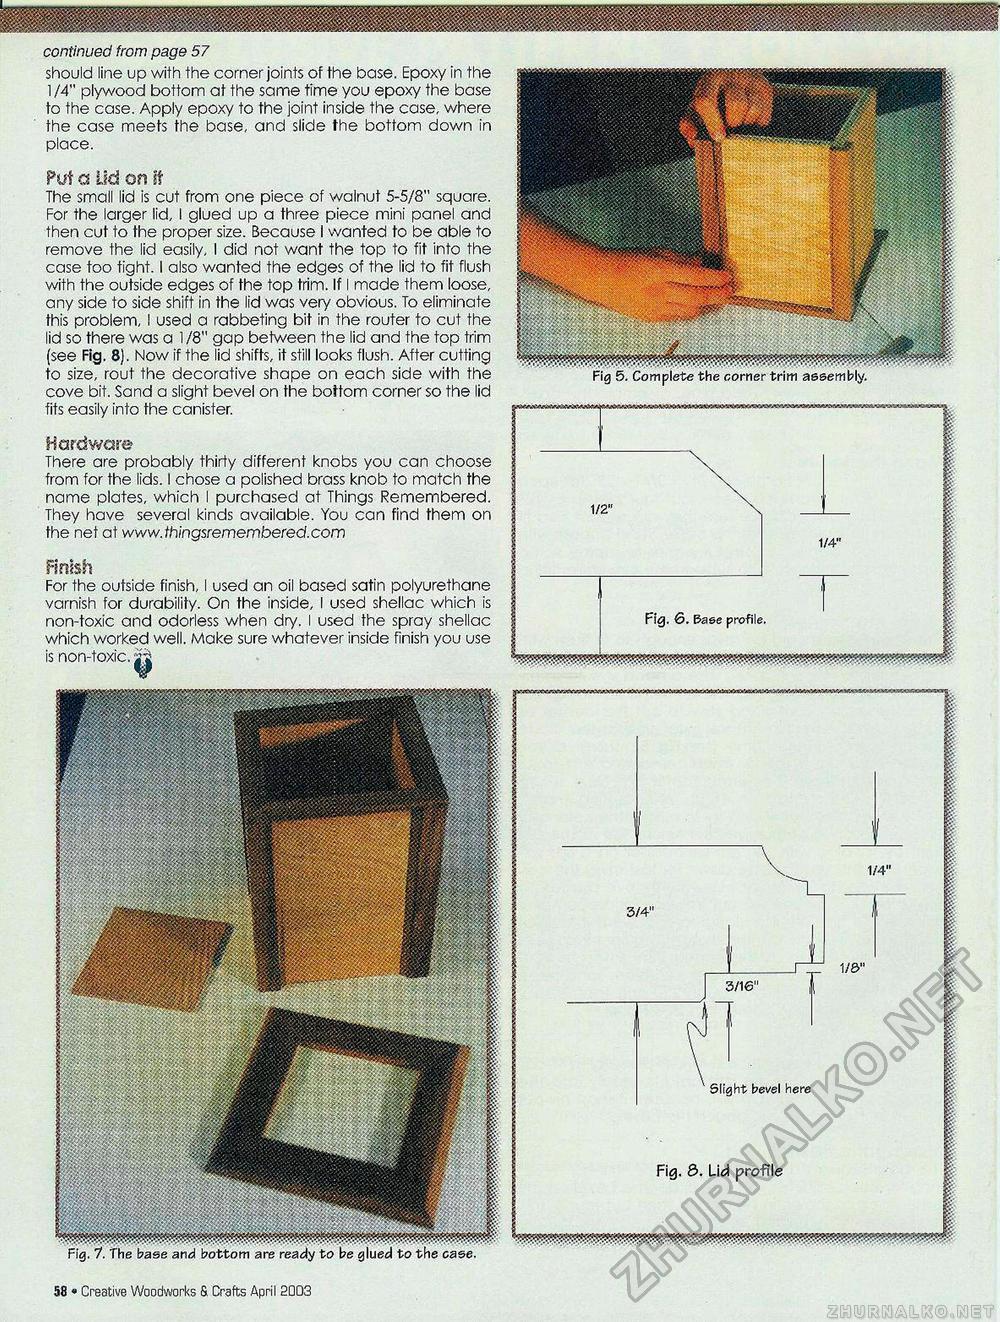
Fig profile Base ' Slight bevel here Fig. 5. Lid profile continued from page 57 should line up with the corner joints of the base. Epoxy in the 1/4" plywood bottom at the same time you epoxy the base to the case. Apply epoxy to the joint inside the case, where the case meets the base, and slide the bottom down in place. Put a Lid on it The small lid is cut from one piece of walnut 5-5/8" square. For the larger lid, I glued up a three piece mini panel and then cut to the proper size. Because I wanted to be able to remove the lid easily, I did not want the top to fit into the case too tight. I also wanted the edges of the lid to fit flush with the outside edges of the top trim. If I made them loose, any side to side shift in the lid was very obvious. To eliminate this problem, I used a rabbeting bit in the router to cut the lid so there was a 1 /8" gap between the lid and the top trim (see Fig. 8). Now if the lid shifts, it still looks flush. After cutting to size, rout the decorative shape on each side with the cove bit. Sand a slight bevel on the bottom corner so the lid fits easily into the canister. Hardware There are probably thirty different knobs you can choose from for the lids. I chose a polished brass knob to match the name plates, which I purchased at Things Remembered. They have several kinds available. You can find them on the net at www.thingsremembered.com Finish For the outside finish, I used an oil based satin polyurethane varnish for durability. On the inside, I used shellac which is non-toxic and odorless when dry. I used the spray shellac which worked well. Make sure whatever inside finish you use is non-toxic, si fl4 • Creative Woodworks & Crafts April 2003 |


