Creative Woodworks & crafts 2003-09, страница 20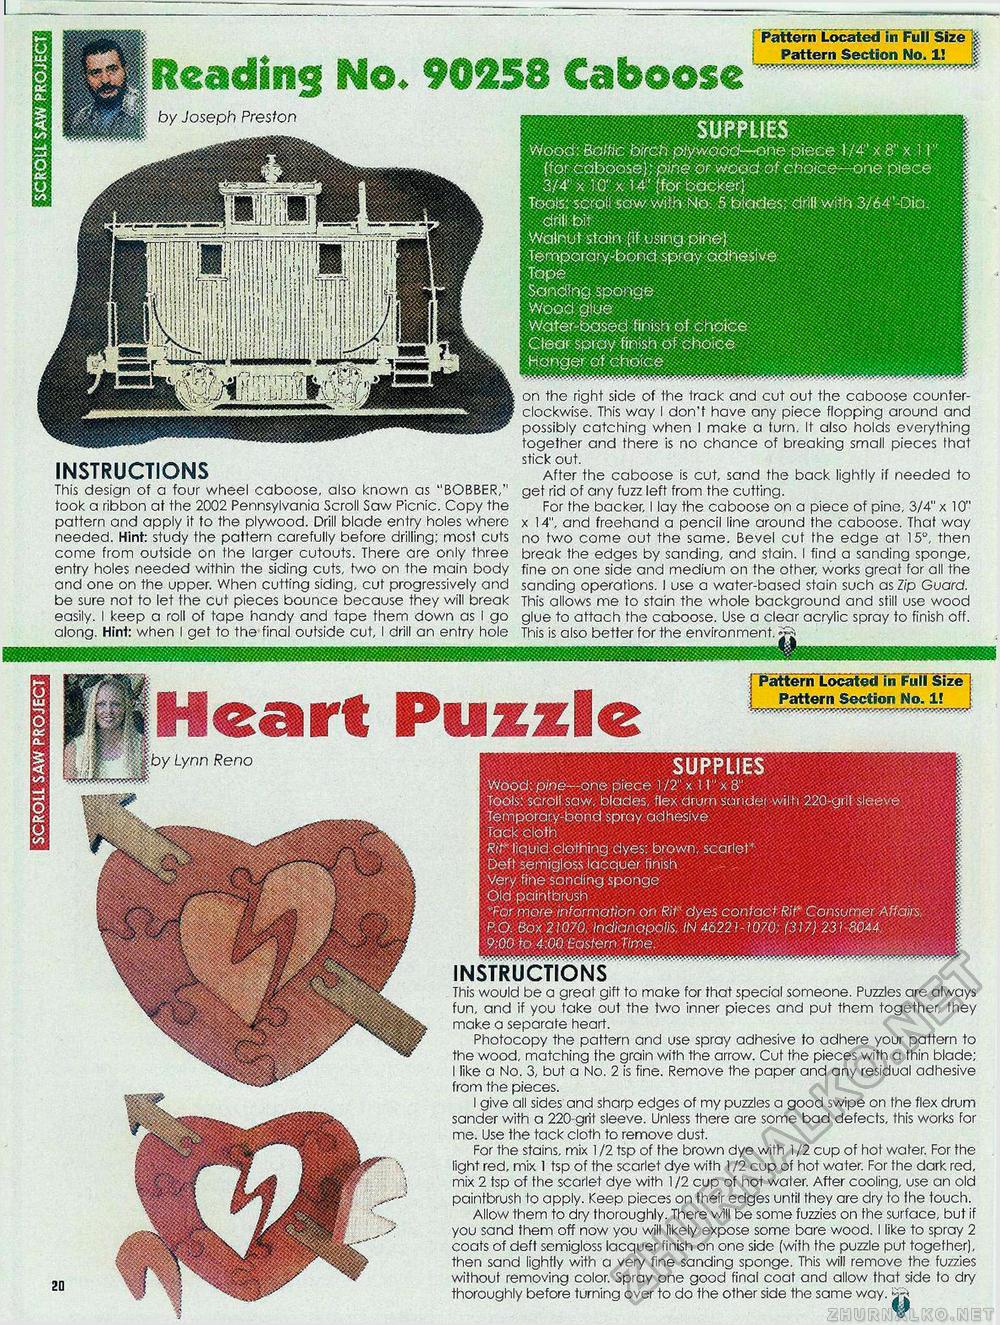
SUPPLIES Wood: Baltic birch piywpbo'—one piece l/4"x 8"x 11 (for caboose}; pine or wood of choice—one piece 3/4"x toxw'lf backer} ; Tpais/. sbro!; saw withN.b. 5 blades: drill with 3/64'-Oia. drill bit /Walnuf stain (if.tjstrig.pine) Temporary-bond spray adhesive Tape :'' SdnctiWgf. spartge wood glue water-basey finish of chofce Clear spray finish of choice honge? of chp:ce SUPPLIES : Wood; pine—one piece 1 /2" x H" x 8" Tools: scroll saw, blades, flex drum sunder wilh 220-giii sleeve Temporary-bond spray adhesive Tack cloth RiP" liquid clothing dyes: brown, scarier-Deft semigloss lacquer finish Very fine sanding sponge Old paintbrush for more information or) Ril" dyes contact Rif° Consumer Affairs, P.O. .Box 21070. Indianapolis, IN 46221-1070; (317) 231-8044. 9:00 to 4:00 eastern Time. Pattern Located in Full Size | eading No. 90258 Caboose ^^^^^ Heart Puzzle Pattern Located in Full Size Pattern Section No. 1! by Joseph Preston INSTRUCTIONS This design of a four wheel caboose, also known as "BOBBER," took a ribbon at the 2002 Pennsylvania Scroll Saw Picnic. Copy the pattern and apply it to the plywood. Drill blade entry holes where needed. Hint: study the pattern carefully before drilling: mosl cuts come from outside on the larger cutouts. There are only three entry holes needed within the siding cuts, two on the main body and one on the upper. When cutting siding, cut progressively and be sure not to let the cut pieces bounce because they will break easily. I keep a roll of tape handy and tape them down as I go along. Hint: when I get to the final outside cut, I drill an entry hole on the right side of the track and cut out the caboose counterclockwise. This way I don't have any piece flopping around and possibly catching when I make a turn. It also holds everything together and there is no chance of breaking small pieces that stick out. After the caboose is cut, sand the back lightly if needed to get rid of any fuzz left from the cutting. For the backer, I lay the caboose on a piece of pine, 3/4" x 10" x 14", and freehand a pencil line around the caboose. That way no two come out the same. Bevel cut the edge at 15", then break the edges by sanding, and slain. I find a sanding sponge, fine on one side and medium on the other, works great for all the sanding operations. I use a water-based stain such as Zip Guard. This allows me to stain the whole background and still use wood glue to attach the caboose. Use a clear acrylic spray to finish off. This is also better for the environment. • INSTRUCTIONS This would be a great gift to make for that special someone. Puzzles are always fun, and if you take out the two inner pieces and put them together, they make a separate heart. Photocopy the pattern and use spray adhesive to adhere your pattern to the wood, matching the grain with the arrow. Cut the pieces with a thin blade; I like a No. 3, but a No. 2 is fine. Remove the paper and any residual adhesive from the pieces. I give all sides and sharp edges of my puzzles a good swipe on the flex drum sander with a 220-gril sleeve. Unless there are some bad defects, this works for me. Use the tack cloth to remove dust. For the stains, mix 1 /2 tsp of the brown dye with 1 /2 cup of hot water. For the light red, mix 1 tsp of the scarlet dye with 1 /2 cup of hot water. For the dark red, mix 2 tsp of the scarlet dye with 1 /2 cup of hot wafer. After cooling, use an old paintbrush to apply. Keep pieces on their edges until they are dry to the touch. Allow them to dry thoroughly. There will be some fuzzies on the surface, but if you sand them off now you will likely expose some bare wood. I like to spray 2 coats of deft somigloss lacquer finish on one side (with the puzzle put together), then sand lightly with a very fine sanding sponge. This will remove the fuzzies without removing color. Spray one good final coat and allow that side to dry thoroughly before turning over to do the other side the same way. |


