Creative Woodworks & crafts 2003-09, страница 24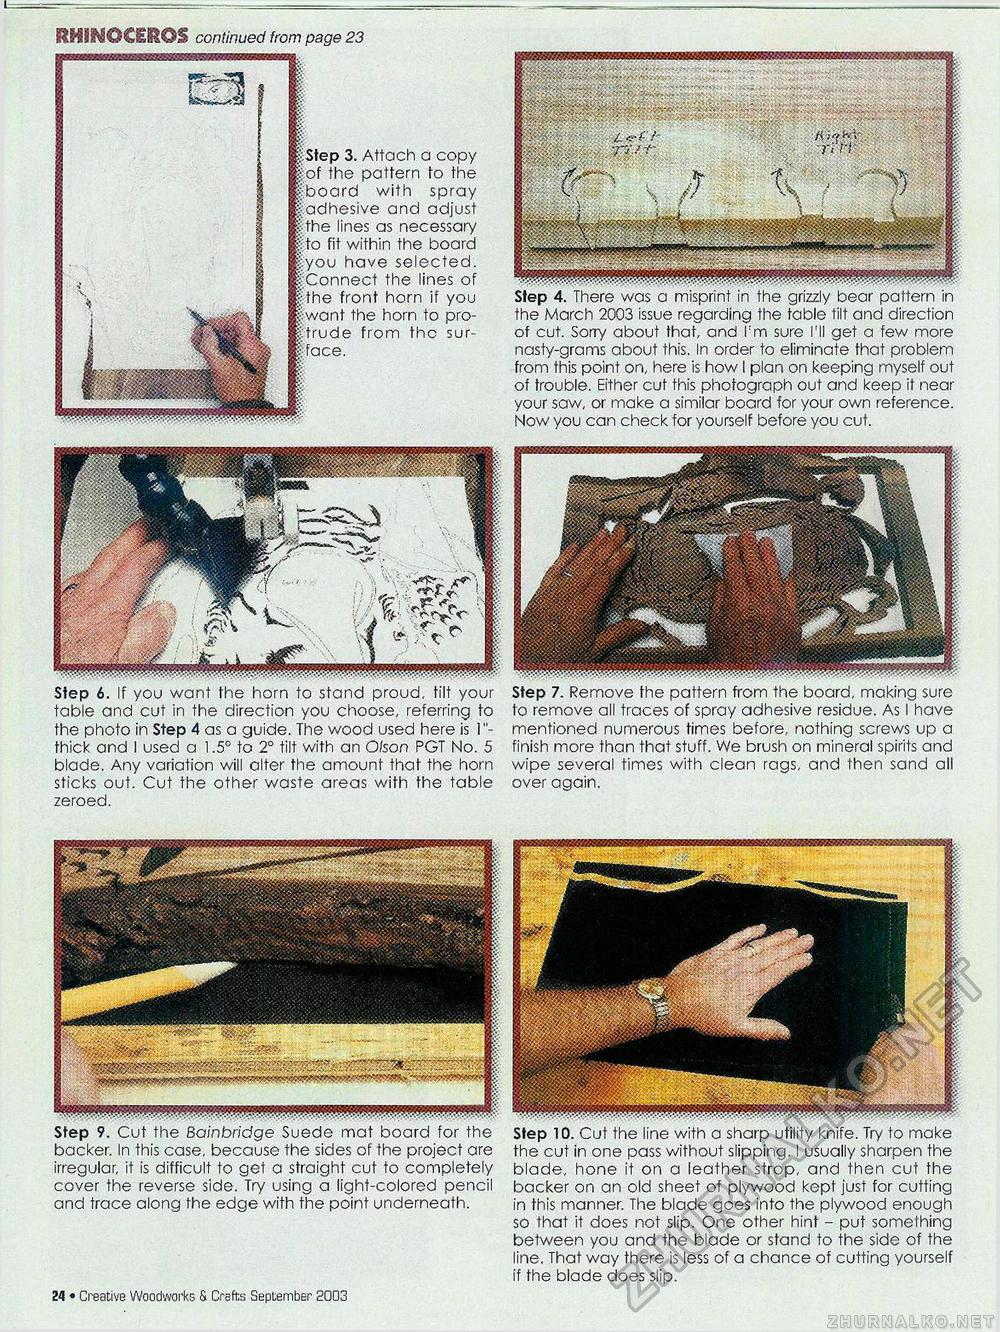
RHIW0€ETOS continued from page 23 3. Attach a copy the pattern to the ard with spray ive and adjust lines as necessary fit within the board have selected. the lines of front horn if you the horn to pro-from the sur- Step 6. If you want the horn to stand proud, tilt your table and cut in the direction you choose, referring to the photo in Step 4 as a guide. The wood used here is 1"-thick and I used a 1.5° to 2° tilt with an Olson PGT No. 5 blade. Any variation will alter the amount that the horn sticks out. Cut the other waste areas with the table zeroed. Step 7. Remove the pattern from the board, making sure to remove all traces of spray adhesive residue. As I have mentioned numerous times before, nothing screws up a finish more than that stuff. We brush on mineral spirits and wipe several times with clean rags, and then sand all over again. Step 4. There was a misprint in the grizzly bear pattern in the March 2003 issue regarding the table tilt and direction of cut. Sorry about that, and I'm sure I'll get a few more nasty-grams about this. In order to eliminate that problem from this point on, here is how I plan on keeping myself out of trouble. Either cut this photograph out and keep it near your saw, or make a similar board for your own reference. Now you can check for yourself before you cut. Step 9. Cut the Bainbridge Suede mat board for the backer. In this case, because the sides of the project are irregular, it is difficult to get a straight cut to completely cover the reverse side. Try using a light-colored pencil and trace along the edge with the point underneath. Step 10. Cut the line with a sharp utility knife. Try to make the cut in one pass without slipping. I usually sharpen the blade, hone it on a leather strop, and then cut the backer on an old sheet of plywood kept just for cutting in this manner. The blade goes into the plywood enough so that it does not slip. One other hint - put something between you and the blade or stand to the side of the line. That way there is less of a chance of cutting yourself if the blade does slip. 24 • Creative Woodworks & Crafts September 2003 the bottom supports. shelf supports. |


