Creative Woodworks & crafts 2003-09, страница 30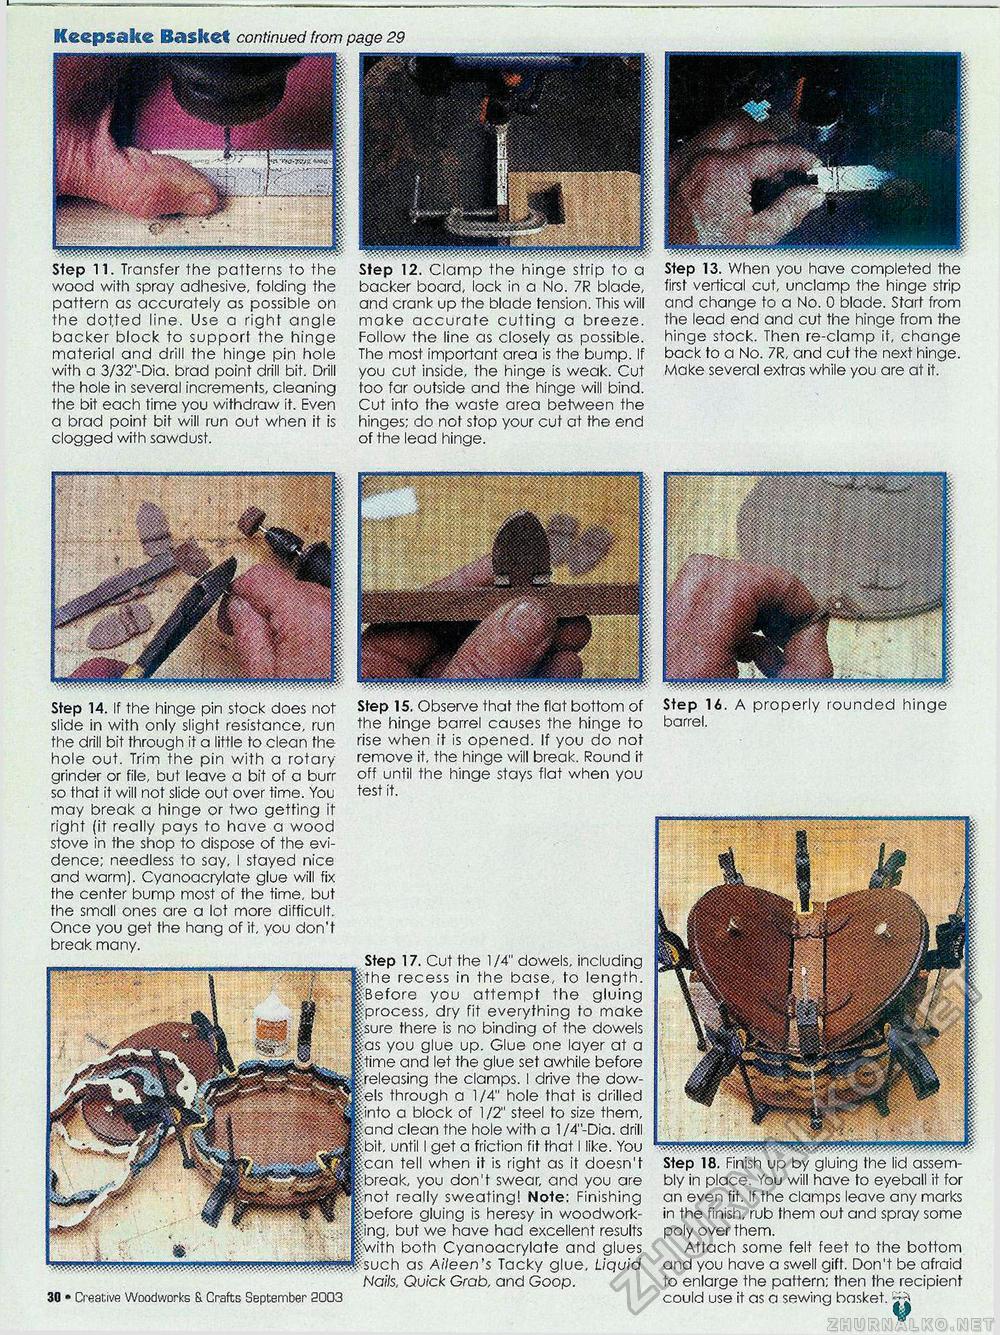
Keepsake Basket continued from page 29 Step 14. If the hinge pin stock does not slide in with only slight resistance, run the drill bit through it a little to clean the hole out. Trim the pin with a rotary-grinder or file, but leave a bit of a burr so that it will not slide out over time. You may break a hinge or two getting it right (it really pays to have a wood stove in the shop to dispose of the evidence; needless to say, I stayed nice and warm). Cyanoacrylate glue will fix the center bump most of the time, but the small ones are a lot more difficult. Once you get the hang of it, you don't break many. Step 15. Obseive that the flat bottom of the hinge barrel causes the hinge to rise when it is opened. If you do not remove it, the hinge will break. Round it off until the hinge stays flat when you test it. 30 • Creative Woodworks & Crafts September 2003 the bottom supports. shelf supports. Step 17. Cut the 1/4" dowels, including e recess in the base, to length, fore you attempt the gluing , dry fit everything to make there is no binding of the dowels you glue up. Glue one layer at a and let the glue set awhile before the clamps. I drive the dow-through a 1/4" hole that is drilled a block of 1/2" steel to size them, clean the hole with a l/4"-Dia. drill , until I get a friction fit that I like. You tell when it is right as it doesn't you don't swear, and you are ot really sweating! Note: Finishing gluing is heresy in woodwork-but we have had excellent results both Cyanoacrylate and glues as Aileen's Tacky glue, Liquid Nails, Quick Grab, and Goop. Step 11. Transfer the patterns to the wood with spray adhesive, folding the pattern as accurately as possible on the doffed line. Use a right angle backer block to support the hinge material and drill the hinge pin hole with a 3/32"-Dia. brad point drill bit. Drill the hole in several increments, cleaning the bit each time you withdraw it. Even a brad point bit will run out when it is clogged with sawdust. Step 14. A properly rounded hinge barrel. backer board, lock in a No. 7R blade, and crank up the blade tension. This will make accurate cutting a breeze. Follow the line as closely as possible. The most important area is the bump. If you cut inside, the hinge is weak. Cut too far outside and the hinge will bind. Cut info the waste area between the hinges; do not stop your cut at the end of the lead hinge. Step 13. When you have completed the first vertical cut, unclamp the hinge strip and change to a No. 0 blade. Start from the lead end and cut the hinge from the hinge stock. Then re-clamp it, change back to a No. 7R, and cut the next hinge. Make several extras while you are at it. Step 18. Finish up by gluing the lid assembly in place. You will have to eyeball it for an even fit. If the clamps leave any marks in the finish, rub them out and spray some poly over them. Attach some felt feet to the bottom and you have a swell gift. Don't be afraid to enlarge the pattern; then the recipient could use it as a sewing basket. |


