Creative Woodworks & crafts 2003-09, страница 38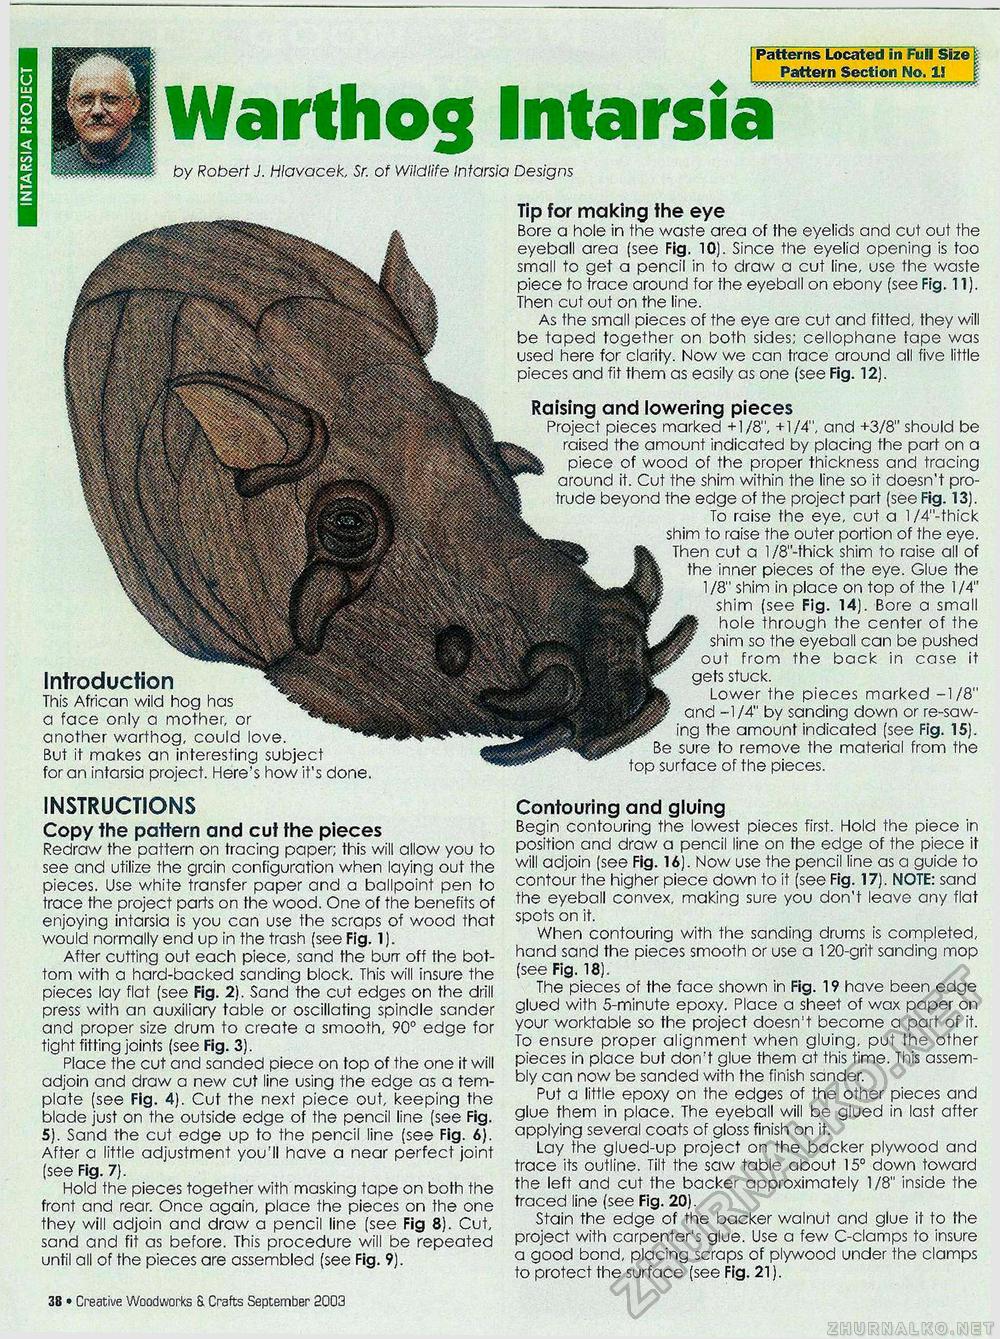
Patterns Located in Full Size [ Pattern Section No. 1! Warthog Intarsia by Robert J. Hlavacek, Sr. of Wildlife Intarsia Designs Introduction This African wild hog has a face only a mother, or another warthog, could love. But it makes an interesting subject for an intarsia project. Here's how it's done. INSTRUCTIONS Copy the pattern and cut the pieces Redraw the pattern on tracing paper; this will allow you to see and utilize the grain configuration when laying out the pieces. Use white transfer paper and a ballpoint pen to trace the project parts on the wood. One of the benefits of enjoying intarsia is you can use the scraps of wood that would normally end up in the trash (see Fig. 1). After cutting out each piece, sand the burr off the bottom with a hard-backed sanding block. This will insure the pieces lay flat (see Fig. 2). Sand the cut edges on the drill press with an auxiliary table or oscillating spindle sander and proper size drum to create a smooth, 90° edge for tight fitting joints (see Fig. 3). Place the cut and sanded piece on top of the one it will adjoin and draw a new cut line using the edge as a template (see Fig. 4). Cut the next piece out, keeping the blade just on the outside edge of the pencil line (see Fig. 5). Sand the cut edge up to the pencil line (see Fig. 6). After a little adjustment you'll have a near perfect joint (see Fig. 7). Hold the pieces together with masking tape on both the front and rear. Once again, place the pieces on the one they will adjoin and draw a pencil line (see Fig 8). Cut, sand and fit as before. This procedure will be repeated until all of the pieces are assembled (see Fig. 9). 38 • Creative Woodworks & Crafts September 2003 the bottom supports. shelf supports. Tip for making the eye Bore a hole in the waste area of the eyelids and cut out the eyeball area (see Fig. 10). Since the eyelid opening is too small to get a pencil in to draw a cut line, use the waste piece to trace around for the eyeball on ebony (see Fig. 11). Then cut out on the line. As the small pieces of the eye are cut and fitted, they will be taped together on both sides; cellophane tape was used here for clarity. Now we can trace around all five little pieces and fit them as easily as one (see Fig. 12). Raising and lowering pieces Project pieces marked +1/8", +1/4", and +3/8" should be raised the amount indicated by placing the part on a piece of wood of the proper thickness and tracing around it. Cut the shim within the line so it doesn't protrude beyond the edge of the project part (see Fig. 13). To raise the eye, cut a l/4"-thick shim to raise the outer portion of the eye. Then cut a 1 /8"-thick shim to raise all of the inner pieces of the eye. Glue the 1 /8" shim in place on top of the 1/4" shim (see Fig. 14). Bore a small hole through the center of the shim so the eyeball can be pushed out from the back in case it gets stuck. Lower the pieces marked -1/8" and -1/4" by sanding down or re-saw-ing the amount indicated (see Fig. 15). Be sure to remove the material from the top surface of the pieces. Contouring and gluing Begin contouring the lowest pieces first. Hold the piece in position and draw a pencil line on the edge of the piece it will adjoin (see Fig. 16). Now use the pencil line as a guide to contour the higher piece down to it (see Fig. 17). NOTE: sand the eyeball convex, making sure you don't leave any flat spots on it. When contouring with the sanding drums is completed, hand sand the pieces smooth or use a 120-grit sanding mop (see Fig. 18). The pieces of the face shown in Fig. 19 have been edge glued with 5-minute epoxy. Place a sheet of wax paper on your worktable so the project doesn't become a part of it. To ensure proper alignment when gluing, put the other pieces in place but don't glue them at this time. This assembly can now be sanded with the finish sander. Put a little epoxy on the edges of the other pieces and glue them in place. The eyeball will be glued in last after applying several coats of gloss finish on it. Lay the glued-up project on the backer plywood and trace its outline. Tilt the saw table about 15° down toward the left and cut the backer approximately 1/8" inside the traced line (see Fig. 20). Stain the edge of the backer walnut and glue it to the project with carpenter's glue. Use a few C-clamps to insure a good bond, placing scraps of plywood under the clamps to protect the surface (see Fig. 21). |


