Creative Woodworks & crafts 2003-09, страница 40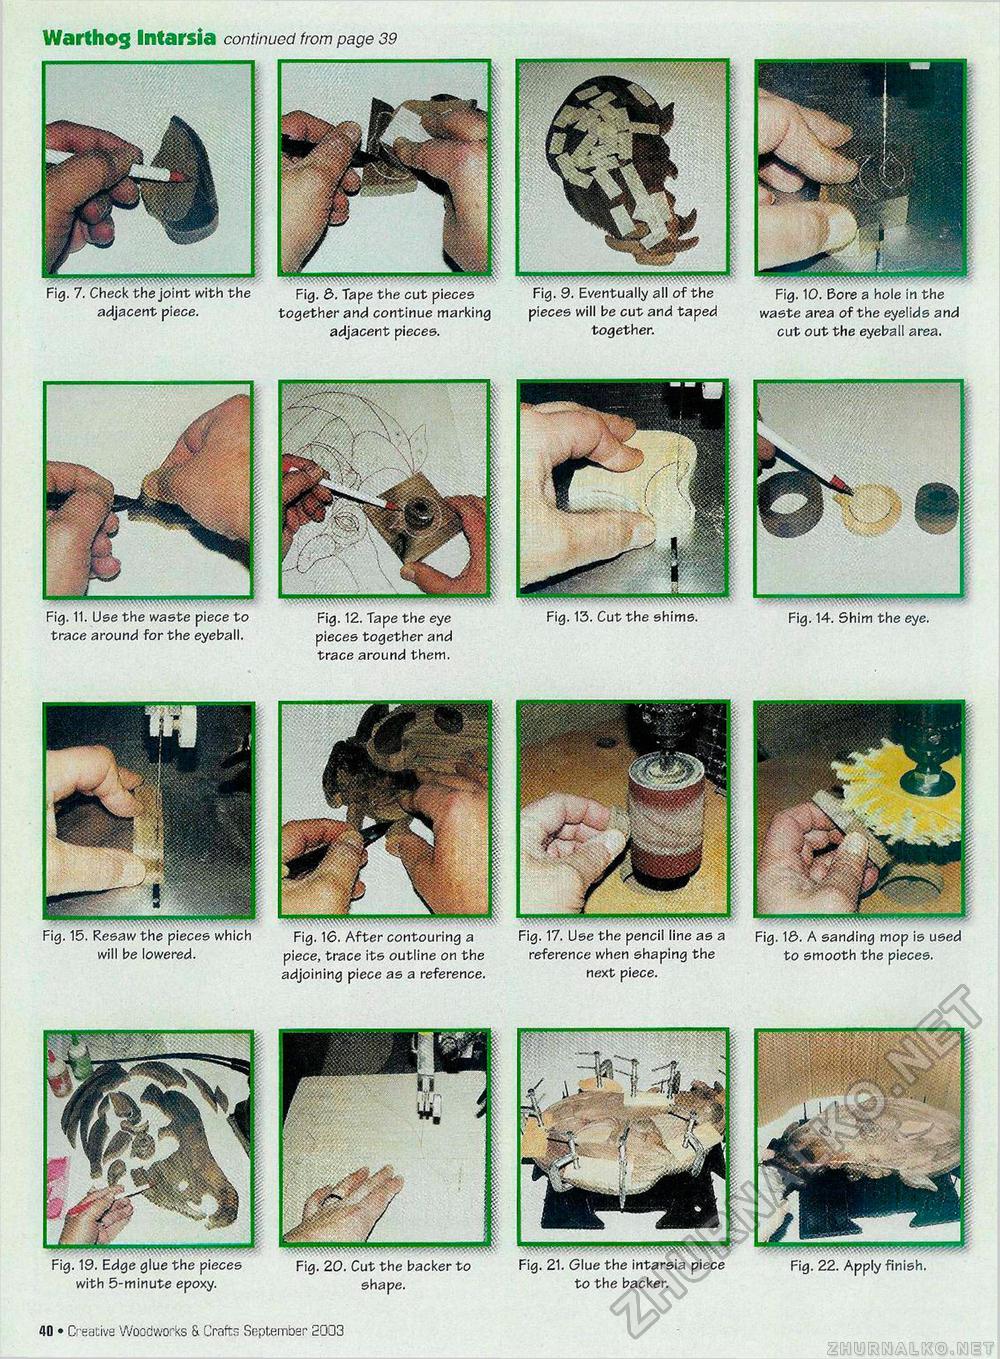
Warthog Intarsia continued from page 39 Fig. 10. Bore a Hole in the waste area of the eyelids and cut out the eyeball area. Fig. 6. Tape the cut pieces together and continue marking adjacent pieces. . Check the joint with the adjacent piece. Fig. 9. Eventually all of the pieces will be cut and taped together. Fig. 12. Tape the eye pieces together and trace around them. Fig. 11. Use the waste piece to trace around for the eyeball. Fig. 13. Cut the shims. Fig. 14. 5him the eye. Fig. 15. Resaw the pieces which will be lowered. ^PSWTOWTO-.....v.v.\v Fig. 16. After contouring a piece, trace its outline on the adjoining piece as a reference. Fig. 17. Use the pencil line as a reference when shaping the next piece. Fig. 15. A sanding mop is used to smooth the pieces. with 5-minute epoxy. Fig. 20. Cut the backer to shape. Fig. 21. Glue the intarsia piece to the backer. Fig. 22. Apply finish. 40 • Creative Woodworks & Crafts September 2003 the bottom supports. shelf supports. |


