Creative Woodworks & crafts 2003-09, страница 53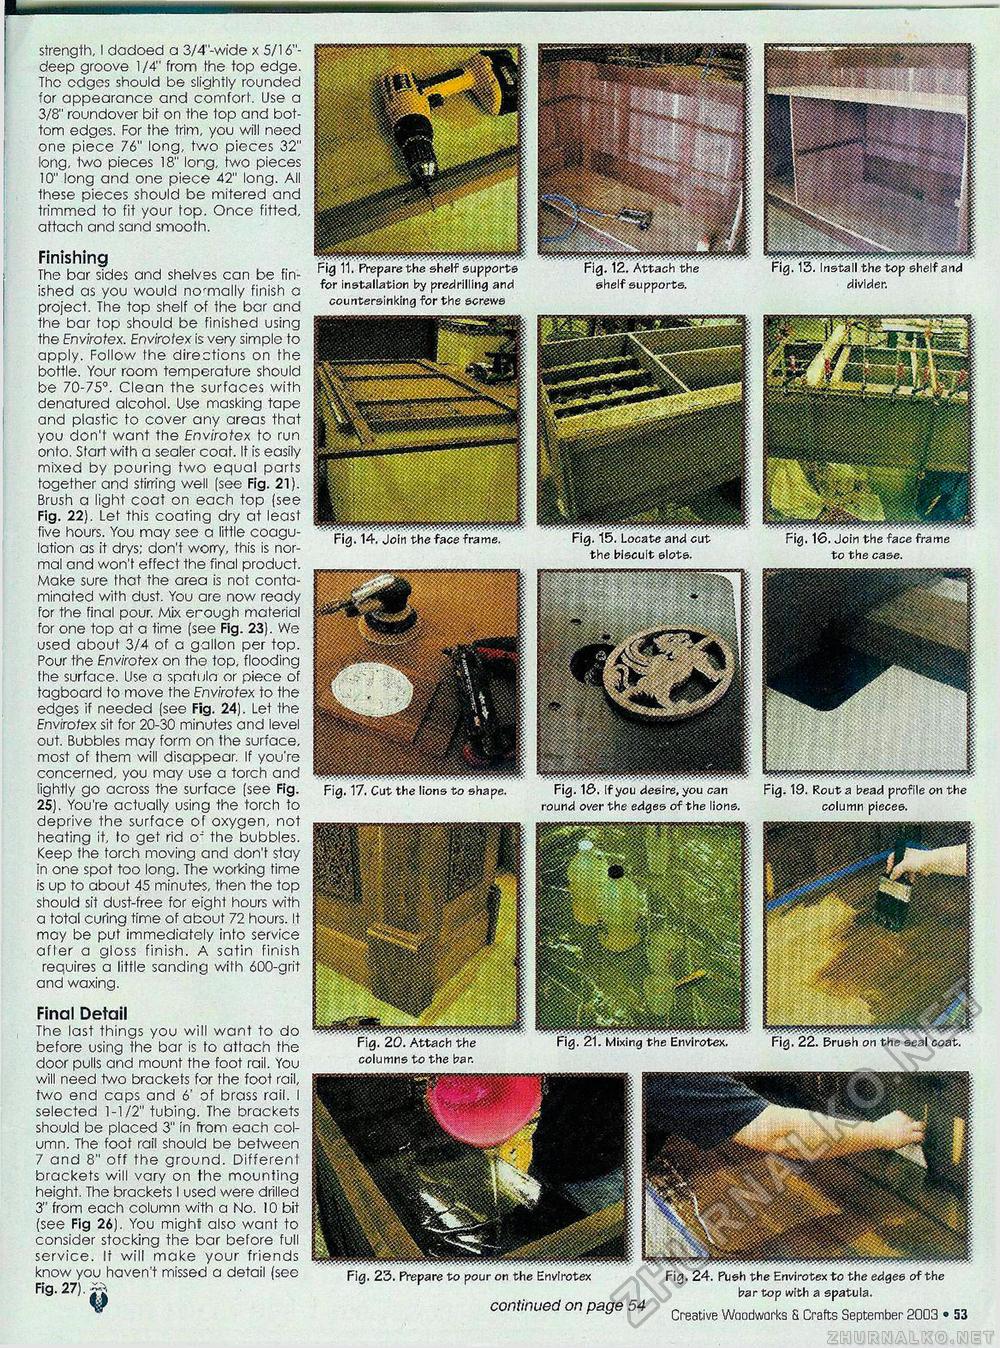
strength, I dadoed a 3/4'-wide x 5/16"-deep groove 1/4" from the top edge. The edges should be slightly rounded for appearance and comfort. Use a 3/8" roundover bit on the lop and bottom edges. For the trim, you will need one piece 76" long, two pieces 32" long, two pieces 18" long, two pieces 10" long and one piece 42" long. All these pieces should be mitered and trimmed to fit your top. Once fitted, attach and sand smooth. Finishing The bar sides and shelves can be finished as you would ncmally finish o project. The top shelf of the bar and the bar top should be finished using the Envirotex. Envirotex is very simple to apply. Follow the directions on the bottle. Your room temperature should be 70-75°. Clean the surfaces with denatured alcohol. Use masking tape and plastic to cover any areas that you don't want the Envirotex to run onto. Start with a sealer coat. It is easily mixed by pouring two equal parts together and stirring well (see Fig. 21). Brush a light coat on each top (see Fig. 22). Let this coating dry at least five hours. You may see a little coagulation as it drys; don't worry, this is normal and won't effect the final product. Make sure that the area is not contaminated with dust. You are now ready for the final pour. Mix erough material for one top at a time (see Fig. 23). We used about 3/4 of a gallon per top. Pour the Envirotex on the top, flooding the surface. Use a spatula or piece of tagboard to move the Envirotex to the edges if needed (see Fig. 24). Let the Envirotex sit for 20-30 minutes and level out. Bubbles may form on the surface, most of them will disappear. If you're concerned, you may use a torch and lightly go across the surface (see Fig. 25). You're actually using the torch to deprive the surface ol oxygen, not heating it, to get rid o" the bubbles. Keep the torch moving and don't stay in one spot too long. The working time is up to about 45 minutes, then the top should sit dust-free for eight hours with a total curing time of about 72 hours. It mcy be put immediately into service afler a gloss finish. A satin finish requires a little sanding with 600-grit and waxing. Final Detail The last things you will want to do before using the bar is to attach the door pulls and mount the foot rail. You will need Iwo brackets for the foot rail, two end caps and 6' of brass rail. I selected 1-1/2" tubing. The brackets should be placed 3" in from each column. The foot rail should be between 7 and 8" off the ground. Different brackets will vary on the mounting height. The brackets I used were drilled 3" from each column with a No. 10 bit (see Fig 26). You might also want to consider stocking the bar before full service. It will make your friends know you haven't missed a detail (see Fig. 27). the biscuit ©tots. to the case. Fig. 19. Rout a bead profile on the column pieces. columns to the bar. countersinking for the screws shelf supports. divider. continued on page 54 Fig. 24. Push the Envirotex to the edges of the bar top with a spatula. Creative Woodworks & Crafts September 8003 • 53 |


