Creative Woodworks & crafts 2003-09, страница 50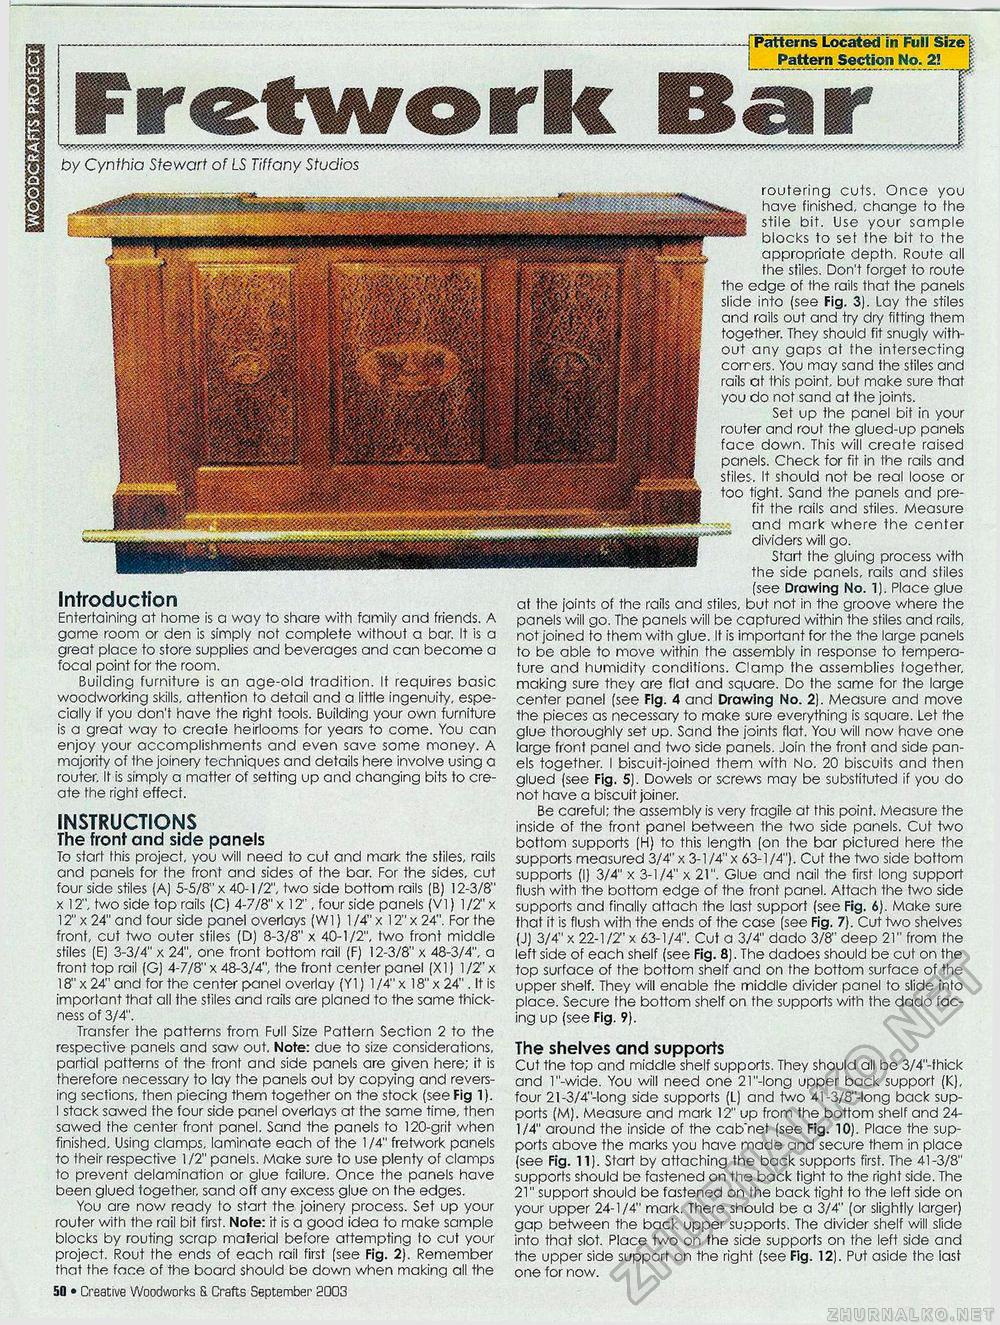
-j Patterns LocatedinFull Size i; | Pattern Section No. 2! >' ffp,.T-r-^r-': by Cynthia Stewart of LS Tiffany Studios Introduction Entertaining at home is a way to share with family and friends. A game room or den is simply not complete without a bar. It is a great place to store supplies and beverages and can become a focal point for the room. Building furniture is an age-old tradition. It requires basic woodworking skills, attention to detail and a little ingenuity, especially if you don't have the right tools. Building your own furniture is a great way to create heirlooms for years to come. You can enjoy your accomplishments and even save some money. A majority of the joinery techniques and details here involve using a router. It is simply a matter of setting up and changing bits to create the right effect. INSTRUCTIONS The front and side panels To start this project, you will need to cut and mark the stiles, rails and panels for the front and sides of the bar. For the sides, cut four side stiles (A) 5-5/8" x 40-1 /2", two side bottom rails (B) 12-3/8" x 12", two side top rails (C) 4-7/8" x 12", four side panels (VI} 1/2" x 12" x 24" and four side panel overlays (W1) 1 /4" x 12" x 24". For the front, cut two outer stiles (D) 8-3/8" x 40-1/2", two front middle stiles (E) 3-3/4" x 24", one front bottom rail (F) 12-3/8" x 48-3/4", a front top rail (G) 4-7/8" x 48-3/4", the front center panel (XI) 1/2" x 18" x 24" and for the center panel overlay (Y1) 1 /4" x 18" x 24". It is important that all the stiles and rails are planed to the same thickness of 3/4". Transfer the patterns from Full Size Pattern Section 2 to the respective panels and saw out. Note: due to size considerations, partial patterns of the front and side panels are given here; it is therefore necessary to lay the panels out by copying and reversing sections, then piecing them together on the stock (see Fig 1). I stack sawed the four side panel overlays at the same time, then sawed the center front panel. Sand the panels to 120-grit when finished. Using clamps, laminate each of the 1/4" fretwork panels to their respective 1/2" panels. Make sure to use plenty of clamps to prevent delamination or glue failure. Once the panels have been glued together, sand off any excess glue on the edges. You are now ready lo start the joinery process. Set up your router with the rail bit first. Nole: it is a good idea to make sample blocks by routing scrap material before attempting to cut your project. Rout the ends of each rail first (see Fig. 2). Remember that the face of the board should be down when making all the 50 • Creative Woodworks & Crafts September 2003 the bottom supports. shelf supports. routering cuts. Once you have finished, change to the stile bit. Use your sample blocks to set the bit to the appropriate depth. Route all the stiles. Don't forget to route the edge of the rails that the panels slide into (see Fig. 3). Lay the stiles and rails out and try dry fitting them together. They should fit snugly without any gaps at the intersecting corners. You may sand the stiles and rails at this point, but make sure that you do not sand at the joints. Set up the panel bit in your router and rout the glued-up panels face down. This will create raised panels. Check for fit in the rails and stiles. It should not be real loose or too tight. Sand the panels and pre-fit the rails and stiles. Measure and mark where the center dividers will go. Start the gluing process with the side panels, rails and stiles (see Drawing No. 1). Place glue at the joints of the rails and stiles, but not in the groove where the panels will go. The panels will be captured within the stiles and rails, not joined to them with glue. It is important for the the large panels to be able to move within the assembly in response to temperature and humidity conditions. Clamp the assemblies together, making sure they are flat and square. Do the same for the large center panel (see Fig. 4 and Drawing No. 2). Measure and move the pieces as necessary to make sure everything is square. Let the glue thoroughly set up. Sand the joints flat. You will now have one large front panel and two side panels. Join the front and side panels together. I biscuit-joined them with No. 20 biscuits and then glued (see Fig. 5). Dowels or screws may be substituted if you do not have a biscuit joiner. Be careful; the assembly is very fragile at this point. Measure the inside of the front panel between the two side panels. Cut two bottom supports (H) to this length (on the bar pictured here the supports measured 3/4" x 3-1 /4" x 63-1/4"). Cut the two side bottom supports (I) 3/4" x 3-1/4" x 21". Glue and nail the first long support flush with the bottom edge of the front panel. Attach the two side supports and finally attach the last support (see Fig. 6). Make sure that it is flush with the ends of the case (see Fig. 7). Cut two shelves (J) 3/4" x 22-1/2" x 63-1/4". Cut a 3/4" dado 3/8" deep 21" from the left side of each shelf (see Fig. 8). The dadoes should be cut on the top surface of the bottom shelf and on the bottom surface of the upper shelf. They will enable the middle divider panel to slide into place. Secure the bottom shelf on the supports with the dado facing up (see Fig. 9). The shelves and supports Cut the top and middle shelf supports. They should all be 3/4"-thick and l"-wide. You will need one 21"-long upper back support (K), four 21-3/4"-long side supports (L) and two 4l-3/8"-long back supports (M). Measure and mark 12" up from the bottom shelf and 24-1/4" around the inside of the cab'net (see Fig. 10). Place the supports above the marks you have made and secure them in place (see Fig. 11). Start by attaching the back supports first. The 41-3/8" supports should be fastened on the back tight to the right side. The 21" support should be fastened on the back tight to the left side on your upper 24-1/4" mark. There should be a 3/4" (or slightly larger) gap between the back upper supports. The divider shelf will slide into that slot. Place two on the side supports on the left side and the upper side support on the right (see Fig. 12). Put aside the last one for now. |


