Creative Woodworks & crafts 2004-01, страница 49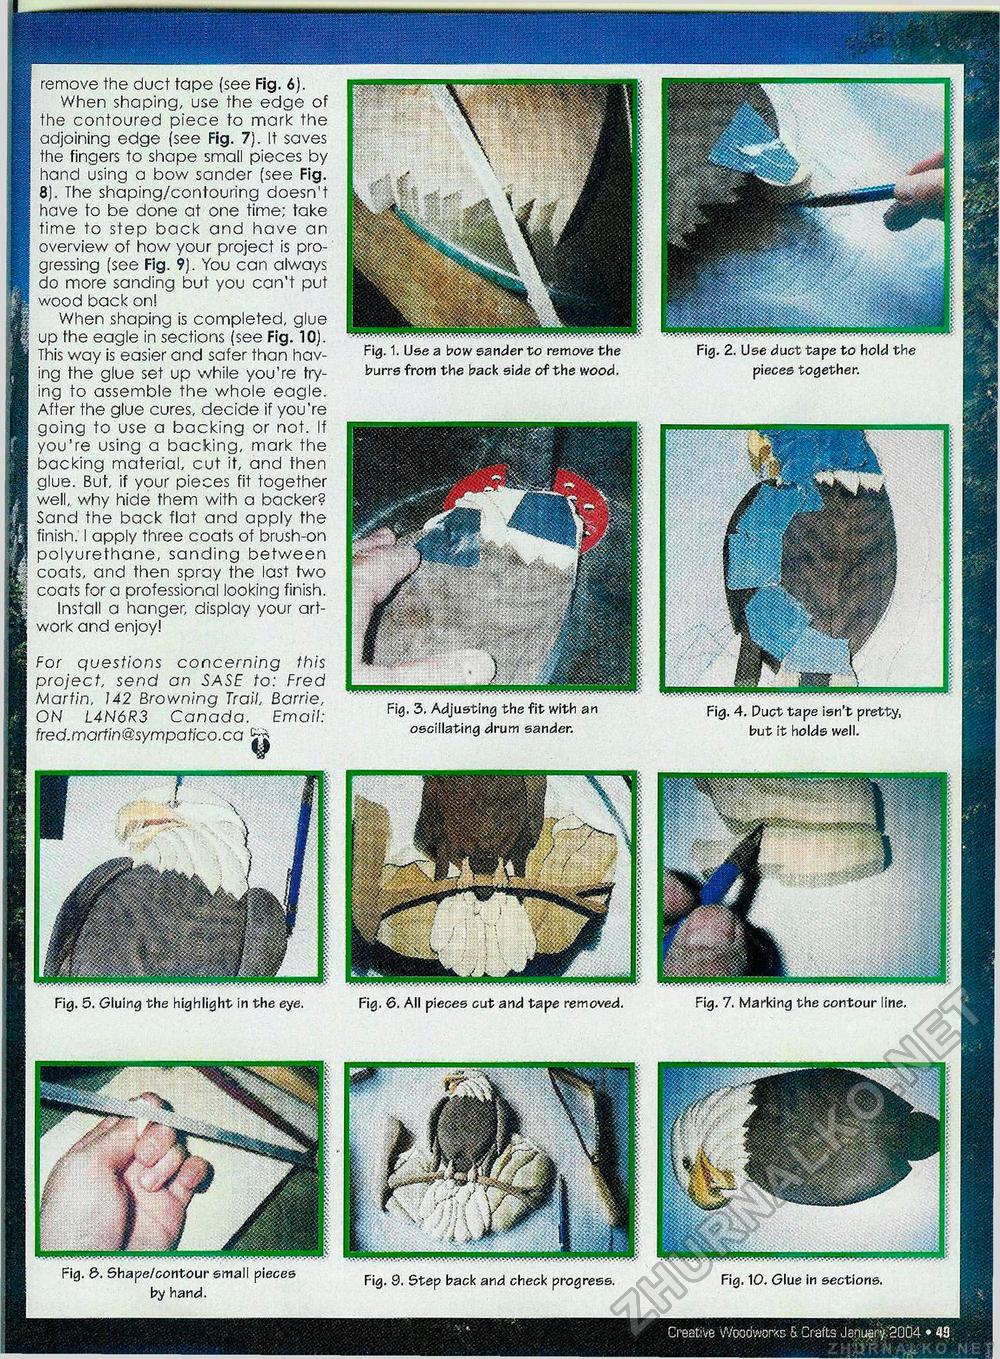
Fig. 5. Gluing the highlight in the eye. Fig. 6. All pieces cut and tape removed. Fig. 7. Marking the contour line. remove the duct tape (see Fig. 6). When shaping, use the edge of the contoured piece to mark the adjoining edge (see Fig. 7). It saves the fingers to shape small pieces by hand using a bow sander (see Fig. 8). The shaping/contouring doesn't have to be done at one time; take time to step back and have an overview of how your project is progressing (see Fig. 9). You can always do more sanding but you can't put wood back on! When shaping is completed, glue up the eagle in sections (see Fig. 10). This way is easier and safer than having the glue set up while you're trying to assemble the whole eagle. After the glue cures, decide if you're going to use a backing or not. If you're using a backing, mark the backing material, cut it, and then glue. But, if your pieces fit together well, why hide them with a backer? Sand the back flat and apply the finish. I apply three coats of brush-on polyurethane, sanding between coats, and then spray the last two coats for a professional looking finish. Install a hanger, display your artwork and enjoy! Fig. 4. Puct tape isn't pretty, but it holds well. For questions concerning this project, send an SASE to: Fred Martin, 142 Browning Trail, Barrie, ON L4N6R3 Canada. Email: fred.martin@sympatico.ca Fig. 1. Use a bow sander to remove the burrs from the back side of the wood. Fig. 3. Adjusting the fit with an oscillating drum sander. Fig. 2. Use duct tape to hold the pieces together. Fig. 9. Step back and check progress. Fig. 10. Glue in sections. Fig. o. Shape/contour small pieces by hand |


