Creative Woodworks & crafts 2004-01, страница 50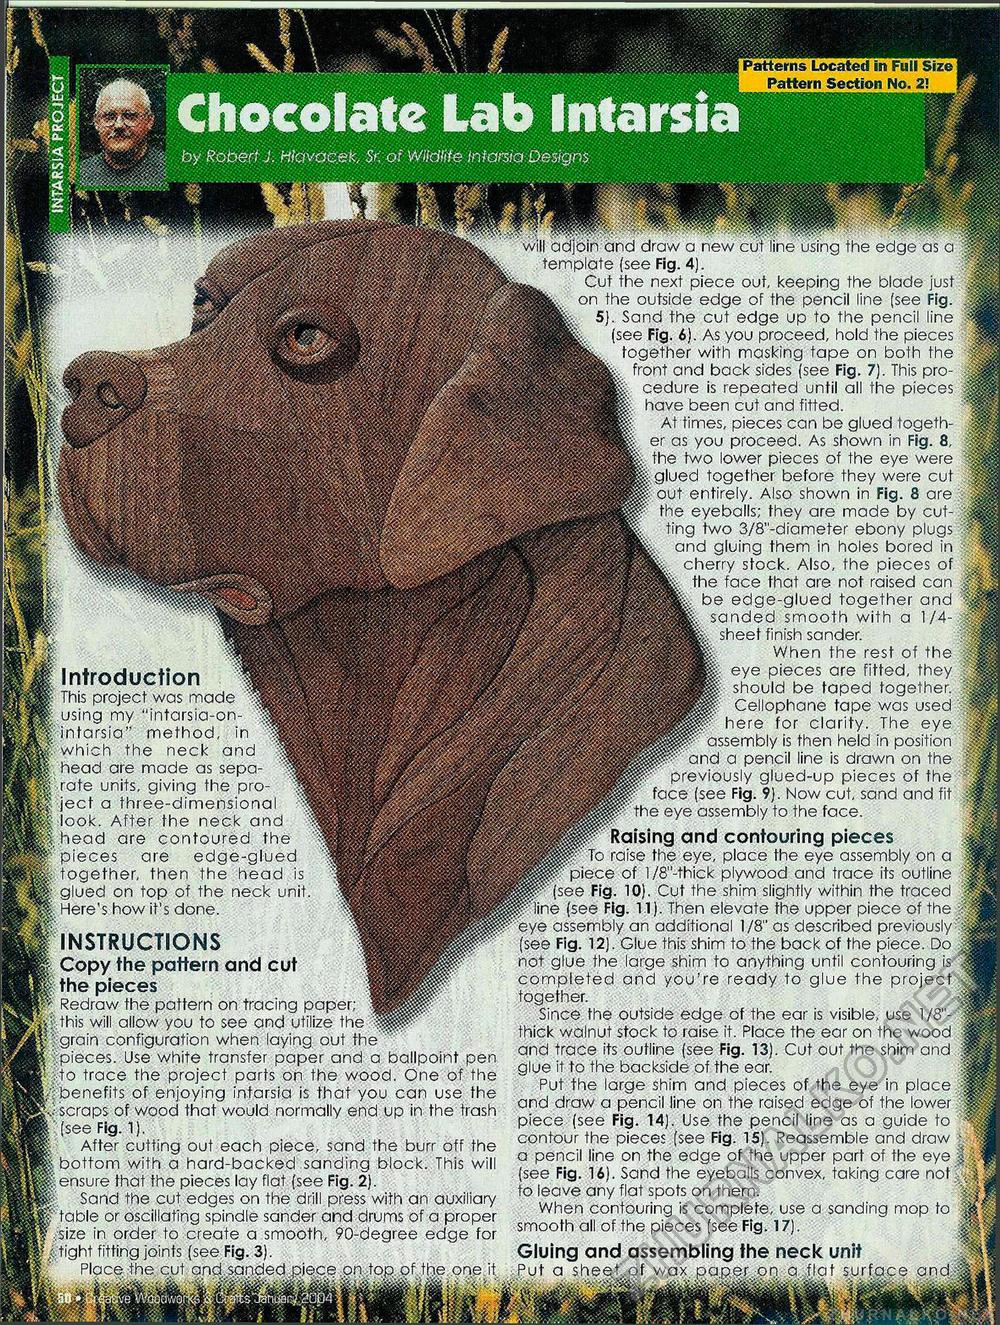
Patterns Located in Full Size Pattern Section No. 21 will adjoin and draw a new cut line using the edge as a ';s§gj template (see Fig. 4). |;e out, keeping the blade just .|| Ige of the pencil line (see Fig. J jt edge up to the pencil line m ; you proceed, hold the pieces Ji fh masking tape on both the M >ack sides (see Fig. 7). This pro- .Jj repeated until all the pieces lower pieces of the eye were |gether^before they were cut ^ contouring pieces M place the eye assembly on a ||| plywood and trace its outline j|| shim slightly within the traced . _ , :levate the upper piece of the :eye assembly an additional 1/8" as described previously (see Fig. 12). Glue this shim to the back of the piece. Do not glue the large shim to anything until contouring is completed and you're ready to glue the project II together. Since the outside edge of the ear is visible, use 1/8"- ||| thick walnut stock to raise it. Place the ear on the wood ||i and trace its outline (see Fig. 13). Cut out the shim and ;:p| glue it to the backside of the ear. Put the large shim and pieces of the eye in place |p and draw a pencil line on the raised edge of the lower |p| piece (see Fig. 14). Use the pencil line as a guide to contour the pieces (see Fig. 15). Reassemble and draw ; 1 a pencil line on the edge of the upper part of the eye fill (see Fig. 16). Sand the eyeballs convex, taking care not , i;' to leave any flat spots on them. When contouring is complete, use a sanding mop to |»| smooth all of the pieces (see Ftg. 17). Gluing and assembling the neck unit Put a sheet.of wax. paper..oq ojjpt surface and I Introduction m 1 This project was made f: using my "intarsia-on- '^ip? fSintarsia" method, in ■ which rhe necl- a^d , | head are made as sepal-rate units, giving the pro-1 ject a three-dimensionn | look. After the neck and ''^HHH&^ff. :|,.head are contoured the 'ffi 'f pieces are edge-glued I together, then the head is ^mi I glued cn op c I -iec;-. . •< . . ■ i. Here's how it's done. I INSTRUCTIONS | Copy the pattern and cut | the pieces & Redraw the pattern on tracing paper; |i|p i'|this will allow you to see and utilize the ;; grain configuration when laying out the { {.pieces. Use white transfer paper and a ballpoint pen f:|to trace the project parts on the wood. One of the L; benefits of enjoying intarsia is that you can use the scraps of wood that would normally end up in the trash I (see Fig. 1). I After cutting out each piece, sand the burr off the P bottom with a hard-backed sanding block. This will Hensure that the pieces lay flat (see Fig. 2). jp Sand the cut edges on the drill press with an auxiliary if table or oscillating spindle sander and drums of a proper f size in order to create a smooth, 90-degree edge for ' i tight fitting joints (see Fig. 3). Place the cut and sanded p.ie.ce on top.pl" the one it |


