Creative Woodworks & crafts 2004-01, страница 52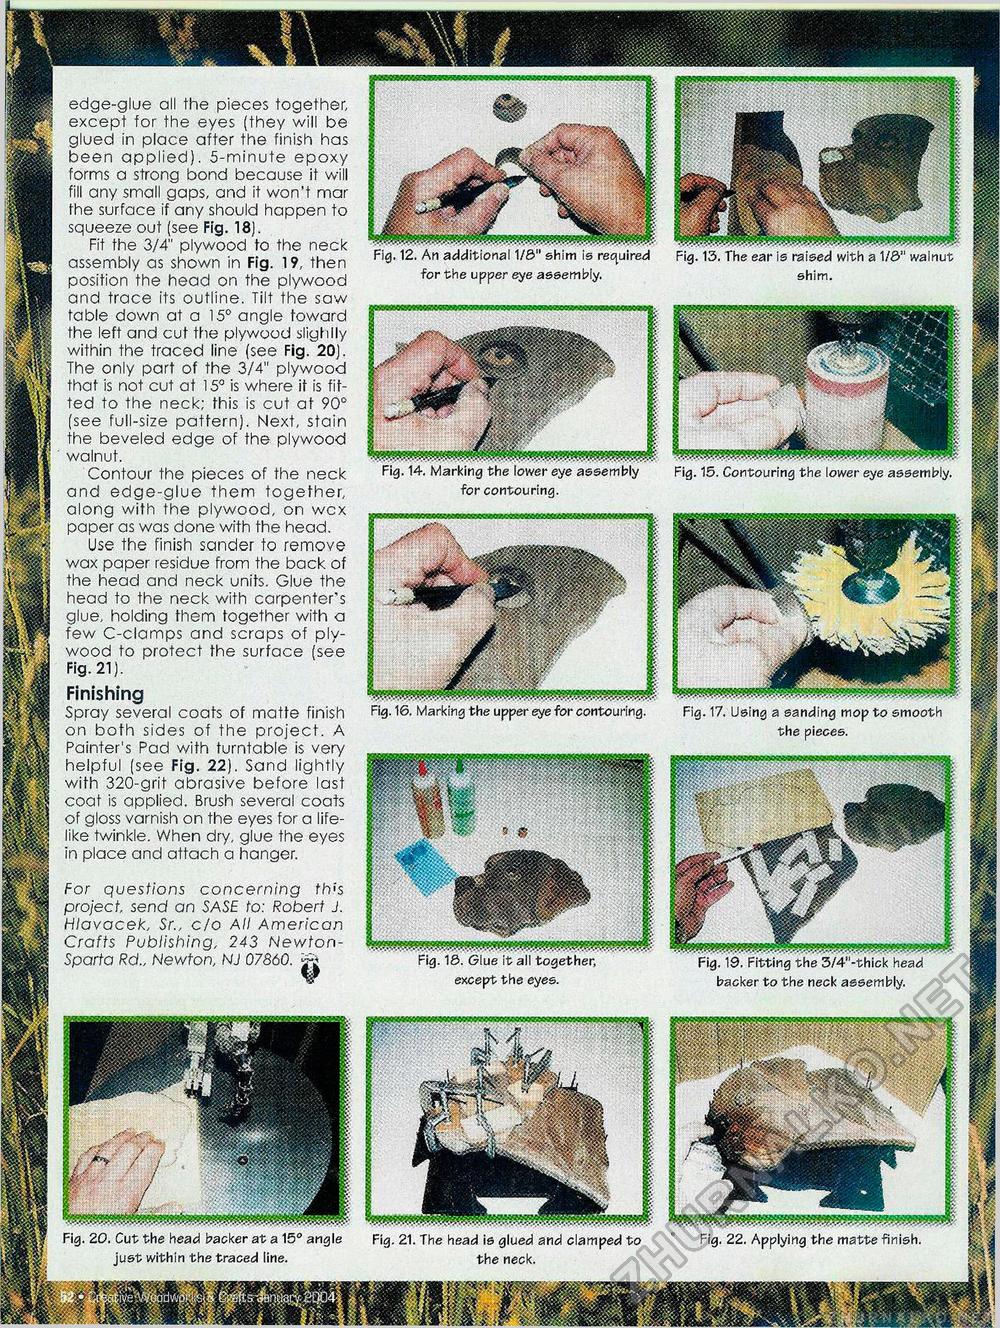
edge-glue all the pieces together, except for the eyes (they will be glued in place after the finish has been applied). 5-minute epoxy forms a strong bond because it will fill any small gaps, and it won't mar the surface if any should happen to squeeze out (see Fig. 18). Fit the 3/4" plywood to the neck assembly as shown in Fig. 19, then position the head on the plywood and trace its outline. Tilt the saw table down at a 15° angle toward the left and cut the plywood slighliy within the traced line (see Fig. 20). The only part of the 3/4" plywood that is not cut at 15° is where it is fitted to the neck; this is cut at 90° (see full-size pattern). Next, stain the beveled edge of the plywood walnut. Contour the pieces of the neck and edge-glue them together, along with the plywood, on wcx paper as was done with the head. Use the finish sander to remove wax paper residue from the back of the head and neck units. Glue the head to the neck with carpenter's glue, holding them together with a few C-clamps and scraps of plywood to protect the surface (see Fig. 21). Finishing Spray several coats of matte finish on both sides of the project. A Painter's Pad with turntable is very helpful (see Fig. 22). Sand lightly with 320-grit abrasive before last coat is applied. Brush several coats of gloss varnish on the eyes for a lifelike twinkle. When dry, glue the eyes in place and attach a hanger. Fig. 13. The ear is raised with a 1/0" walnut shim. Fig. 12. An additional 1/6" shim is reqi for the upper eye assembly. Fig. 15. Contouring the lower eye assembly. Fig. 14, Marking the lower eye assembly for contouring. Fig. 17. Using a sanding mop to smooth the pieces. Fig. 16. Marking the upper eye for contouring. For questions concerning this project, send an SASE to: Robert J. Hlavacek, Sr., do All American Crafts Publishing, 243 Newton-Sparta Rd„ Newton, NJ 07860. Fig. 19, Fitting the 3/4"-thick head backer to the neck assembly. Fig. 16. Glue it all together, except the eyes. Fig. 20. Cut the head backer at a 15° angle just within the traced line. Fig. 22. Applying the matte finish. Fig. 21. The head is glued and clamped to the neck. |


