Creative Woodworks & crafts 2004-06, страница 37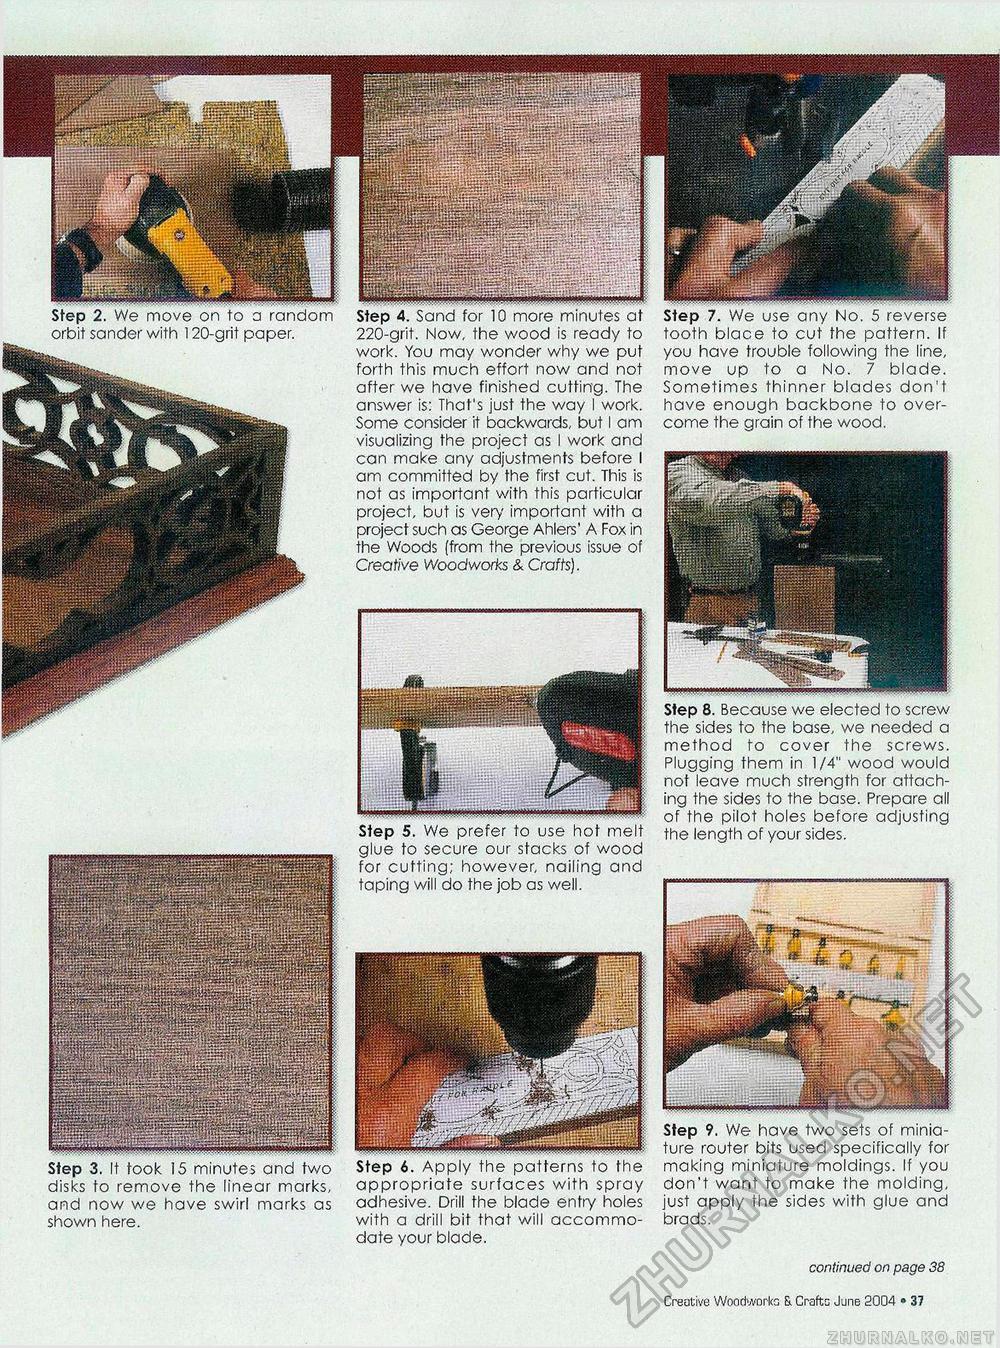
sander with 120-grit paper. Step 3. It took 15 minutes and two disks to remove the linear marks, and now we have swirl marks as shown here. more minutes at 220-grit. Now, the wood is ready to work. You may wonder why we put forth this much effort now and not after we have finished cutting. The answer is: That's just the way I work. Some consider it backwards, but I am visualizing the project as I work and can make any adjustments before I am committed by the first cut. This is not as important with this particular project, but is very important with a project such as George Ahlers' A Fox in the Woods (from the previous issue of Creative Woodworks & Crafts). Step 5. We prefer to use hot melt glue to secure our stacks of wood for cutting; however, nailing and taping will do the job as well. Step A. Apply the patterns to the appropriate surfaces with spray adhesive. Drill the blade entry holes with a drill bit that will accommodate your blade. Step 9. We have two sets of miniature router bits used specifically for making miniature moldings. If you don't want to make the molding, just apply the sides with glue and brads. continued on page 38 Step 7. We use ony No. 5 reverse tooth blace to cut the pattern. If you have trouble following the line, move up to a No. 7 blade. Sometimes thinner blades don't have enough backbone to overcome the grain of the wood. Step 8. Because we elected to screw the sides to the base, we needed a method to cover the screws. Plugging them in 1/4" wood would not leave much strength for attaching the sides to the base. Prepare all of the pilot holes before adjusting the length of your sides. 4fi • Creative Woodworks S. Crafts June 2004 |


