Creative Woodworks & crafts 2004-06, страница 40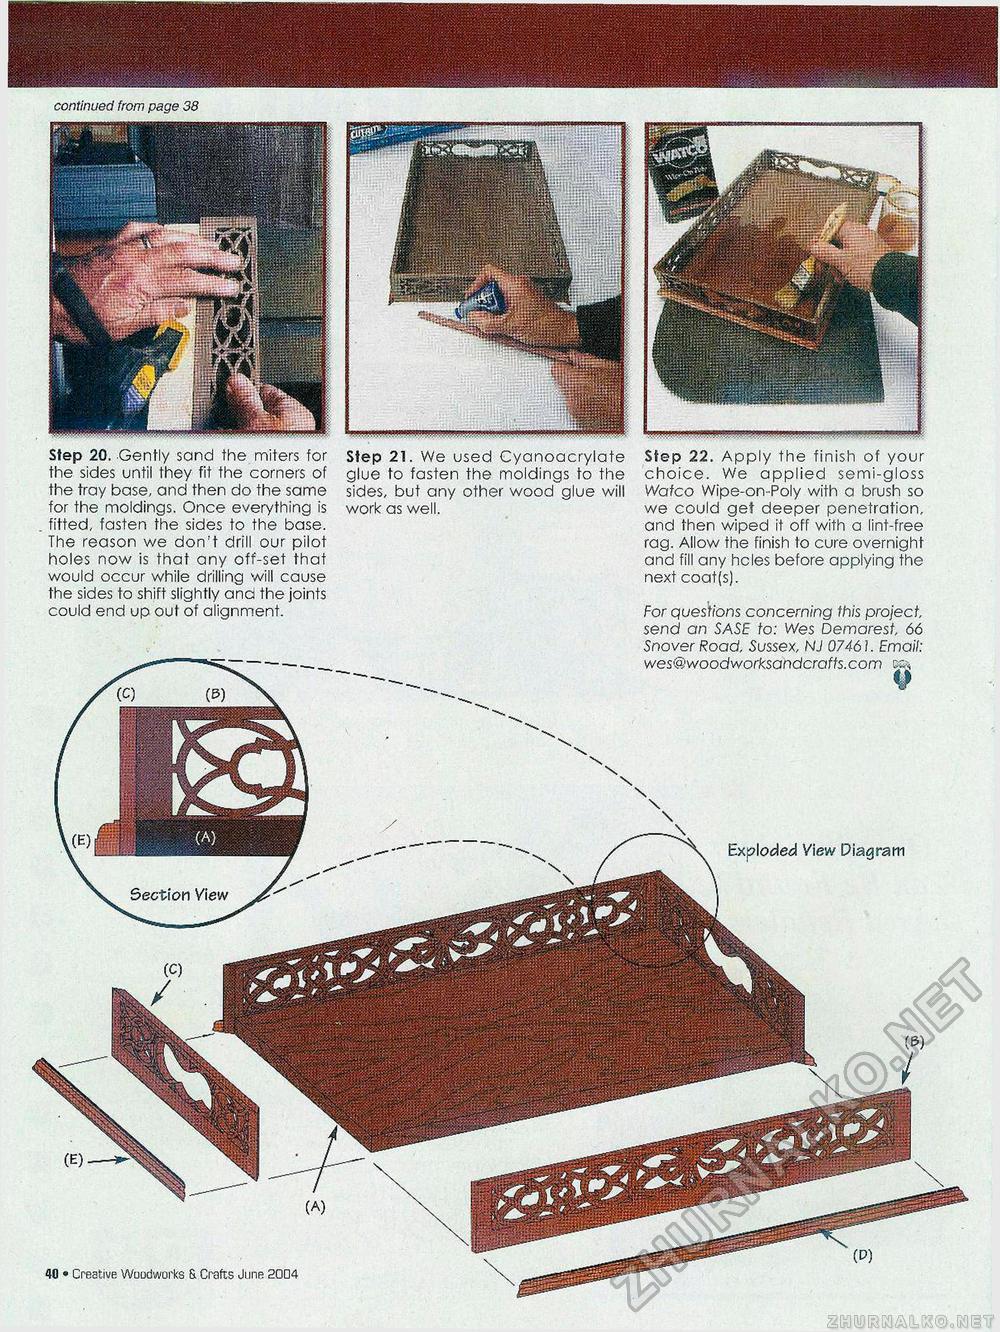
continued from page 38 Exploded View Diagram Step 21. We used Cyanoacrylate glue to fasten the moldings to the sides, but any other wood glue will work as well. 40 • Creative Woodworks & Crafts June 20D4 Step 20. Gently sand the miters for the sides until they fit the corners of the tray base, and then do the same for the moldings. Once everything is fitted, fasten the sides to the base. The reason we don't drill our pilot holes now is that any off-set that would occur while drilling will cause the sides to shift slightly ana the joints could end up out of alignment. Step 22. Apply the finish of your choice. We applied semi-gloss Wafco Wipe-on-Poly with a brush so we could get deeper penetration, and then wiped it off with a lint-free rag. Allow the finish to cure overnight and fill any hcles before applying the next coat(s). For questions concerning this project, send an SASE to: Wes Demarest, 66 Snover Road, Sussex, NJ 07461. Email: wes@woodworksandcrafts.com |


