Creative Woodworks & crafts 2004-06, страница 38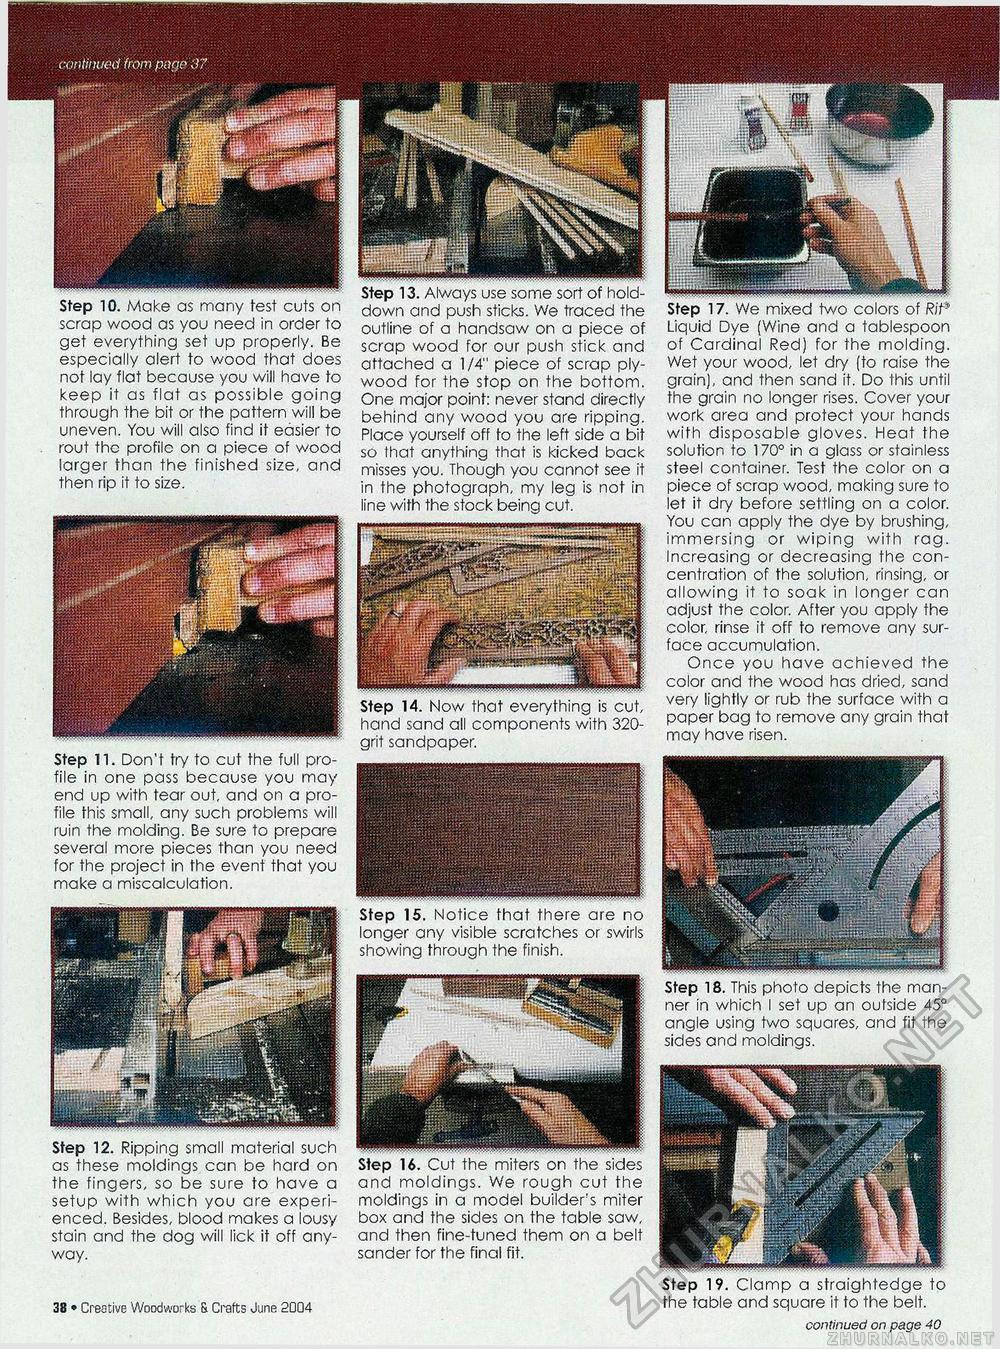
Step 10. Make as many test cuts on scrap wood as you need in order to get everything set up properly. Be especially alert to wood that does not lay flat because you will have to keep it as flat as possible going through the bit or the pattern will be uneven. You will also find it easier to rout the profile on a piece of wood larger than the finished size, and then rip it to size. Step 11. Don't try to cut the full profile in one pass because you may end up with tear out, and on a profile this small, any such problems will ruin the molding. Be sure to prepare several more pieces than you need for the project in the event that you make a miscalculation. Step 12. Ripping small material such as these moldings can be hard on the fingers, so be sure to have a setup with which you are experienced. Besides, blood makes a lousy stain and the dog will lick it off anyway. 4fi • Creative Woodworks S. Crafts June 2004 Step 17. We mixea two coiors or Mr-Liquid Dye (Wine and a tablespoon of Cardinal Red) for the molding. Wet your wood, let dry (to raise the grain), and then sand it. Do this until the grain no longer rises. Cover your work area and protect your hands with disposable gloves. Heat the solution to 170° in a glass or stainless steel container. Test the color on a piece of scrap wood, making sure to let it dry before settling on a color. You can apply the dye by brushing, immersing or wiping with rag. Increasing or decreasing the concentration of the solution, rinsing, or allowing it to soak in longer can adjust the color. After you apply the color, rinse it off to remove any surface accumulation. Once you have achieved the color and the wood has dried, sand very lightly or rub the surface with a paper bag to remove any grain that may have risen. Step 15. Notice that there are no longer any visible scratches or swirls showing through the finish. Step 18. This photo depicts the manner in which I set up an oulside 45° angle using two squares, and fit the sides and moldings. Step 16. Cut the miters on the sides and moldings. We rough cut the moldings in a model builders miter box and the sides on the table saw, and then fine-tuned them on a belt sander for the final fit. Step 19. Clamp a straightedge to the table and square it to the belt. continued on page 40 down and push sticks. We traced the outline of a handsaw on a piece of scrap wood for our push stick and attached a 1/4" piece of scrap plywood for the stop on the bottom. One major point: never stand directly behind any wood you are ripping. Place yourself off to the left side a bit so that anything that is kicked back misses you. Though you cannot see it in the photograph, my leg is not in line with the stock being cut. Step 14. Now that everything is cut, hand sand all components with 320-grit sandpaper. |


