Creative Woodworks & crafts 2004-06, страница 42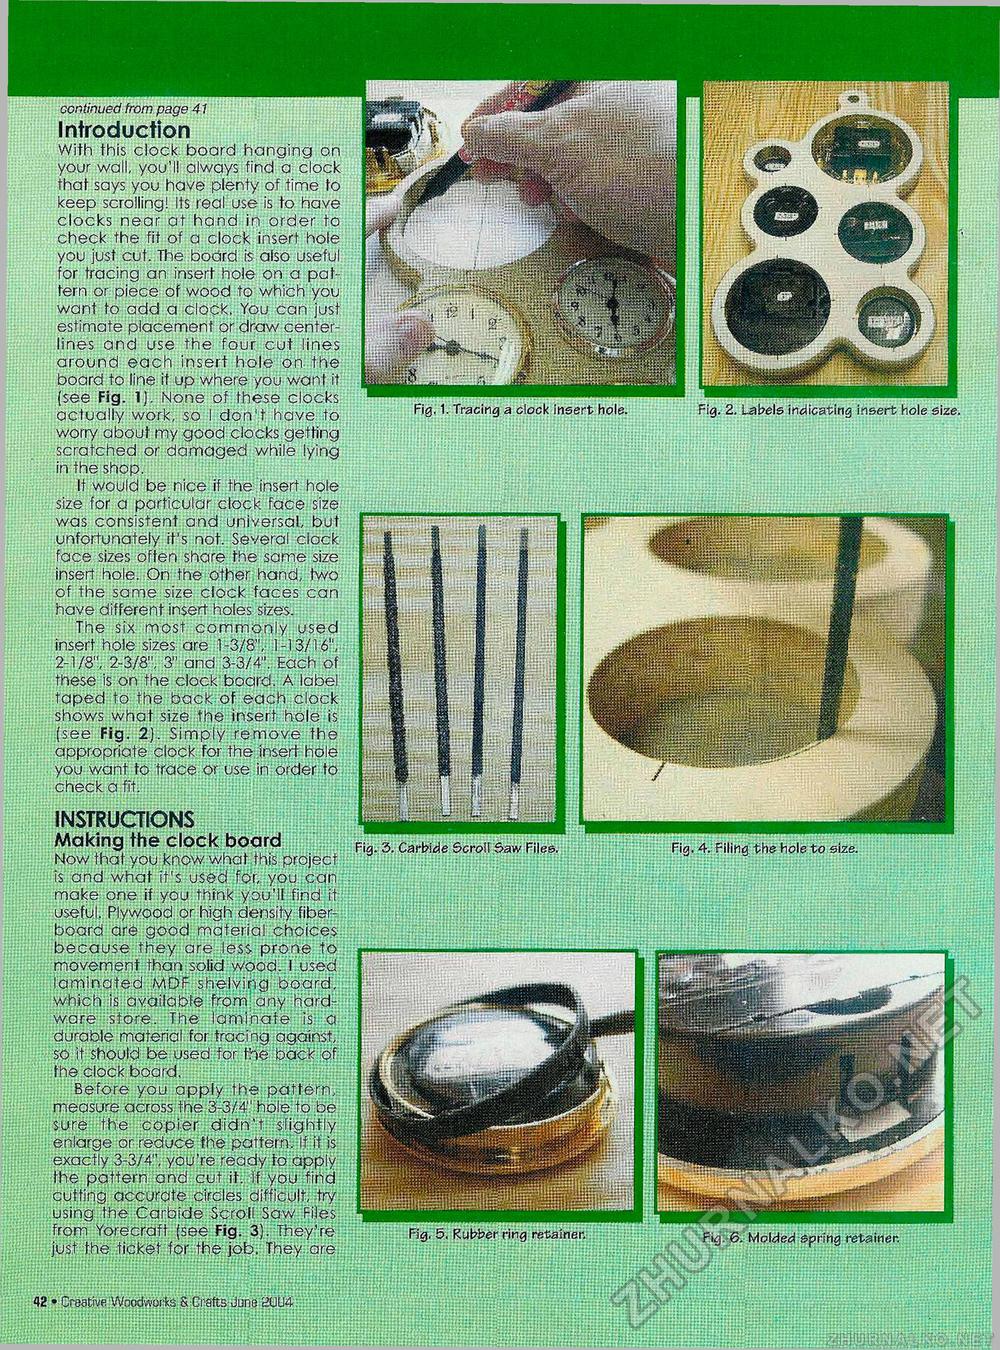
continued from page 41 Introduction With this clock board hanging on your wall, you'll always find a clock that says you have plenty of time to keep scrolling! Its real use is to have clocks near at hand in order to check the fit of a clock insert hole you just cut. The board is also useful, for tracing an insert hole on a pattern or piece of wood to which you want to add a clodk. You can just estimate placement Or draw center-lines and use the four cut lines around each insert hole on the board to line it up where you want it (see Fig. 1). None of these clocks actually work, so I don't have to worry about my good clocks getting scratched or damaged while lying in the shop. It would be nice if the .insert hole size for a particular clock face size was consistent and universal, but unfortunately it's not. Several clock face sizes often share the same size insert hole. On the other hand, two of the same size clock faces can have different insert holes sizes. The six most commonly used insert hole sizes are 1-3/8", 1-13/16", 2-1/8", 2-3/8", 3" and 3-3/4". Each of these is on the clock board. A label taped to the back of each clock shows what size the insert hole is :(see Fig. 2). Simply remove the appropriate clock for the insert hole you want to trace or use in order to check a fit. Fig. 1. Tracing a clock insert hole. Fig. 2. Labels indicating insert hole size. INSTRUCTIONS Making the clock board Now that you know what this project is and what it's used for, you can make one if you think you'll find it useful. Plywood or high density fiber-board are good material choices because they are less prone to movement than solid wood. I used laminated MDF shelving board, which is available from; any hardware1 store. The laminate is- a durable material for tracing against, so it should be used for the back Of the clock board. Before you apply the pattern, measure across the 3-3/4" hole! lb be sure the copier didn't slightly enlarge or reduce the pattern. If it is exactly 3-3/4", you're ready to apply the pattern and cut it. If you find cutting accurate circles difficult, try using the Carbide Scroll Saw Files from Yorecraft (see Fig. 3). They're just the ticket for the job. They are Fig. 3. Carbide Scroll Saw Files. Rubber ring retainer. Fig. 6. Molded spring retainer. 42 • Creative .'Woodworks S Gratts June ajU4 |


