Creative Woodworks & crafts 2004-08, страница 62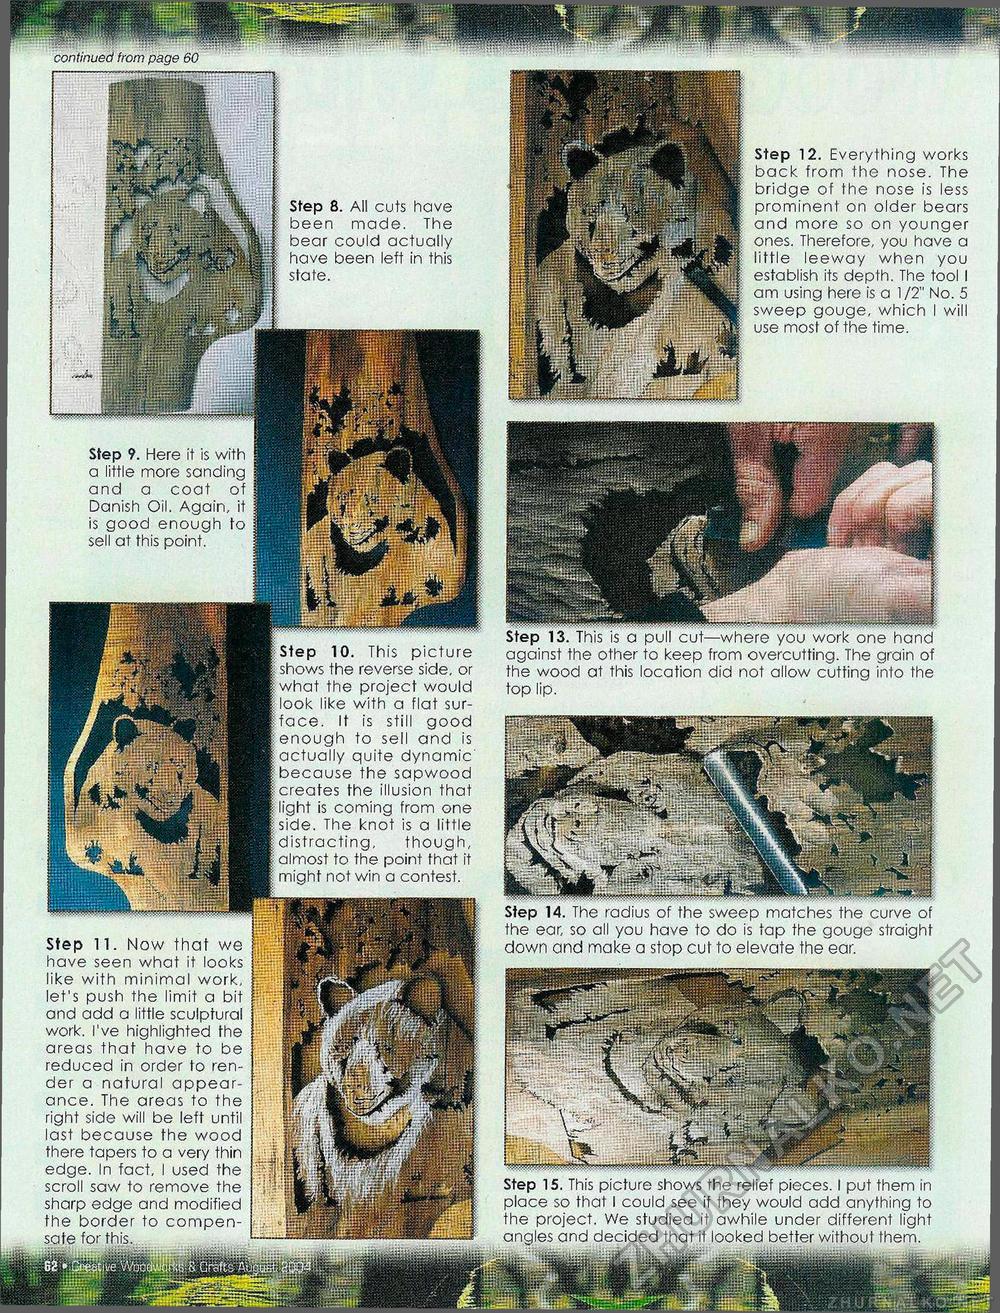
the ear, so all you have to do is tap the gouge straight down and make a stop cut to elevate the ear. Step 15. This picture shows the relief pieces. I put them in place so that I could see if they would add anything to . We studied it awhile under different light Step 8. All cuts have been made. The bear could actually have been left in this state. Step 12. Everything works back from the nose. The bridge of the nose is less prominent on older bears and more so on younger ones. Therefore, you have a little leeway when you establish its depth. The tool I am using here is a 1 /2" No. 5 sweep gouge, which I will use most of the time. against the other to keep from overcutting. The grain of the wood at this location did not allow cutting into the top lip. Step 10. This picture the reverse side, or what the project would look like with a flat surface. It is still good nough to sell and is actually quite dynamic' because the sapwood the illusion that is coming from one The knot is a little distracting, though, almost to the point that it might not win a contest. Step 9. Here it is with a little more sanding and a coat of Danish Oil. Again, it is good enough to sell at this point. Step 11. Now that have seen what it looks like with minimal work, let's push the limit a bit and add a little sculptural work. I've highlighted the areas that have to be reduced in order to render a natural appearance. The areas to the right side will be left until last because the wood there tapers to a very thin edge. In fact, I used the scroll saw to remove the sharp edge and modified the border to compen- |


