Creative Woodworks & crafts 2004-08, страница 63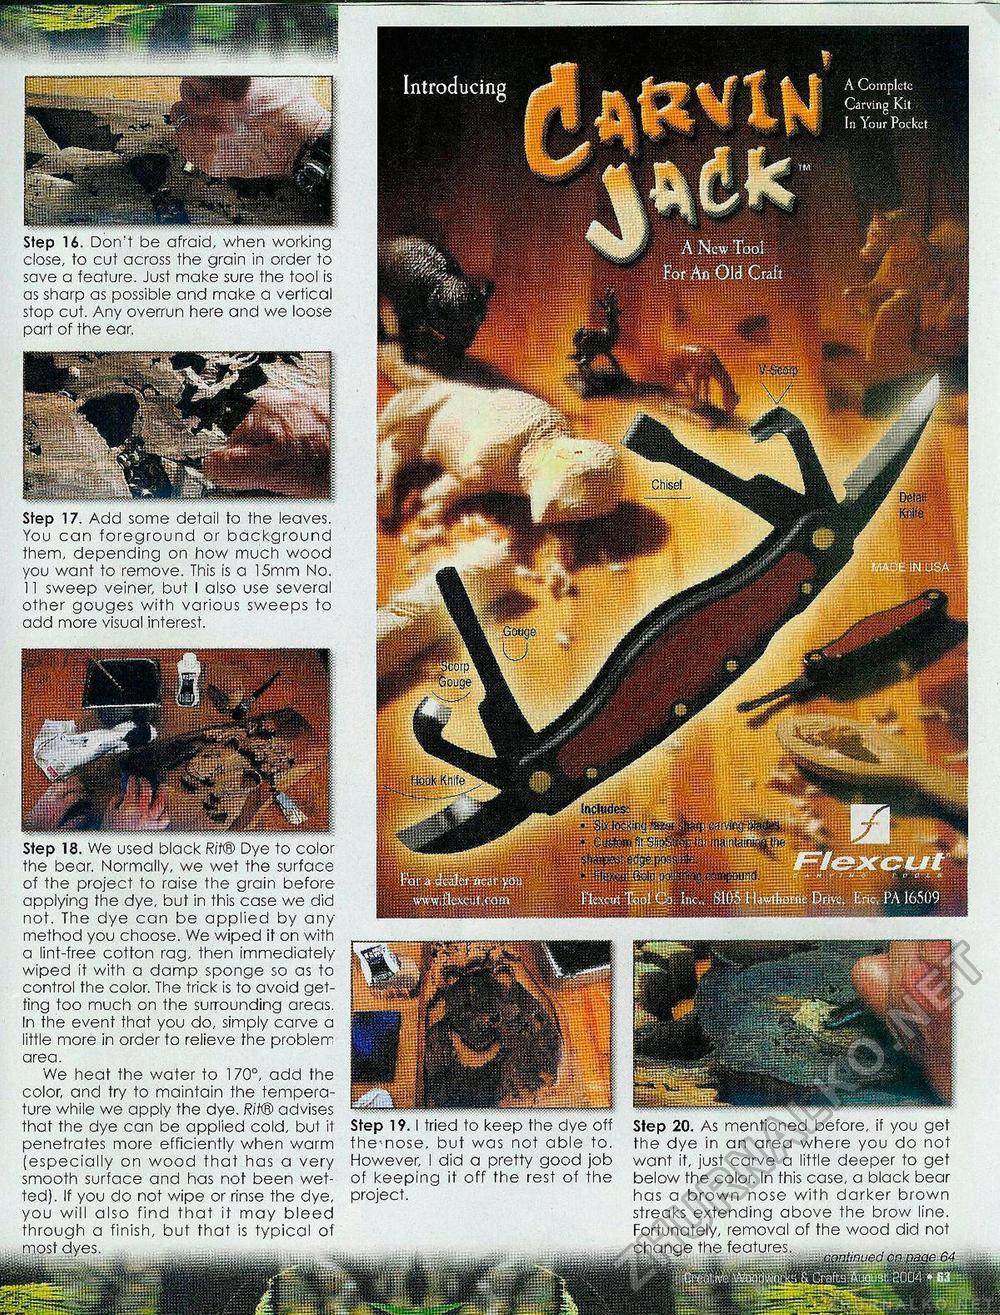
Step 16. Don't be afraid, when working close, to cut across the grain in order to save a feature. Just make sure the tool is as sharp as possible and make a vertical stop cut. Any overrun here and we loose part of the ear. Step 17. Add some detail to the leaves. You can foreground or background them, depending on how much wood you want to remove. This is a 15rnm No. 11 sweep veiner, but I also use several other gouges with various sweeps to add more visual interest. Step 18. We used black Rit® Dye to color the bear. Normally, we wet the surface of the project to raise the grain before applying the dye, but in this case we did not. The dye can be applied by any method you choose. We wiped it on with a lint-free cotton rag, then immediately wiped it with a damp sponge so as to control the color. The trick is to avoid getting too much on the surrounding areas. In the event that you do, simply carve a little more in order to relieve the problem area. We heat the water to 170°, add the color, and try to maintain the temperature while we apply the dye. Rit® advises that the dye can be applied cold, but it penetrates more efficiently when warm (especially on wood that has a very smooth surface and has not been wetted). If you do not wipe or rinse the dye, you will also find that it may bleed through a finish, but that is typical ot most dyes. Step 19.1 tried to keep the dye off the nose, but was not able to. However, I did a pretty good job of keeping it off the rest of the project. Step 20. As mentioned before, if you get the dye in an area where you do not want it, just carve a little deeper to get below the color. In this case, a black bear has a brown nose with darker brown streaks extending above the brow line. Fortunately, removal of the wood did not change the features. .. , — . •- ■ .continued on.fi |


