Creative Woodworks & crafts 2004-08, страница 64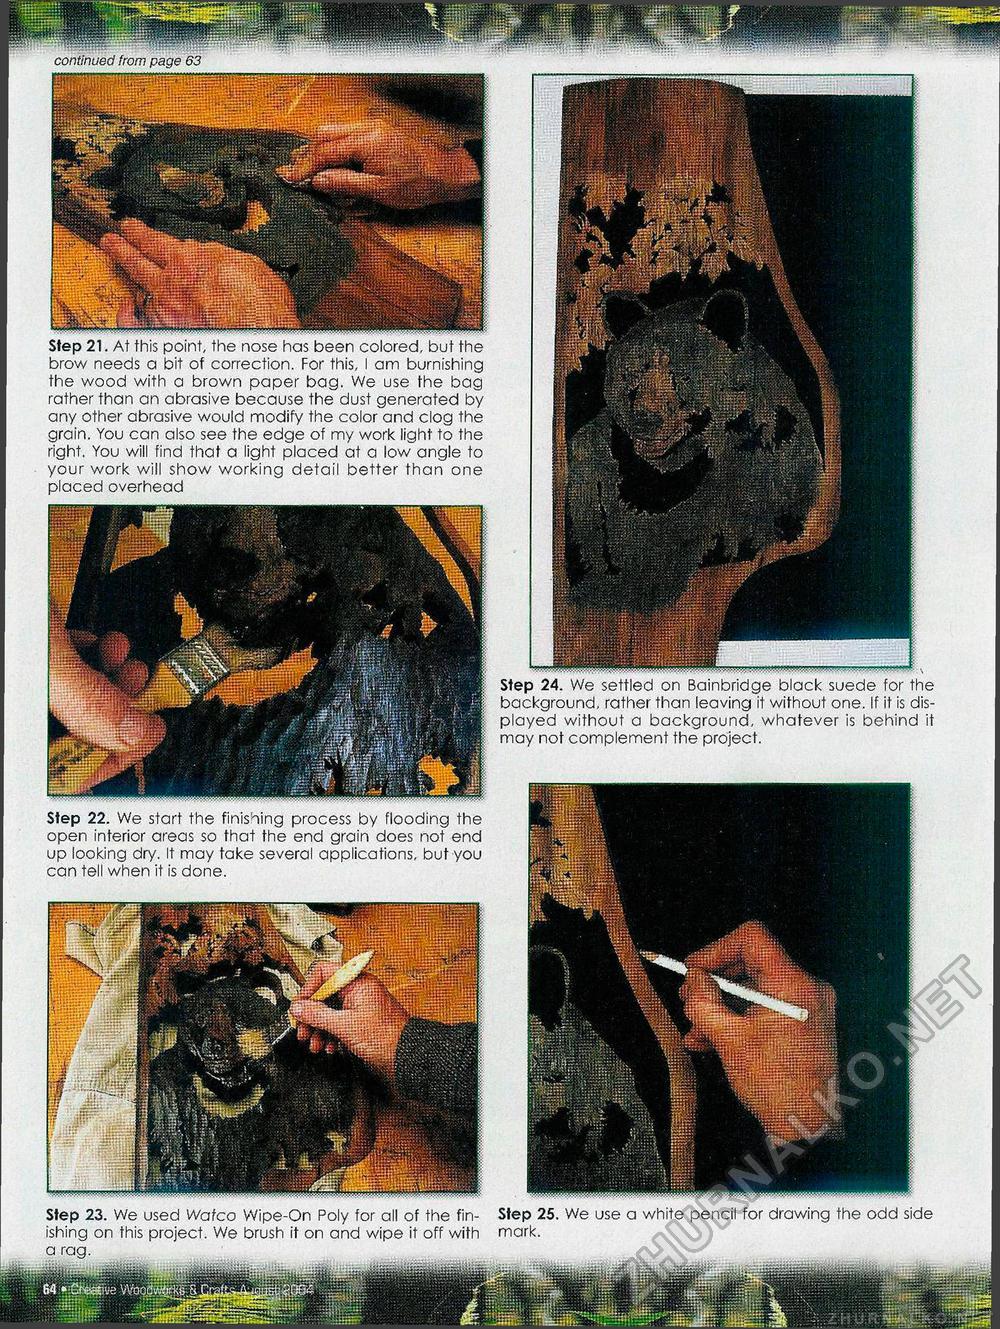
continued from page 63 Step 21. At this point, the nose has been colored, but the brow needs a bit of correction. For this, I am burnishing the wood with a brown paper bag. We use the bag rather than an abrasive because the dust generated by any other abrasive would modify the color and clog the grain. You can also see the edge of my work light to the right. You will find that a light placed at a low angle to your work will show working detail better than one placed overhead Step 24. We settled on Bainbridge black suede for the background, rather than leaving it without one. If it is displayed without a background, whatever is behind it may not complement the project. Step 23. We used Watco Wipe-On Poly for all of the finishing on this project. We brush it on and wipe it off with Step 25. We use a white pencil for drawing the odd side mark. Step 22. We start the finishing process by flooding the open interior areas so that the end grain does not end up looking dry. It may take several applications, but you can tell when it is done. |


