Creative Woodworks & crafts 2004-11, страница 72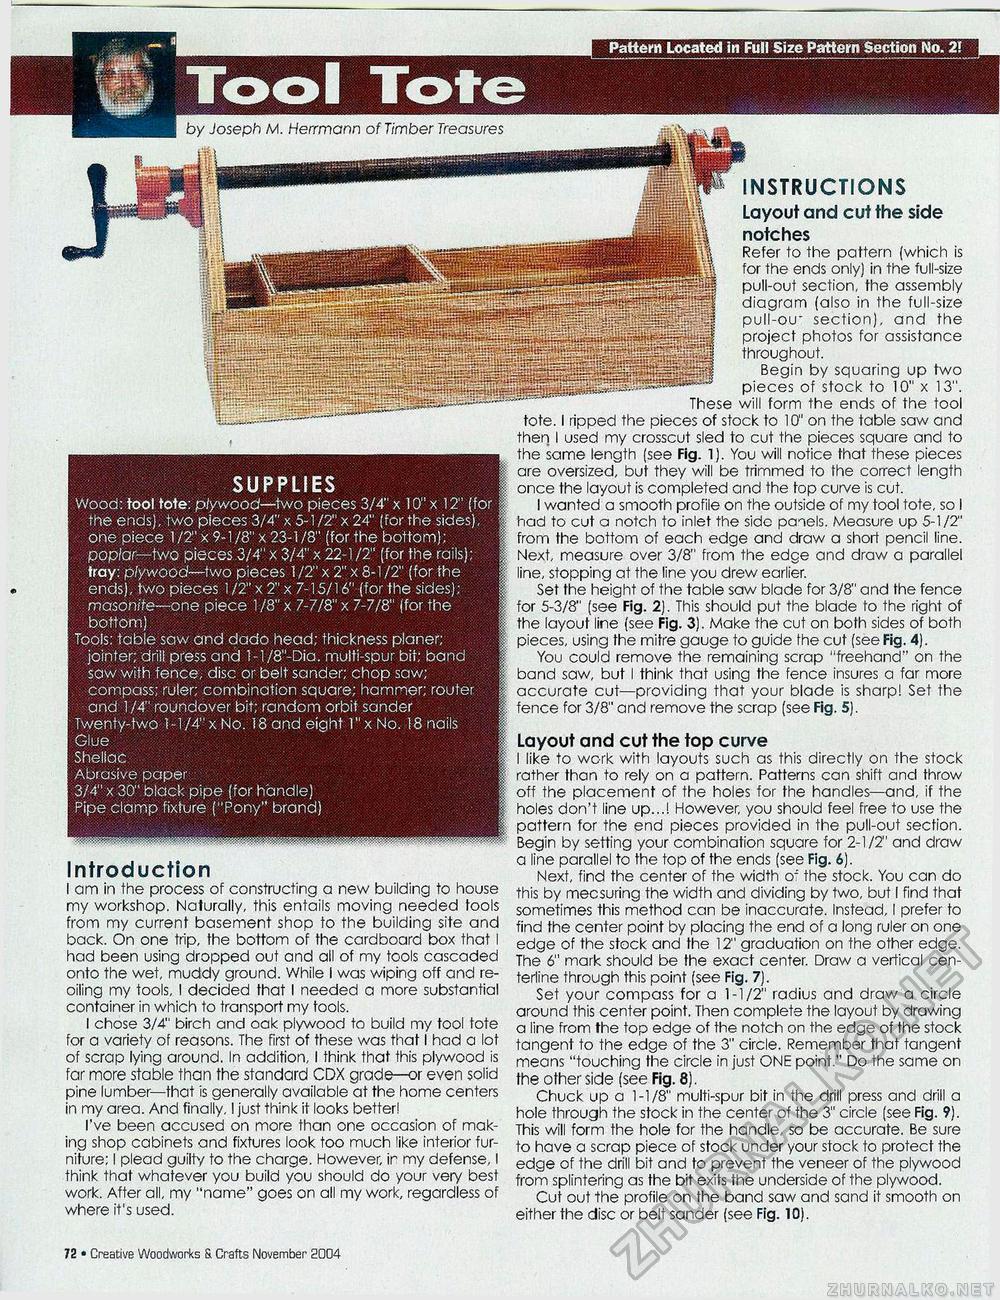
Tool Tote Pattern Located in Full Size Pattern Section No. 2! by Joseph M. Herrmann of Timber Treasures SUPPLIES Wood: tool tote: plywood—two pieces 3/4" x 10" x 12" (for the ends), two pieces 3/4" x 5-1/2" x 24" (for the sides), one piece 1 /2" x 9-1/8" x 23-1 /8" (for the bottom); poplar—two pieces 3/4" x 3/4" x 22-1 /2" (for the rails); tray: plywood—two pieces 1 /2" x 2" x 8-1/2" (for the ends), two pieces l/2"x2"x 7-15/16" (for the sides): masonife—one piece 1/8" x 7-7/8" x 7-7/8" (for the bottom) Tools: fable saw and dado head; thickness planer; jointer; drill press and l-l/8"-Dia. multi-spur bit; band saw with fence, disc or belt sander; chop saw; compass; ruler; combination square; hammer; router and 1 /A" roundover bit; random orbit sander Twenty-two 1-1/4" x No. 18 and eight T'xNo. 18 nails Glue Shellac Abrasive paper 3/4" x 30" black pipe (for handle) Pipe clamp fixture ("Pony" brand) Introduction I am in the process of constructing a new building to house my workshop. Naturally, this entails moving needed tools from my current basement shop to the building site and back. On one trip, the bottom of the cardboard box that I had been using dropped out and all of rny tools cascaded onto the wet, muddy ground. While I was wiping off and re-oiling my tools, I decided that I needed a more substantial container in which to transport my tools. I chose 3/4" birch and oak plywood to build my tool tote for a variety of reasons. The first of these was that I had a lot of scrap lying around. In addition, I think that this plywood is far more stable than the standard CDX grade—or even solid pine lumber—that is generally available at the home centers in my area. And finally, I just think it looks better! I've been accused on more than one occasion of making shop cabinets and fixtures look too much like interior furniture; I plead guilty to the charge. However, ir my defense, I think that whatever you build you should do your very best work. After all, my "name" goes on all my work, regardless of where it's used. INSTRUCTIONS Layout and cut the side notches Refer to the pattern (which is for the ends only) in the full-size pull-out section, the assembly diagram (also in the full-size pull-ou" section), and the project photos for assistance throughout. Begin by squaring up two pieces of stock to 10" x 13". These will form the ends of the tool tote. I ripped the pieces of stock to 10" on the table saw and then I used my crosscut sled to cut the pieces square and to the same length (see Fig. 1). You will notice that these pieces are oversized, but they will be trimmed to the correct length once the layout is completed and the fop curve is cut. I wanted a smooth profile on the outside of my tool tote, so I had to cut a notch to inlet the side panels. Measure up 5-1/2" from the bottom of each edge and draw a short pencil line. Next, measure over 3/8" from the edge and draw a parallel line, stopping at the line you drew earlier. Set the height of the table saw blade for 3/8" and the fence for 5-3/8" (see Fig. 2). This should put the blade to the right of the layout line (see Fig. 3). Make the cut on both sides of both pieces, using the mitre gauge to guide the cut (see Fig. 4). You could remove the remaining scrap "freehand" on the band saw, but I think that using the fence insures a far more accurate cut—providing that your blade is sharp! Set the fence for 3/8" and remove the scrap (see Fig. 5). Layout and cut the top curve I like to work with layouts such as this directly on the stock rather than to rely on a pattern. Patterns can shift and throw off the placement of the holes for the handles—and, if the holes don't line up...! However, you should feel free to use the pattern for the end pieces provided in the pull-out section. Begin by setting your combination square for 2-1/2" and draw a line parallel to the top of the ends (see Fig. 6). Next, find the center of the width o~ the stock. You can do this by mecsuring the width and dividing by two, but I find that sometimes this method can be inaccurate. Instead, I prefer to find the center point by placing the end of a long ruler on one edge of the stock and the 12" graduation on the other edge. The 6" mark should be the exact center. Draw a vertical cen-terline through this point (see Fig. 7). Set your compass for a 1-1/2" radius and draw a circle around this center point. Then complete the layout by drawing a line from the top edge of the notch on the edge of the stock tangent to the edge of the 3" circle. Remember that tangent means "touching the circle in just ONE point." Do the same on the other side (see Fig. 8). Chuck up a 1-1/8" multi-spur bit in the drill press and drill a hole through the stock in the center of the 3" circle (see Fig. 9). This will form the hole for the handle, so be accurate. Be sure to have a scrap piece of stock under your stock to protect the edge of the drill bit and to prevent the veneer of the plywood from splintering as the bit exits the underside of the plywood. Cut out the profile on the band saw and sand it smooth on either the disc or belt sander (see Fig. 10). 72 • Creative Woodworks S. Crafts November 2004 |


