Creative Woodworks & crafts 2004-11, страница 73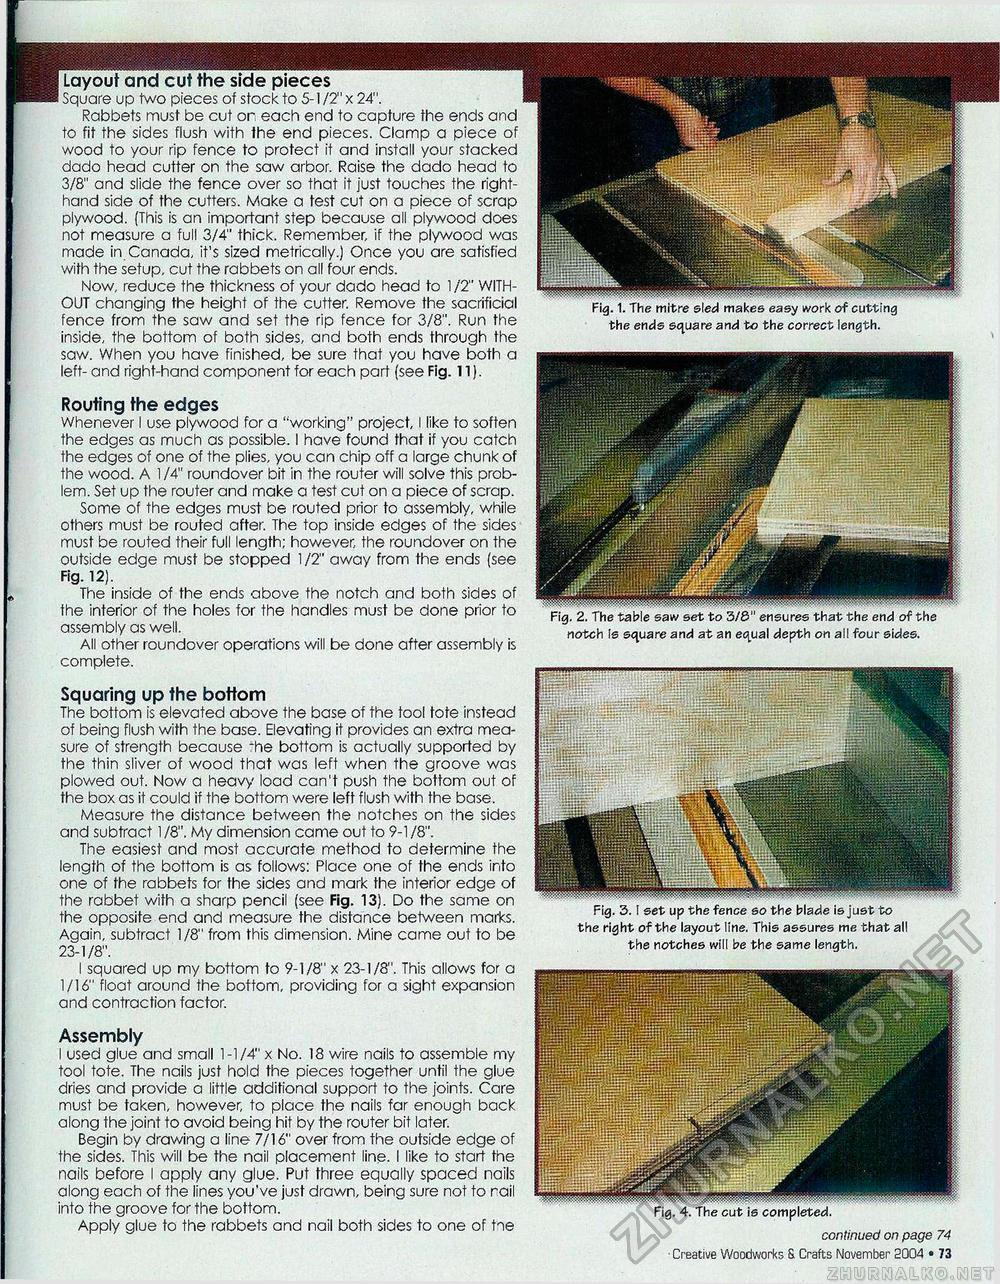
Fig. 1. The mitre sled makes easy work of cutting the ends square and to the correct length. continued on page 74 ■ Creative Woodworks & Crafts November 2004 • 73 (Layout i I Square up two pieces of stock to. Rabbets must be cut or each end to capture the ends and to fit the sides flush with the end pieces. Clamp a piece of wood to your rip fence to protect it and install your stacked dado head cutter on the saw arbor. Raise the dado head to 3/8" and slide the fence over so that it just touches the right-hand side of the cutters. Make a test cut on a piece of scrap plywood. (This is an important step because all plywood does not measure a full 3/4" thick. Remember, if the plywood was made in Canada, it's sized metrically.) Once you are satisfied with the setup, cut the rabbets on all four ends. Now, reduce the thickness of your dado head to 1/2" WITHOUT changing the height of the cutter. Remove the sacrificial fence from the saw and set the rip fence for 3/8". Run the inside, the bottom of both sides, and both ends through the saw. When you have finished, be sure that you have both a left- and right-hand component for each part (see Fig. 11). Routing the edges Whenever I use plywood for a "working" project, I like to soften the edges as much as possible. I have found that if you catch the edges of one of the plies, you can chip off a large chunk of the wood. A 1 /4" roundover bit in the router will solve this problem. Set up the router and make a test cut on a piece of scrap. Some of the edges must be routed prior to assembly, while others must be routed after. The top inside edges of the sides must be routed their full length; however, the roundover on the outside edge must be stopped 1 /2" away from the ends (see Fig. 12). The inside of the ends above the notch and both sides of the interior of the holes for the handles must be done prior to assembly as well. All other roundover operations will be done after assembly is complete. Squaring up the bottom The bottom is elevated above the base of the tool tote instead of being flush with the base. Elevating it provides an extra measure of strength because "he bottom is actually supported by the thin sliver of wood that was left when the groove was plowed out. Now a heavy load can't push the bottom out of the box as it could if the bottom were left flush with the base. Measure the distance between the notches on the sides and subtract 1/8". My dimension came out to 9-1/8". The easiest and most accurate method to determine the length of the bottom is as follows: Place one of the ends into one of the rabbets for the sides and mark the interior edge of the rabbet with a sharp pencil (see Fig. 13). Do the same on the opposite end and measure the distance between marks. Again, subtract 1/8" from this dimension. Mine came out to be 23-1/8". I squared up my bottom to 9-1/8" x 23-1/8". This allows for a 1/16" float around the bottom, providing for a sight expansion and contraction factor. Assembly I used glue and small 1-1/4" x No. 18 wire nails to assemble my tool tote. The nails just hold the pieces together until the glue dries and provide a little additional support to the joints. Care must be taken, however, to place the nails far enough back along the joint to avoid being hit by the router bit later. Begin by drawing a line 7/16" over from the outside edge of the sides. This will be the nail placement line. I like to start the nails before I apply any glue. Put three equally spaced nails along each of the lines you've just drawn, being sure not to rail into the groove for the bottom. Apply glue to the rabbets and nail both sides to one of tne the right of the layout line. This assures me that all the notches will be the same length. notch Is square and at an equal depth on all four sides. |


