Creative Woodworks & crafts 2005-01, страница 18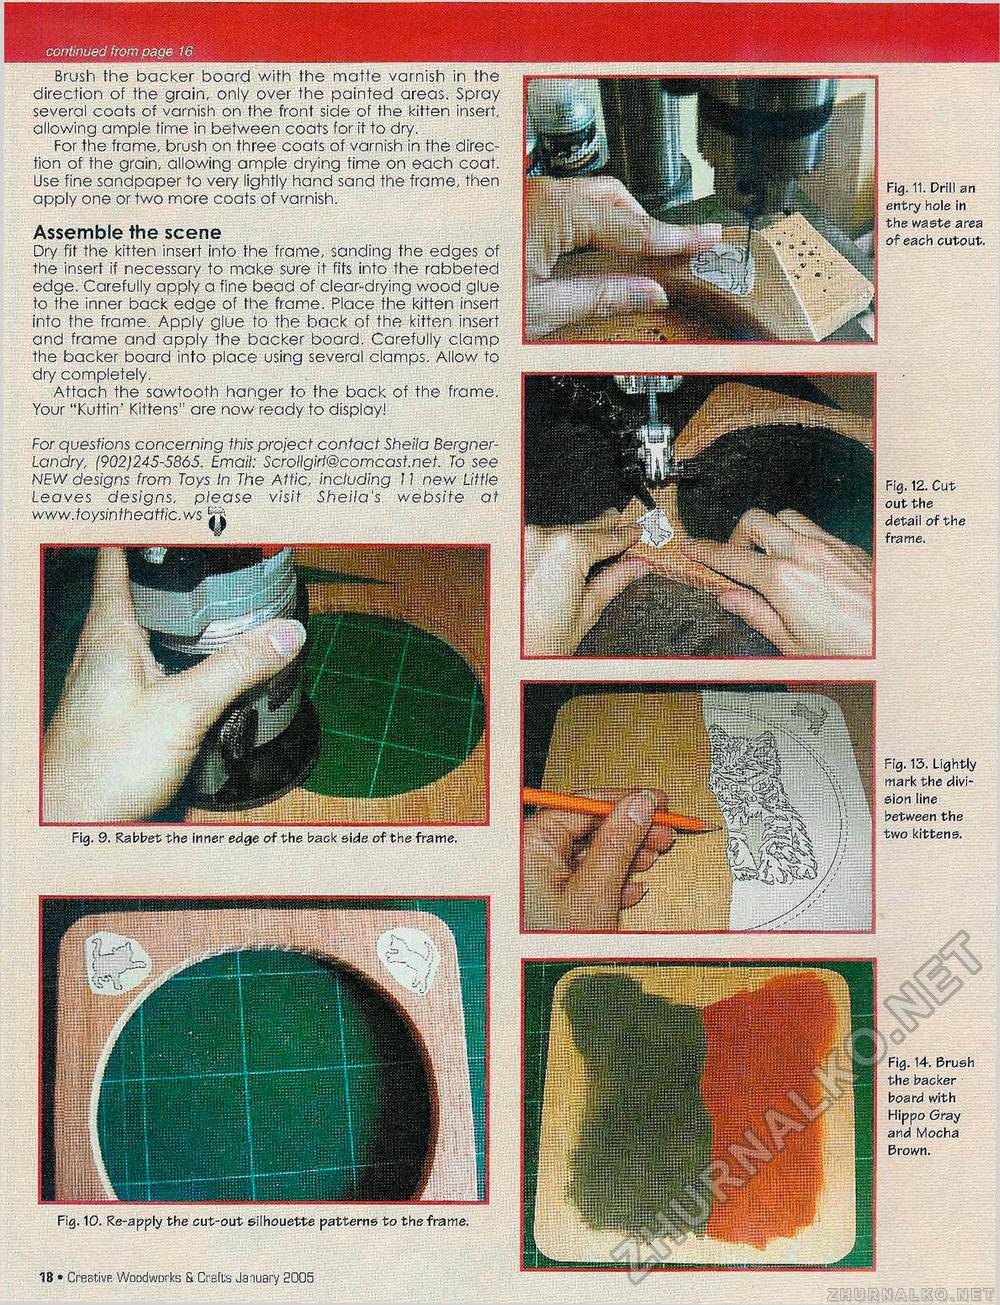
Fig. 9. Rabbet the inner edge of the back side of the frame. Fig. 10. Re-apply the cut-out silhouette patterns to the frame. 18 • Creative Woodworks S Crafts January 2005 Fig. 14. Brush the backer board with Hippo Gray and Mocha Brown. continued from page 16 Brush the backer board wifh the matte varnish in the direction of the grain, only over the painted areas. Spray several coats of varnish on the front side of the kitten insert, allowing ample time in between coats for it to dry. For the frame, brush on three coats of varnish in the direction of the grain, allowing ample drying time on each coat. Use fine sanapaper to very lightly hana sana the frame, then apply one or two more coats of varnish. Assemble the scene Dry fit the kitten insert into the frame, sanding the edges of the insert if necessary to make sure it fits into the rabbeted edge. Carefully apply a fine bead of clear-drying wood glue to the inner back edge of fhe frame. Place the kitten insert into fhe frame. Apply glue to the back of the kitten insert and frame and apply the backer board. Carefully clamp the backer board into place using several clamps. Allow to dry completely. Attach the sawtooth hanger to fhe back of the frame. Your "Kuttin' Kittens" are now ready to display! For quesfrons concerning this project contact Sheila Bergner-Landry, (902)245-5865. Email: Scrollgirl@comcast.net. To see NEW designs from Toys In The Attic, including J! new Little Leaves designs, please visit Sheila's website at www.foysintheattic.ws Jp Fig. 12. Cut out the detail of the frame. Fig. 11. Drill an entry hole in the waste area of each cutout. Fig. 13. Lightly mark the division line between the two kittens. |


