Creative Woodworks & crafts 2005-01, страница 15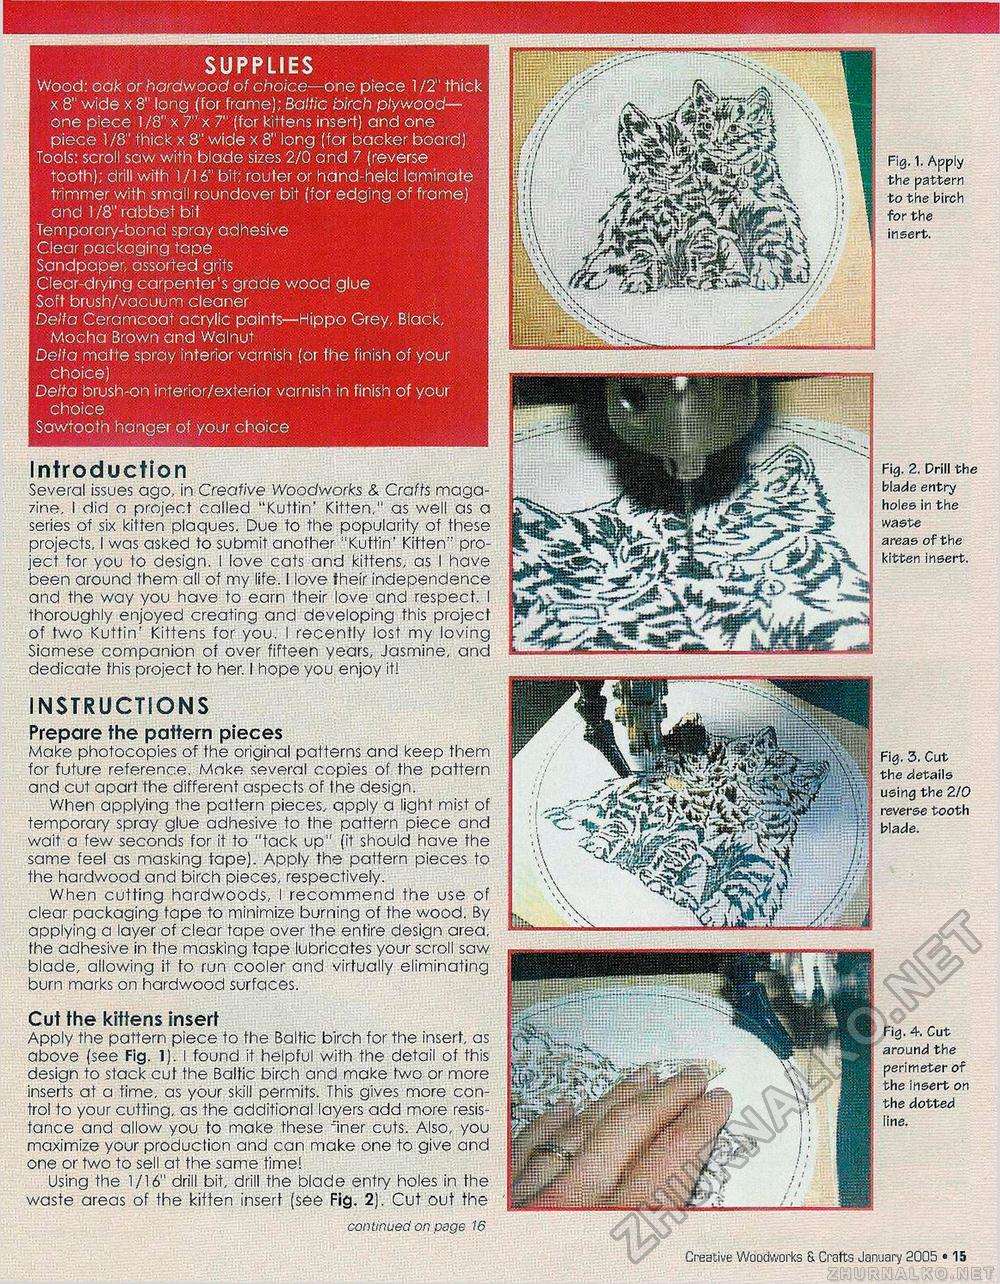
SUPPLIES Wood: oak or hardwood of choice—one piece 1 /2" thick x 8" wide x 8" long (for frame); Baltic birch plywood— one piece 1/8" x 7" x 7" (for kittens insert) and one piece 1 /&" thick x 8" wide x 8" long (for backer board) Tools: scroll saw with blade sizes 2/0 and 7 (reverse tooth); drill with 1/16" bit; router or hand-held laminate trimmer with small roundover bit (for edging of frame) and 1/8" rabbet bit Temporary-bona spray adhesive Clear packaging tape Sandpaper, assorted grits Clear-drying carpenter's grade wood glue Soft brush/vacuum cleaner Delta Ceramcoat acrylic paints—Hippo Grey, Black, Mocha Brown and Walnut Delta matte spray interior varnish (or the finish of your choice) Delta brush-on interior/exterior varnish in finish of your choice Sawtooth hanger of your choice Fig. 1. Apply the pattern to the birch for the insert. Introduction Several issues ago, in Creative Woodworks & Crafts magazine, I did a project called "Kuttin' Kitten," as well as a series of six kitten plaques. Due to the popularity of these projects, I was asked to submit another "Kuttin' Kitten" project for you to design. I love cats and kittens, as I have been around them all of my life. I love their independence and the way you have to earn their love and respect. I thoroughly enjoyed creating and developing this project of two Kuttin' Kittens for you. I recently lost my loving Siamese companion of over fifteen years, Jasmine, and dedicate this project to her. I hope you enjoy itl INSTRUCTIONS Prepare the pattern pieces Make photocopies of the original patterns and keep them for future reference. Make several copies of the pattern and cut apart the different aspects of the design. When applying the pattern pieces, apply a light mist of temporary spray glue aahesive to the pattern piece and wait a few seconds for it to "tack up" (it should have the same feel as masking tape). Apply the pattern pieces to the hardwood and birch pieces, respectively. When cutting hardwoods, I recommend the use of clear packaging tape to minimize burning of the wood. By applying a layer of clear tape over the entire design area, fhe adhesive in the masking tape lubricates your scroll saw blade, allowing it fo run cooler and virtually eliminating burn marks on hardwood surfaces. Cut the kittens insert Apply the pattern piece to the Baltic birch for the insert, as above (see Fig. 1). I found it helpful with the detail of this design to stack cut the Baltic birch and make two or more inserts at a time, as your skill permits. This gives more control to your cutting, as the additional layers add more resistance and allow you to make these "iner cuts. Also, you maximize your produclion and can make one to give and one or two to sell at the same time! Using the 1/16" drill bit, drill the blade entry holes in the waste areas of the kitten insert (see Fig. 2). Cut out the con tinued on page 16 48 • Creative Woodworks S. Crafts January 2005 Fig. 2. Drill the blade entry holes in the waste areas of the kitten insert. Fig. 3. Cut the details using the 2/0 reverse tooth blade. Fig. 4. Cut around the perimeter of the insert on the dotted line. |


