Creative Woodworks & crafts 2005-01, страница 25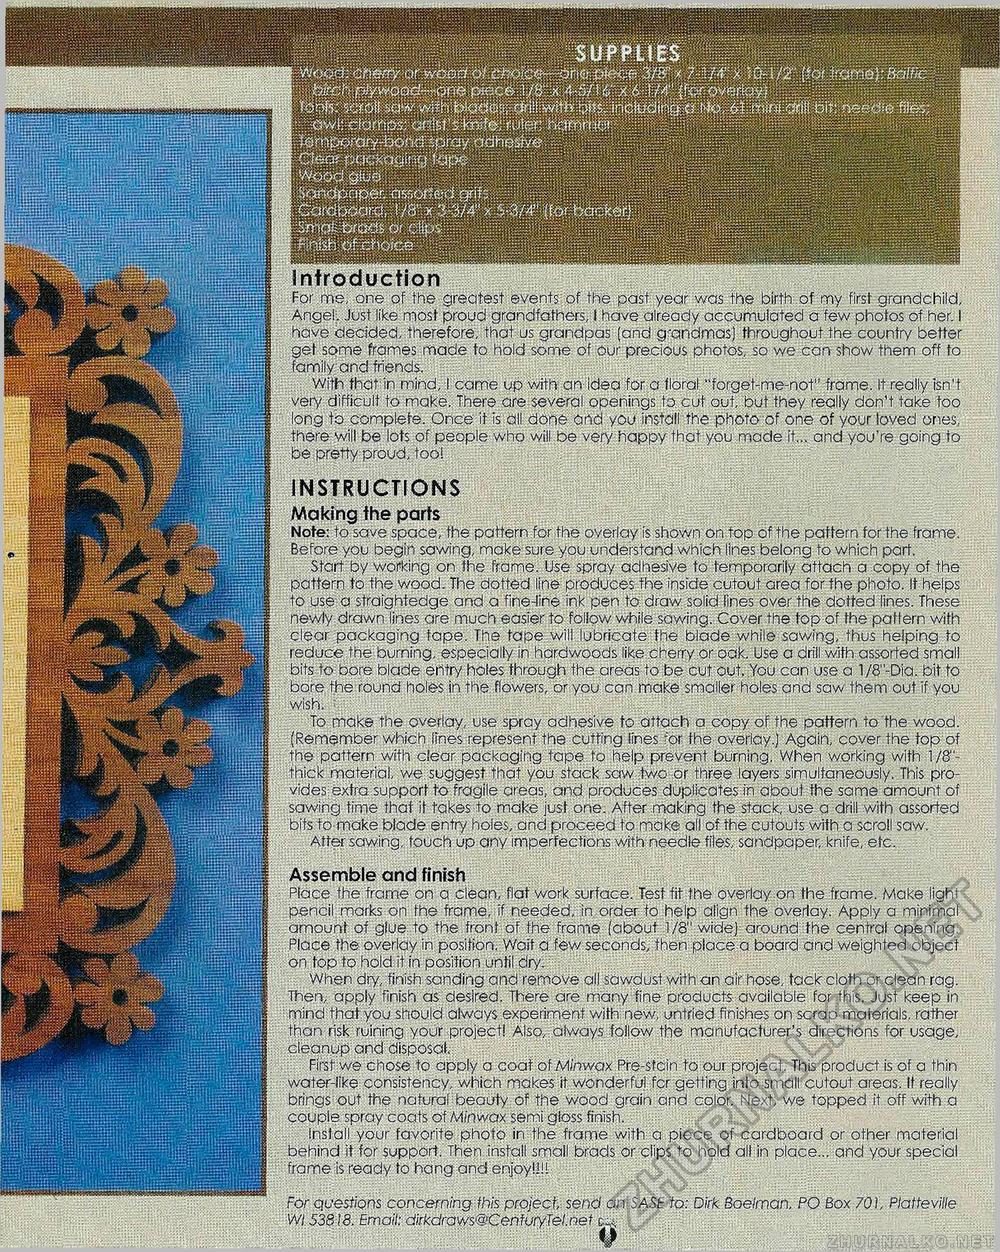
Introduction For me, one of the greatest events of the past year was the birth of my first grandchild, Angel;. Just like most proud grandfathers, I have already accumulated a few photos of her. I have decided, therefore, that us grandpas (and grandmas) throughout the country better get some frames made to hold some of our precious photos, so we can show them off to family-and friends.' With that in mind, I came up with an idea for a floral "forget-me-not" frame. It really isn't very difficult to make. There are several openings to cut out, but they really don't take too long to complete. Once it is all done and you install the photo of one of your loved ones, there will be lots of people who will be very happy that you made it... and you're going to be pretty proud, too! INSTRUCTIONS Making the parts Note: to save space, the pattern for the overlay is shown on top of the pattern for the frame. Before you begin sawing, make sure you understand which lines belong to which part. Start by woi*king on the frame. Use spray adhesive to temporarily attach a copy of the pattern to the wood. The dotted line produces the inside cutout area for the photo. It helps to use a straightedge and a fine-line ink pen to draw solid lines over the dotted lines. These newly drawn lines are much easier to follow while sawing. Cover the top of the pattern with clear packaging tape. The tape will lubricate the blade while sawing, thus helping to reduce the burning, especially in hardwoods like cherry or oak. Use a drill with assorted small bits to bore blade entry holes through the areas to be cut out. You can use a 1/8"-Dia. bit to bore the round holes in the flowers, or you can make smaller holes and saw them out if you WiSh. 5 ' " H. i: . To make the overlay, use spray adhesive to attach a copy of the pattern to the wooa. (Remember which lines represent the cutting lines ror the overlay.) Again, cover the top of the pattern with clear packaging tape to help prevent burning. When working with 1 /8"-thick material, we suggest that you stack saw two Or three layers simultaneously. This provides extra support to fragile areas, and produces duplicates in about the same amount of sawing time that it takes to make just one. After making the stack, use a drill with assorted bits:to make blade entn/ holes, and proceed to make all of the cutouts with a scroll saw. After sawing, touch up any imperfections with needle files, sandpaper, knife, etc. Assemble and finish Place the frame on a clean, flat work surface. Test fit the overlay on the frame. Make light pencil marks on the frame, if needed, in order to help align the overlay. Apply a minimal amount of glue to the front of the frame (about 1/8" wide] around the central opening. Place the overlay in position. Wait a few.seconds, then place a board and weighted object on fop to hold it in position until dry. When dry, finish sanding and remove all sawdust with an air hose, tack cloth or clean rag. Then, apply finish as- desired. There are many'fine products available for this. Just keep in mind that;you should always experiment with new, untried finishes on scrap materials, rather than risk ruining your project! Also, always follow the manufacturer's directions for usage, cleanup and disposal. First we chose to apply a coat of Minwax Pre-stcin to our project. This product is of a thin water-like consistency, which makes it wonderful for getting into small cutout areas. If really brings out the natural '-beauty of the wood grain and color. Next, we topped it off with a couple spray coats of Minwaxsemi gloss finish. Install your favorite photo in the frame with a piece of cardboard or other material behind it for support. Then install small brads or clips to hold all in place... and your special frame is ready to hang and enjoy!'!! For questions concerning this project send on SASE to: Dirk Boelmari PO Box 701, Platteville W! 53818. Email: dirkdraws@CenforyTel.net c^ |


