Creative Woodworks & crafts 2005-01, страница 31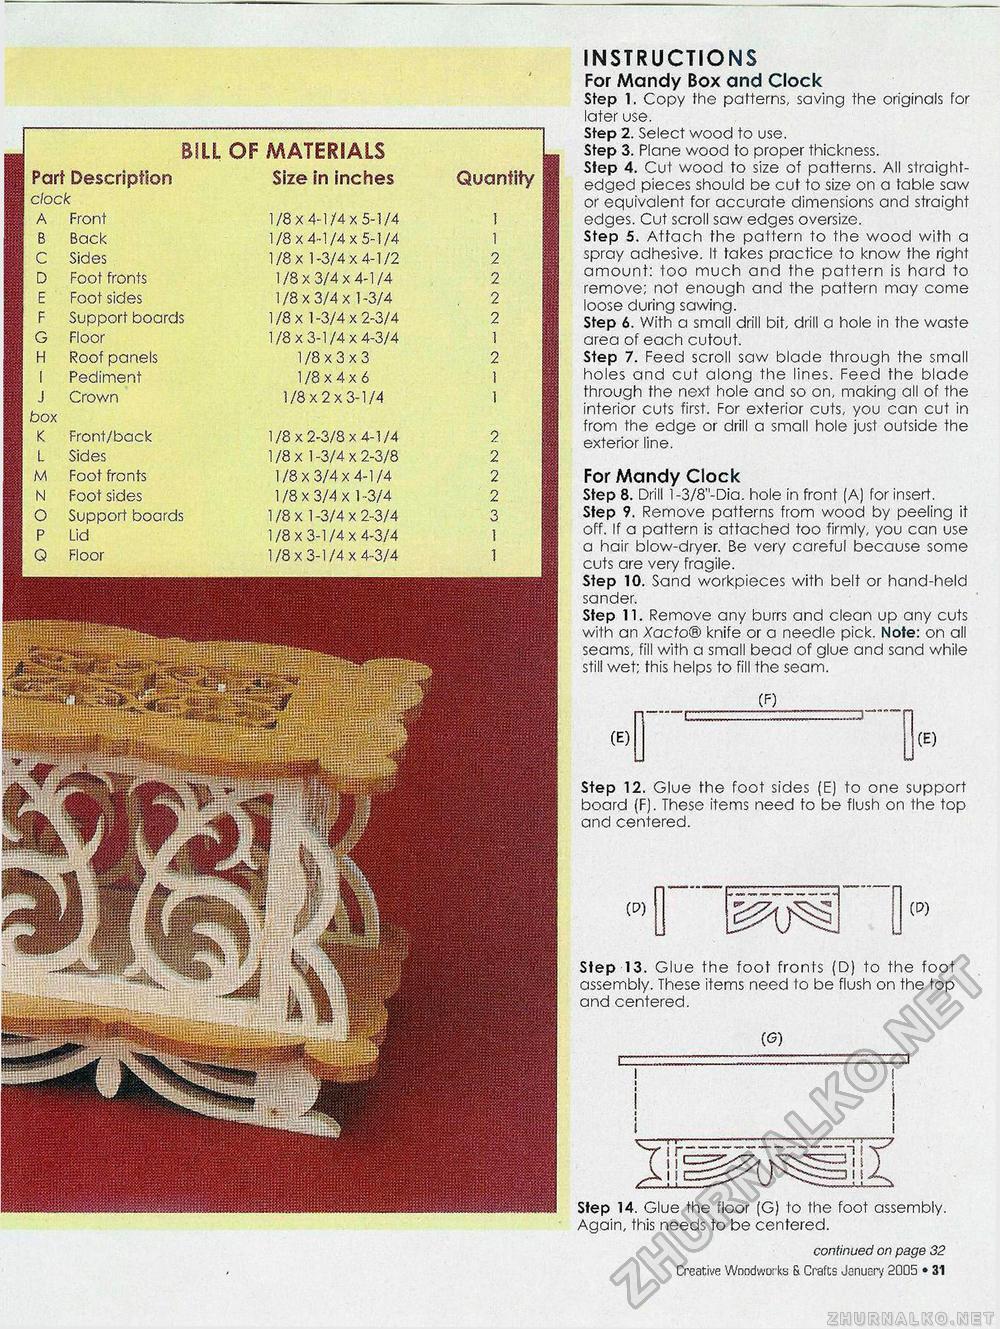
nihbkw INSTRUCTIONS For Mandy Box and Clock Step 1. Copy the patterns, saving the originals for later use. Step 2. Select wood to use. Step 3. Plane wood to proper thickness. Step 4. Cut wood to size of patterns. All straight- edged pieces should be cut to size on a table saw or equivalent for accurate dimensions and straight edges. Cut scroll saw edges oversize. Step 5. Attach the pattern to the wood with a spray adhesive. It takes practice to know the right amount: too much and the pattern is hard to remove; not enough and the pattern may come loose during sawing. Step 6. With a small drill bit, drill a hole in the waste area of each cutout. Step 7. Feed scroll saw blade through the small holes and cut along the lines. Feed the blade through the next hole and so on, making all of the interior cuts first. For exterior cuts, you can cut in from the edge or drill a small hole just outside the exterior line. For Mandy Clock Step 8. Drill l-3/8"-Dia. hole in front (A) for insert. Step 9. Remove patterns from wood by peeling it off. If a pattern is attached too firmly, you can use a hair blow-dryer. Be very careful because some cuts are very fragile. Step 10. Sand workpieces with belt or hand-held sander. Step 11. Remove any burrs and clean up any cuts with an Xacto® knife or a needle pick. Note: on all seams, fill with a small bead of glue and sand while still wet; this helps to fill the seam. Step 12. Glue the foot sides (E) to one support board (F). These items need to be flush on the top and centered. Step 13. Glue the foot fronts (D) to the foot assembly. These items need to be flush on the top and centered. Step 14. Glue the floor (G) to the foot assembly. Again, this needs to be centered. Part Description clock
OF Quantity MATERIALS Size in inches 1/8x4-1/4x5-1/4 1/8x4-1/4x5-1/4 1/8x1-3/4x4-1/2 1/8x3/4x4-1/4 1/8x3/4x1-3/4 1/8 x 1-3/4x2-3/4 1/8x3-1/4x4-3/4 1/8x3x3 1/8x4x6 1/8x2x3-1/4 1/8x2-3/8x4-1/4 1/8x1-3/4x2-3/8 1/8x3/4x4-1/4 1/8x3/4x1-3/4 1/8x1-3/4x2-3/4 1/8x3-1/4x4-3/4 1/8x3-1/4x4-3/4 continued on page 32 Creative Woodworks S. Crafts January 2005 • 31 |


