Creative Woodworks & crafts 2005-01, страница 34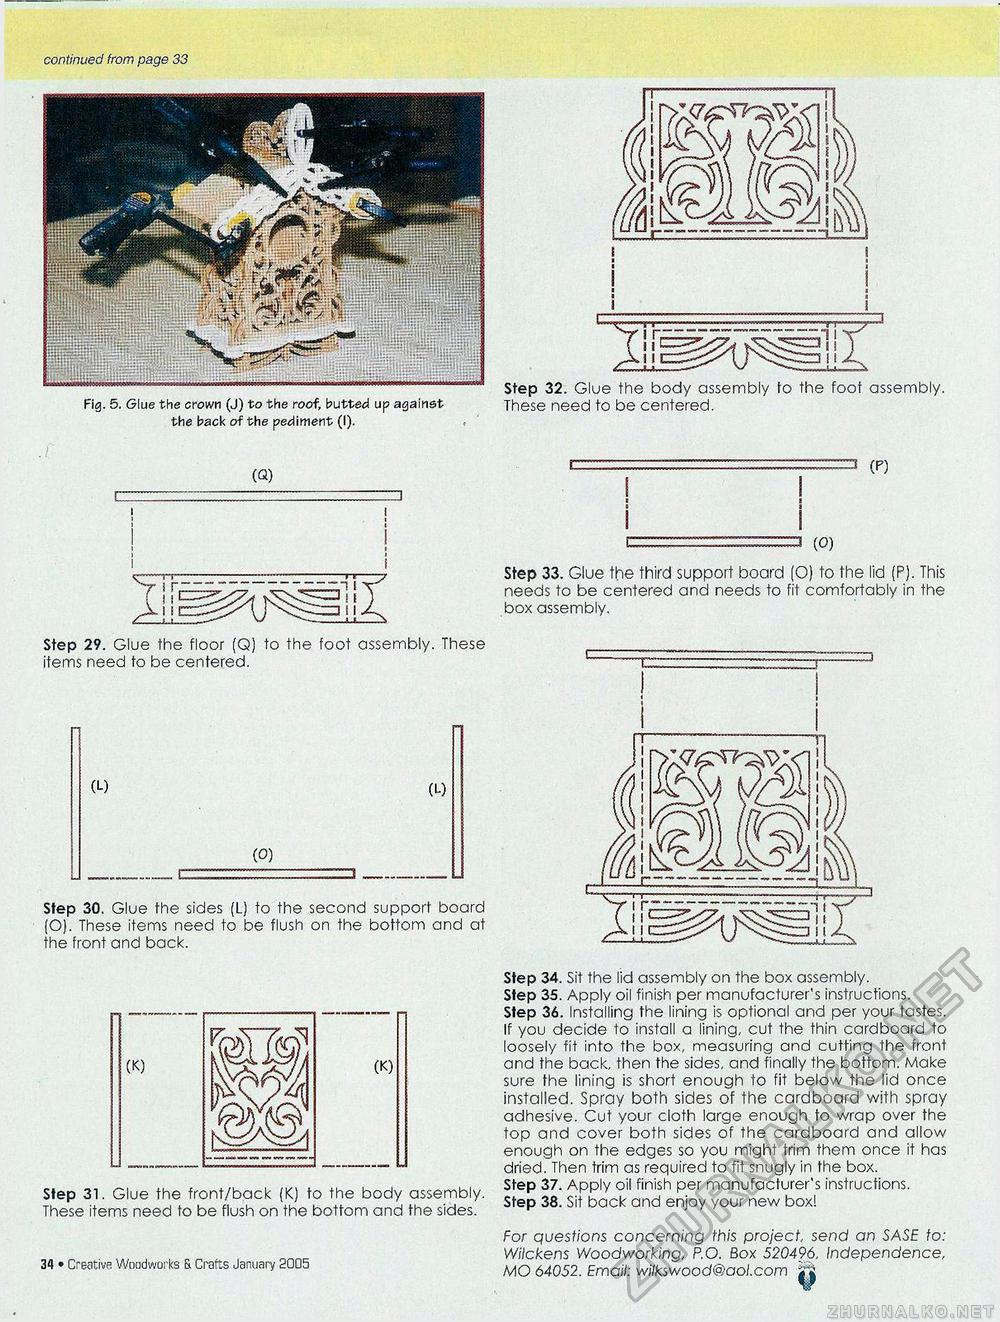
continued from page 33 Fig. 5. Glue the crown (J) to the roof, butted up against the back of the pediment (I). Step 32. Glue the body assembly to the foot assembly. These need to be centered. (Q) C 3 (0) CP) Step 33. Glue the third support board (O) to the lid (P). This needs to be centered and needs to fit comfortably in the box assembly. Step 29. Glue the floor (Q) to the foot assembly. These items need to be centered. (L) (L) (0) Step 30. Glue the sides (L) to the second support board (O). These items need to be flush on the bottom and at the front and back.
Step 31. Glue the front/back (K) to the body assembly. These items need to be flush on the bottom and the sides. 48 • Creative Woodworks S. Crafts January 2005 Step 34. Sit the lid assembly on the box assembly. Step 35. Apply oil finish per manufacturer's instructions. Step 36. Installing the lining is optional and per your tastes. If you decide to install a lining, cut the thin cardboard to loosely fit info the box, measuring and cutting the front and the back, then the sides, and finally the bottom. Make sure the lining is short enough to fit below the lid once installed. Spray both sides of the cardboard with spray adhesive. Cut your cloth large enough to wrap over the top and cover both sides of the cardboard and allow enough on the edges so you might trim them once it has dried. Then trim as required to fit snugly in the box. Step 37. Apply oil finish per manufacturer's instructions. Step 38. Sit back and enjoy your new boxl For questions concerning this project, send an SASE to: Wiickens Woodworking, P.O. Box 520496, Independence, MO 64052. Email: wilkswood@aol.com Shi |


