Creative Woodworks & crafts 2005-01, страница 32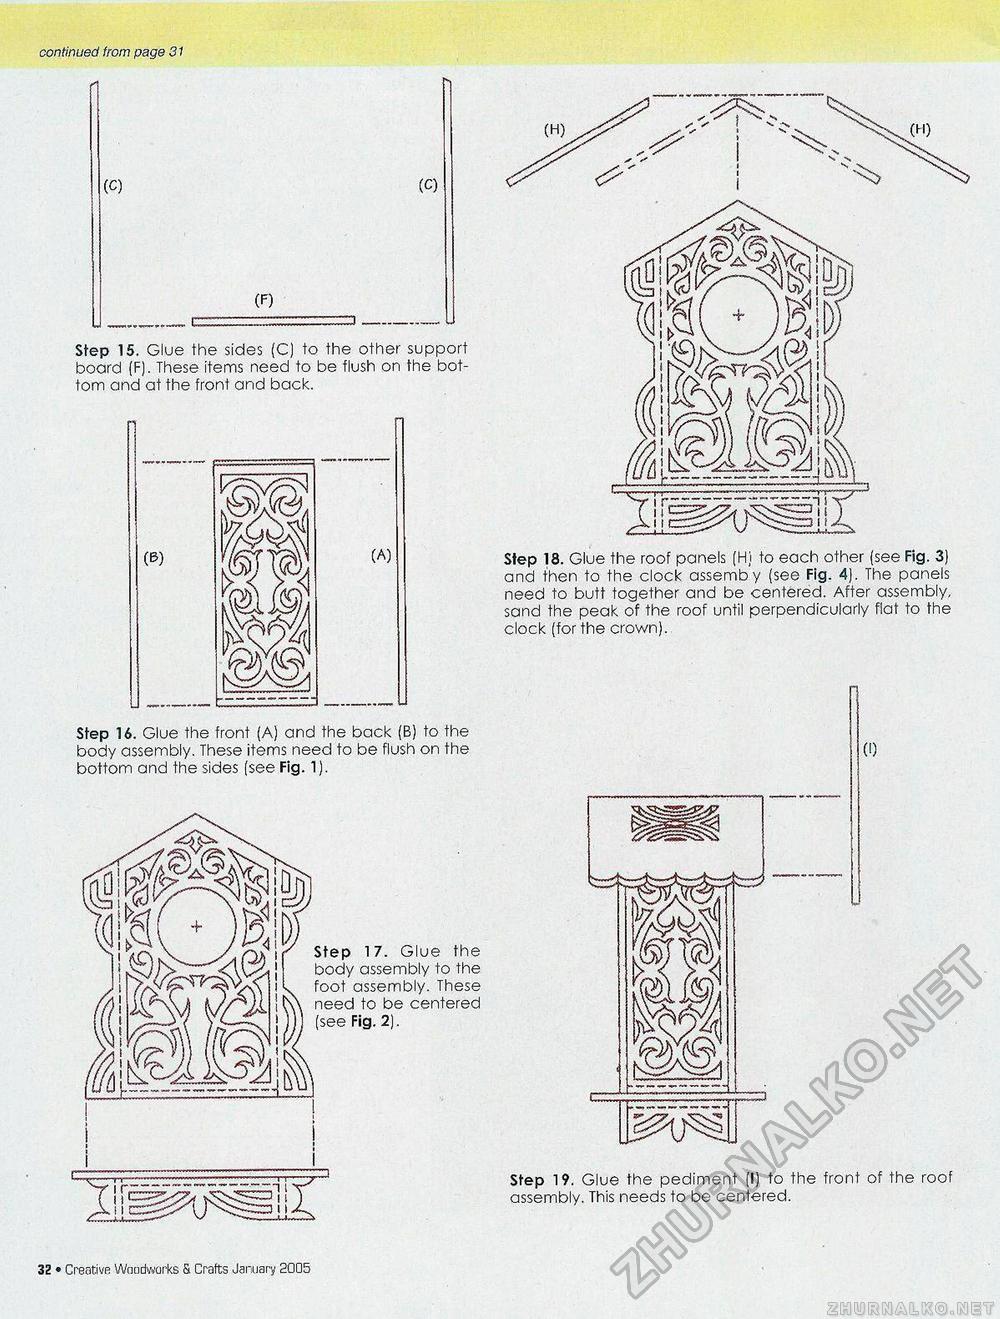
continued from page 31 (C) (C) (F) Step 15. Glue the sides (C) to the other support board (F). These items need to be flush on the bottom and at the front and back. (B) (A) (H) Step 18. Glue the roof panels [Hi to each other (see Fig. 3} and then to the clock assemby (see Fig. 4). The panels need to butt together and be centered. After assembly, sand the peak of the roof until perpendicularly flat to the clock (for the crown). Step 16. Glue the front (A) and the back (B) to the body assembly. These items need to be flush on the bottom and the sides (see Fig. 1). mm (0 Step 19. Glue the pediment (I) to the front of the roof assembly. This needs to be centered. Step 17. Glue the body assembly to the foot assembly. These need to be centered (see Fig. 2). 48 • Creative Woodworks S. Crafts January 2005 |


