Creative Woodworks & crafts 2005-01, страница 33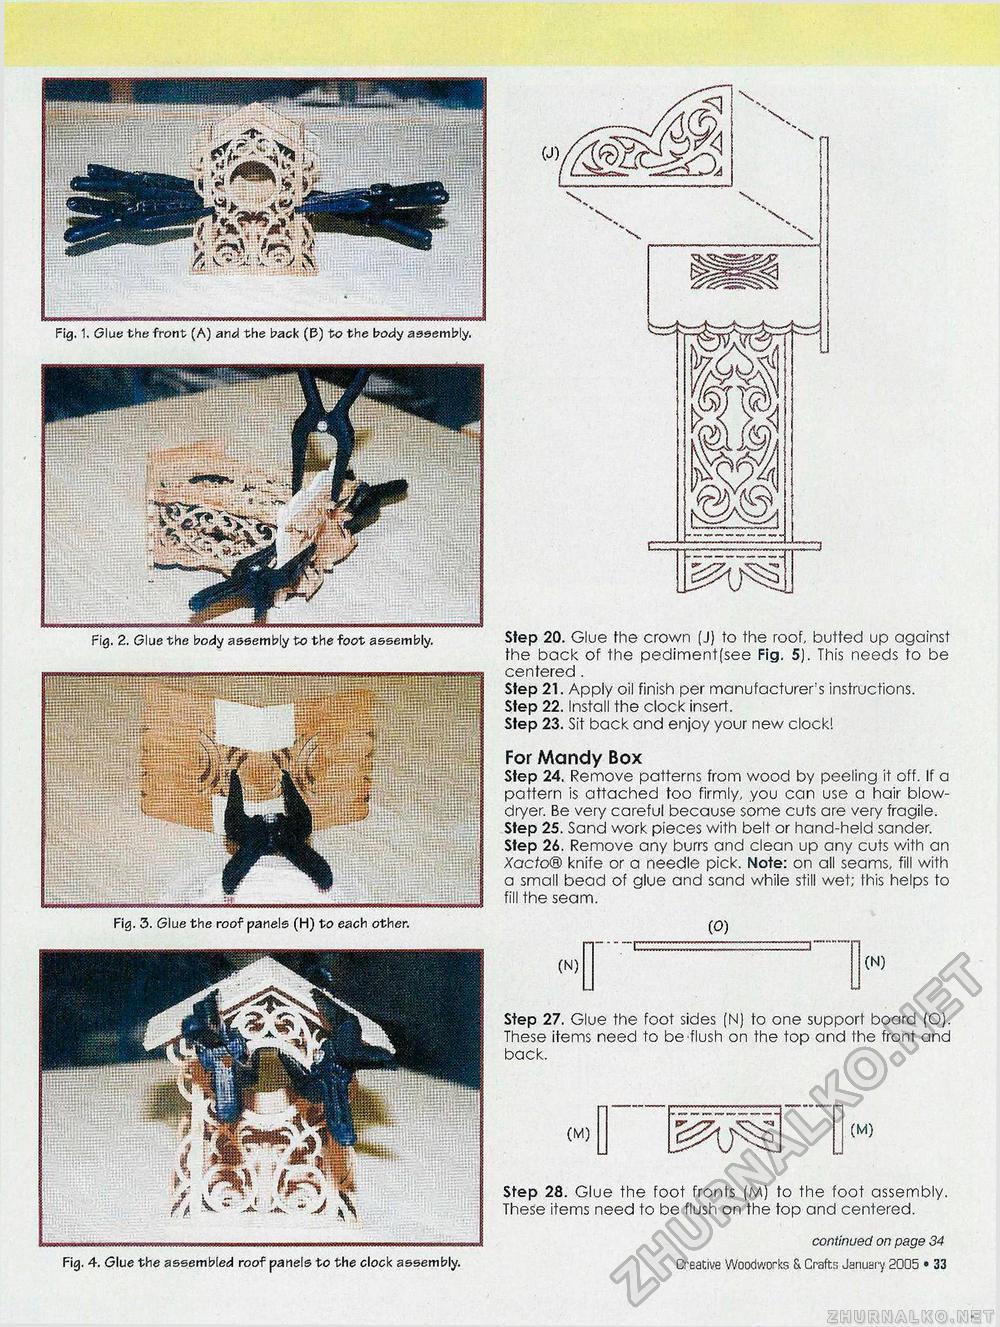
Fig. 1. Glue the front (A) and the back (E3) to the body assembly, Fig. 2. Glue the body assembly to the foot assembly. Fig. 3. Glue the roof panels (H) to each other. PWfl Step 20. Glue the crown (J) to the roof, butted up against the back of the pedimentfsee Fig. 5). This needs to be centered . Step 21. Apply oil finish per manufacturer's instructions. Step 22. Install the clock insert. Step 23. Sit back and enjoy your new clock! For Maridy Box Step 24, Remove patterns from wood by peeling it off. If a pattern is attached too firmly, you can use a hair blow-dryer. Be very careful because some cuts are very fragile. Step 25. Sand work pieces with belt or hand-held sander. Step 26. Remove any burrs and clean up any cuts with an Xacto® knife or a needle pick. Note: on all seams, fill with a small bead of glue and sand while still wet; this helps to fill the seam. (O) (N) (N) Step 27. Glue the foot sides (N) to one support board (O). These items need to be flush on the top and the front and back. (M) WM (M) Fig. 4. Glue the assembled roof panels to the clock assembly. Step 28. Glue the foot fronts (M) to the foot assembly. These items need to be flush on the top and centered. continued on page 34 Creative Woodworks & Crafts January 2005 • 33 |


