Creative Woodworks & crafts 2005-01, страница 58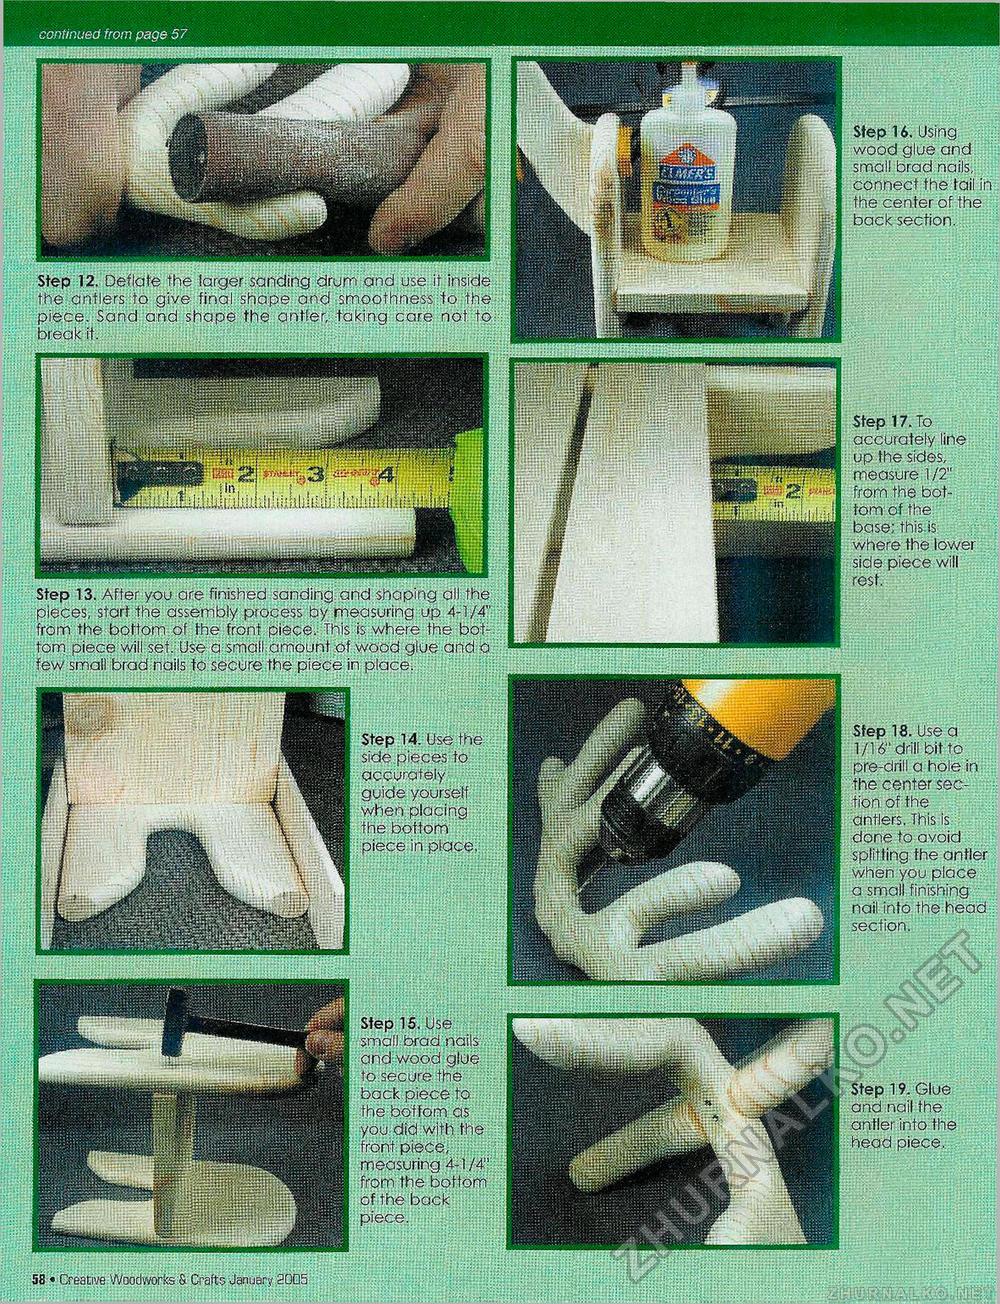
:ontinued from page 57 11111 Step 16. Using wood glue and small brad nails, connect the tail in the center of the back section. Step 12. Deflate the larger sanding drum and use it inside the antlers to give final shape and smoothness to the piece. Sand and shape the antler, taking care not to break it. Step 17. To accurately line up the sides, measure 1/2" from the bottom of the base; this.is where the lovyer side piece will rest. .yllMillilllilllll^Hidlkli Step 13. After you are finished sanding and shaping all the1 pieces, start the assembly process by measuring up 4-1/4" from the bottom of the front piece. This is where the bottom piece will set. Use a small amount of wood glue and a few small brad nails to secure the piece in place: Step 18. Use a 1/16" drill bit to pre-drill a hole in the center section of the antlers. This is done to avoid splitting fhe antler when you place a small finishing -nail into the head section. Step 14. Use the side pieces to accurately guide yourself when placing the bottom piece in place,: Step 15. Use small brad nails and wood glue to secure the back piece to the bottom as you did with the front piece, measuring 4-1/4" from the bottom of the back piece. Step 19. Glue and nail the antler into the head piece. . 58 • Creative WoodvtforfcS Crafts January ,2005 |


