Creative Woodworks & crafts 2005-01, страница 57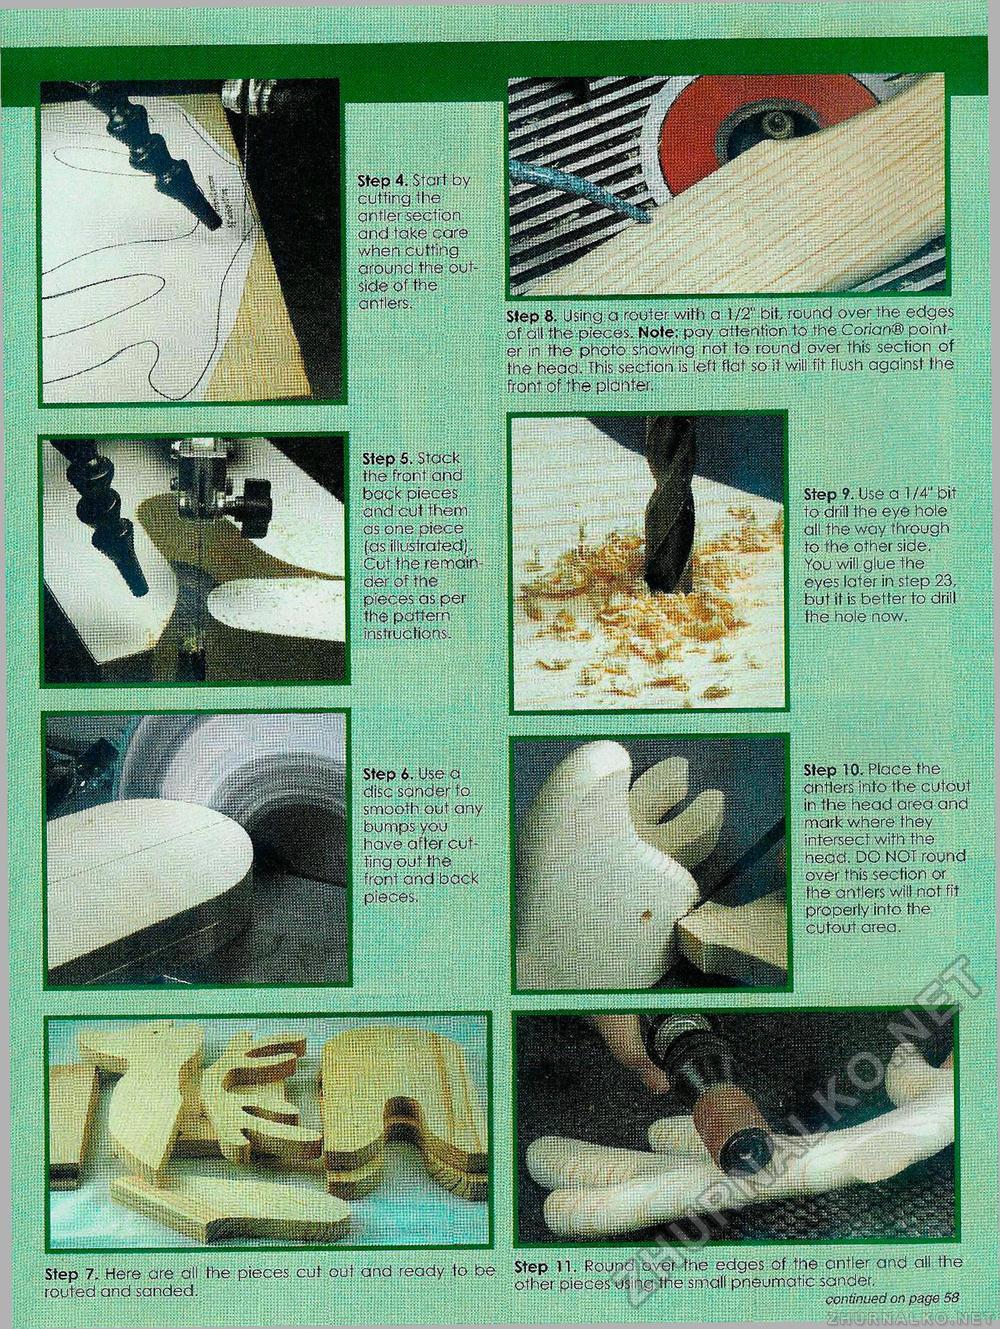
Step 4. Start by cutting the antler section and take care when cutting around the outside of the antlers. Step 8. Using a router with a 1/2" bit. round over the edges .of all-the pieces. Note; pay attention to the.Corian® pointer in the photo showing not to round over this section of the head. This section is left flat so it will fit flush against the front of the planter. Step 5. Stack the front and back pieces and cut them as one piece fas illustrated). Cut the remain der of the pieces as per the pattern instructions. Step 9. Use a I /4" bit to drill the eye hole all fh| way through to the other side. You will glue the eyes later in step 23, but it is better to drill the hole now. wrm. Step 10. Place the antlers info the cutout in the head area and mark where they intersect.with the head. DO NOT round over this .section or the antlers will not fit properly info fhe cutout area. Step 6. Use a disc sander to smooth out any bumps you have offer cutting out the front and back pieces. ' i. ■ Step 11. Round over the edges of the antler and all the other pieces using fhe small pneumatic sander. continued on page 58 Step 7. Here are all the pieces, cut out and ready to be routed and sanded. |


