Creative Woodworks & crafts 2005-03, страница 23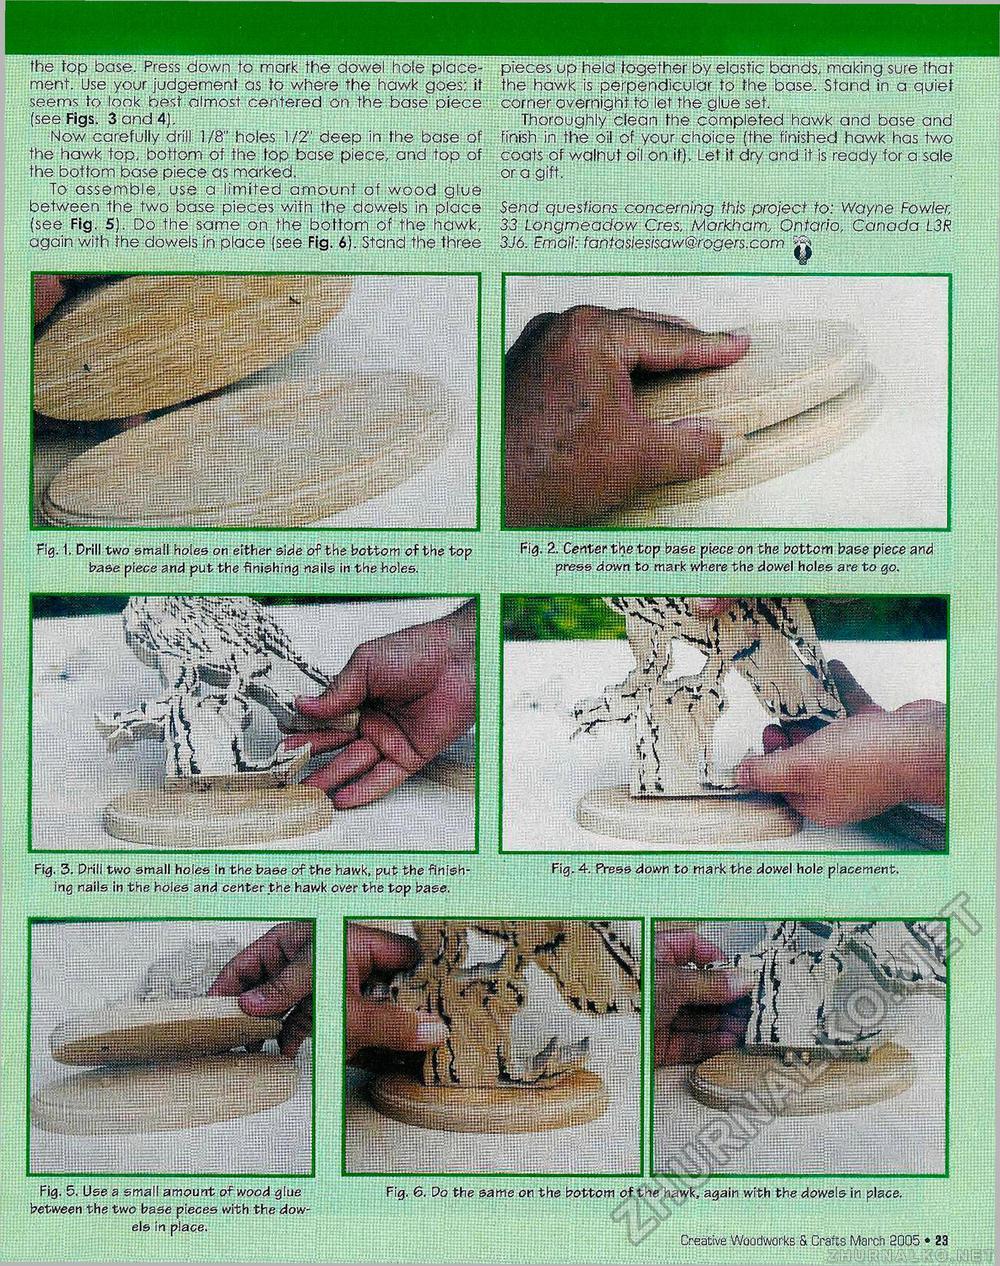
the top base. Press down to mark the dowel hole place- pieces up held together by elastic bands, making sure that ment. Use your judgement as to where the hawk goes'; it the hawk is perpendicular to the base. Stand in a quiet seems to look best almost centered on the base piece comer overnight to let the glue set. (see Figs. 3 and 4). Thoroughly clean the completed hawk and base and Now carefully drill 1/8" holes 1/2" deep in the base of finish in the oil of your choice (the finished hawk has two the hawk top, bottom of the top base piece, and top of coats of walnut oil on it). Let it dry and it is ready for a sale the bottom base piece as marked. or a gift. To assemble, use a limited amount of wood glue between the two base pieces with the dowels in place Send questions concerning this project to: Wayne Fowler, (see Fig. 5). Do the same on the bottom of the hawk, 33 Longmeadow Cres, Markham, Ontario, Canada L3R again with the dowels in place (see Fig. 6). Stand the three 3J6. Ethdil: fantasiesisaw@rogers.com JM!1 If p' . I'} ^^■■wm Era Fig. 3. Drill two small holes in the base of the hawk, put the finish' ing nails in the holes and center the hawk over the top base. Ml llHHS*^ Fig. 5. Use a small amount of wood glue between the two base pieces with the dowels in place. Fig. 6. Do the same on the bottom of the hawk, again with the dowels in place. |


