Creative Woodworks & crafts 2005-03, страница 28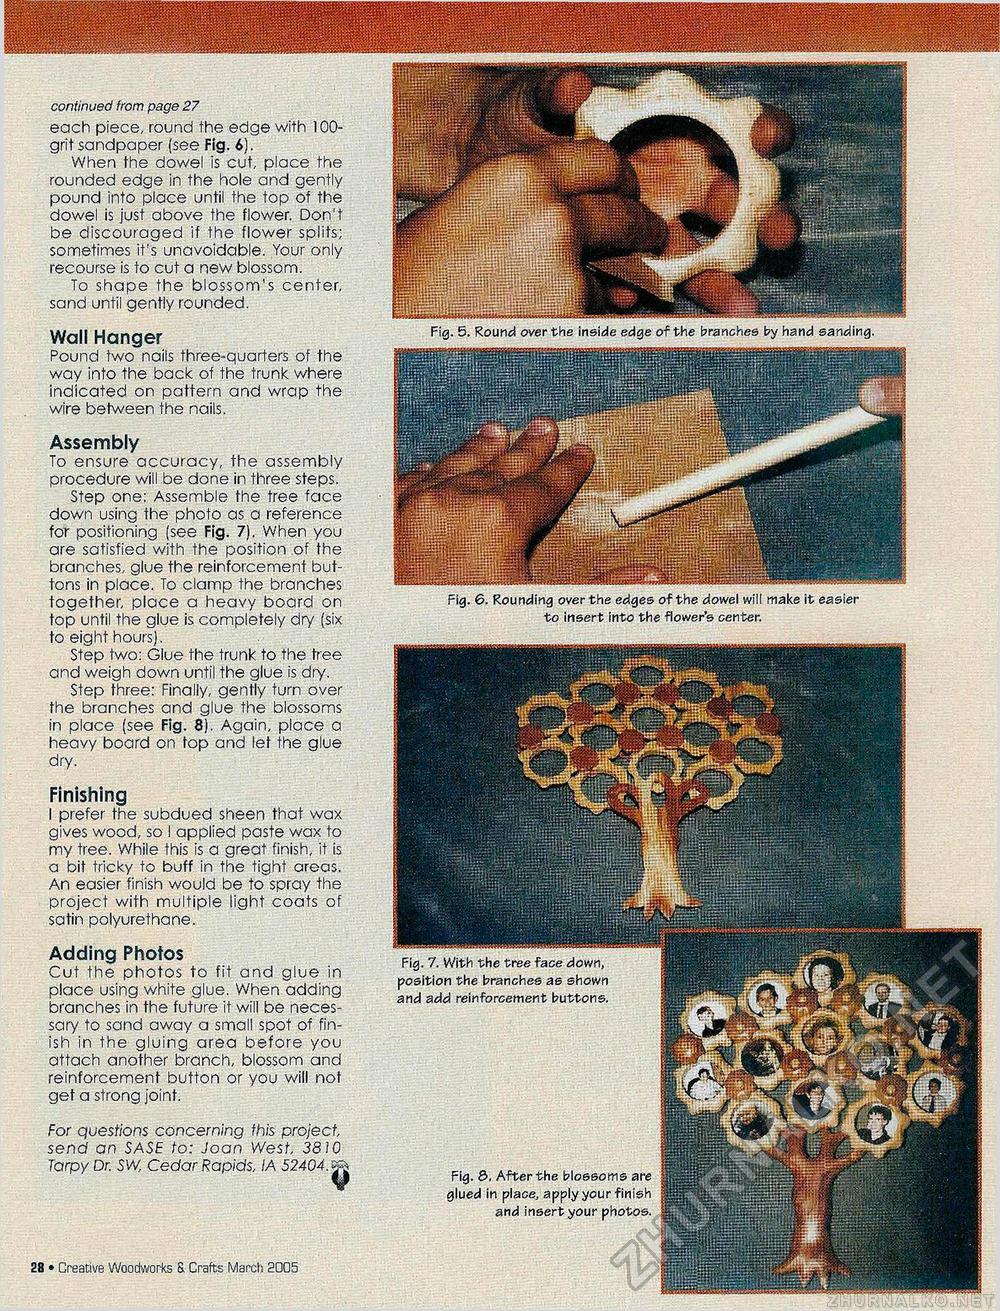
Fig. 7. With the tree face down, position the branches as shown and add reinforcement buttons. 28 • Creative Woodworks S. Crafts March 2005 continued from page 27 each piece, round the edge with 100- grit sandpaper (see Fig. 6). When the dowel is cut, place the rounded edge in the hole and gently pound into place until the top of the dowel is just above the flower. Don't be discouraged if the flower splits; sometimes it's unavoidable. Your only recourse is to cut a new blossom. To shape the blossom's center, sand until gently rounded. Assembly To ensure accuracy, the assembly procedure will be done in three steps. Step one: Assemble the tree face down using the photo as a reference for positioning (see Fig. 7). When you are satisfied with the position of the branches, glue the reinforcement buttons in place. To clamp the branches together, place a heavy board on top until the glue is completely dry (six to eight hours). Step two: Glue the trunk to the tree and weigh down until the glue is dry. Step three: Finally, gently turn over the branches and glue the blossoms in place (see Fig. 8). Again, place a heavy board on top and let the glue dry. Finishing I prefer the subdued sheen that wax gives wood, so I applied paste wax to my tree. While this is a great finish, it is a bit tricky to buff in the tight areas. An easier finish would be to spray the project with multiple light coats of satin polyurethane. Adding Photos Cut the photos to fit and glue in place using white glue. When adding branches in the future it will be necessary to sand away a small spot of finish in the gluing area before you attach another branch, blossom and reinforcement button or you will not get a strong joint. For questions concerning this project, send an SASE to: Joan West, 3810 Tarpy Dr. SW, Cedar Rapids, IA 52404. ^ Wall Hanger Pound two nails three-quarters of the way into the back of the trunk where indicated on pattern and wrap the wire between the nails. Fig. £>. After the blossoms are glued in place, apply your finish and insert your photos. Fig. 5. Round over the inside edge of the branches by hand sanding. Fig. 6. Rounding over the edges of the dowel will make it easier to insert into the flower's center. |


