Creative Woodworks & crafts 2005-06, страница 56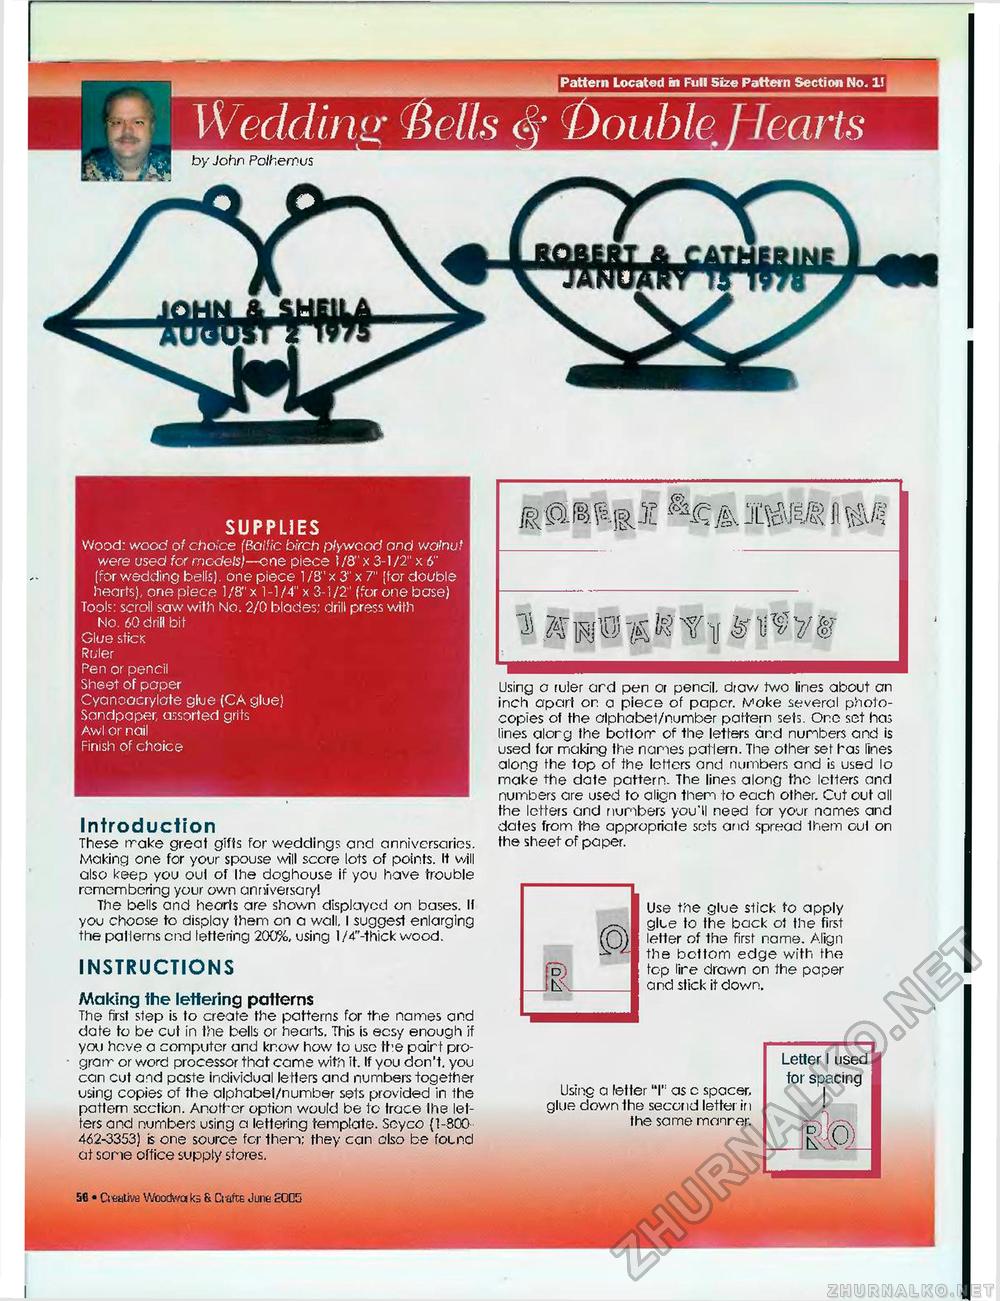
Pattern Located in Full Size Pattern Section No. X! by John Polhemus SUPPLIES Wood: wood of choice fBofffc birch plywood and wo/nu.' were used for models)—-one piece t/8" x 3-1/2" x 6" (for wedding bells). one piece 1 /S" x 3" x 7" [for double hearts), one piece 1/8'x 1-1/4" x 3-1/2'' (for one base) Tools: scroll saw with No. 2/0 blades; drill press with No. 60 drill bit Glue sticK Ruler Pen or pencil Sheet of paper Cyanoacrylate glue (CA glue) Sandpaper, assorted grits Awl or nail Finish of choice ^m^i^jhmmtm Introduction These make great gifts for weddings and anniversaries. Making one for your spouse will score lots of points. It will also keep you oul of Ihe doghouse if you have trouble remembering your own anniversary! The bells and hearts are shown displayed on bases. It you choose to display them on a wall, I suggest enlarging the patterns end lettering 200%, using l/4"-thick wood. INSTRUCTIONS Making the lettering patterns The first step is to create the patterns for the names and date to be cut in the bells or hearts. This is ecsy enough if you hove a computer and know how to use the pair! program or word processor that came with it. If you don't, you can cut and paste individual letters and numbers together using copies of the alphabel/number sets provided in the pattern scction. Another option would be to trace Ihe letters and numbers using a lettering templale. Seyco (1-300 462-3353) is one source for then: they can also be found at some office supply stores. Using a ruler ard pen or pencil, diaw two lines about an inch apart on a piece of paper. Make several photocopies of the alphabel/number pattern sets. One set has lines alorg the bottom of the letters and numbers and is used for making the names pattern. The other set has lines along the top of the letters and numbers and is used lo make the date pattern. The lines along the letters and numbers are used to align them to each other. Cut out all the letters and numbers you'll need for your names and dates from the appropriate sets and spread 1hem oul on the sheet of paper. Use the glue stick to apply glue to the back o! the first letter of the first name. Align the bottom edge with the top lire drawn on the paper and stick it down. Using a letter "I" as c spacer, glue down the second letter in the same manrer.
Letter I used| tor spacing % 56 « Creative Wcodwa ks & CraftE June £0G5 |
||||||


