Creative Woodworks & crafts 2005-06, страница 64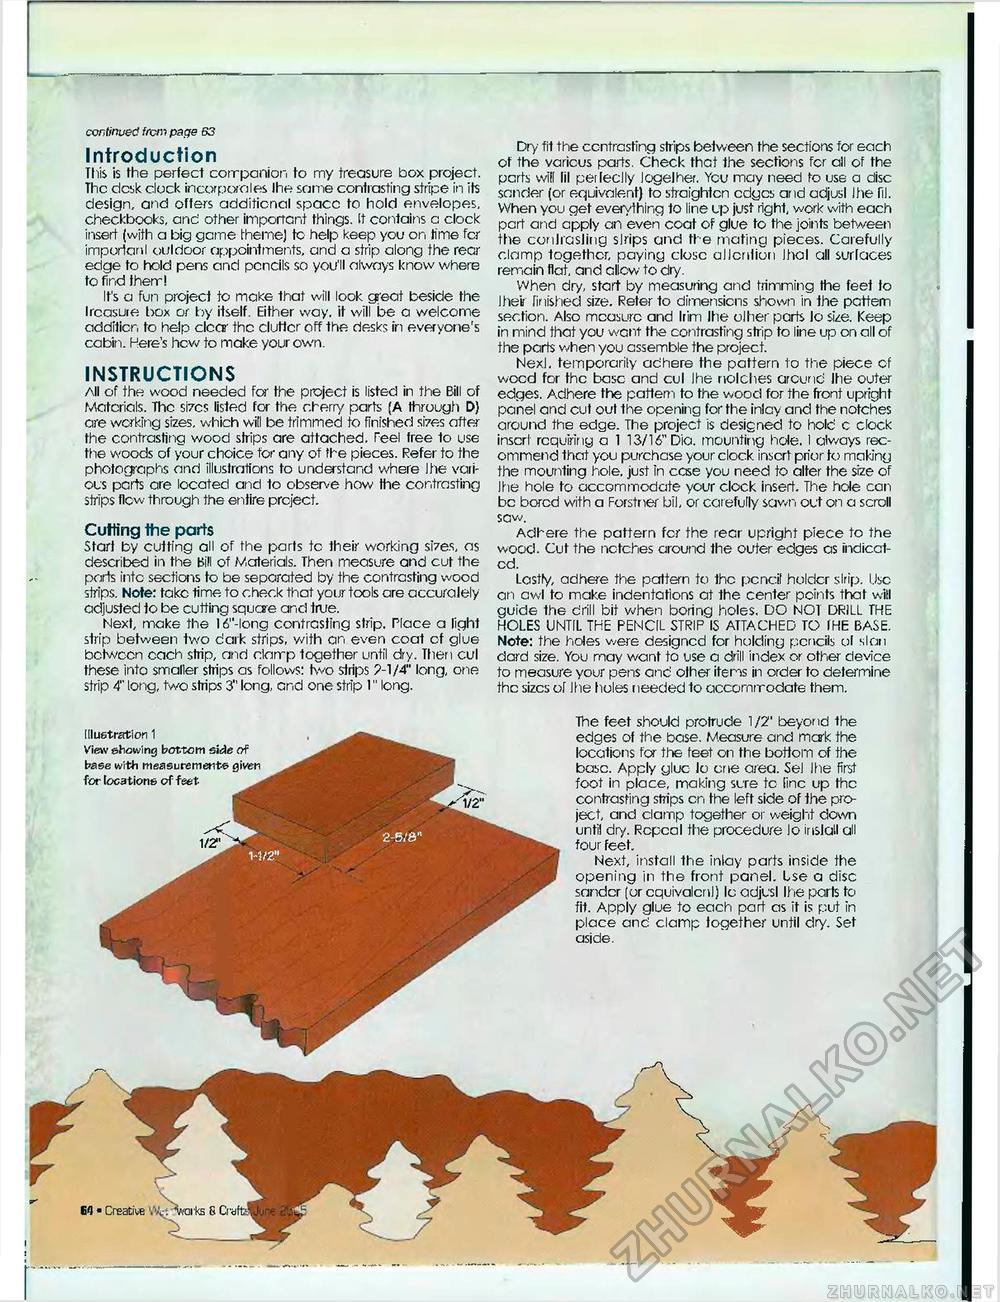
continued from page 63 Introduction This is the perfect companion to my treasure box project. The desk clock incorporates Ihe some contrasting stripe in its design, and offers additional spacc to hold envelopes, checkbooks, and other important things. It contains a clock insert (with a big geme theme) tc help keep you or. time fcr imporlaril outdoor appointments, and a strip along the rear edge to hold pens and pcncils so you'll always know where to find fherr! It's a fun project to make that will look great beside the treasure box or by itself. Either way, it will be a welcome addition to help clccr the clutter off the desks in everyone's cabin. Here's hew to make your own. INSTRUCTIONS All of the wood needed for the project is listed in the Bill of Materials. The sizes listed for the cherry parts (A through D) are working sizes, which will be trimmed to finished sizes after the contrasting wood strips are attached, reel free to use the woods of your choice tor any of the pieces. Refer to the photographs and illustrations to understand where Ihe various parts are located and to observe how the contrasting strips flow through the entire project. Cutting the parts Start by cutting all of the parts tc their working sizes, as described in the Bill of M,aterials. Then measure and cut the ports into sections to be separated by the contrasting wood strips. Note: take time to check that your tools are accurately adjusted to be cutting squcre and true. Next, make the 16"-long contrasting strip, Place a light strip between Iwo dark strips, with an even coat of glue between cach strip, and clomp together until dry. Then cul these into smaller strips as follows: two strips 7-1/4" long, one strip 4" long, two strips 3" long, and one strip 1" long. Dry fit the contrasting strips between the sections for each of the various parts. Check that the sections fcr all of the parts will lit peileclly logelher. Ycu may need to use a disc sander (or equivalent) to straighten edges and adjusl I tie HI. When you get everything to line up just right, work with each pert arid apply an even coat of glue to the joints between the conliasling slrips and the mating pieces. Carefully clamp together, paying close attention thai all surlaces remain flat, and allow to dry. When dry, start by measuring and trimming the feet to Ihe'u finished size. Reter to dimensions shown in the pcttem section. Also measure and Irim Ihe olher parts lo size. Keep in mind that you want the contrasting strip to line up on all of the parts when you assemble the project. Nexl, temporarily adhere the pattern to the piece of wood for the base and cul Ihe notches around Ihe outer edges. Adhere the pattern to the wood for the front upright panel and cut out the opening for the inlcy and the notches around the edge. The project is designed to hold c clock insert requiring a 1 13/16" Dia. mounting hole. 1 always recommend that you purchase your clock insert prior to making the mounting hole, just in case you need to alter the size of the hole to accommodate your clock insert. The hole can be bored with a Forstner bit, or carefully sawn out on a scroll saw. Adhere the pattern fcr the recr upright piece to the wood. Cut the notches around the outer edges as indicated. Lastly, adhere the pattern to the pcncif holder slrip. Use an awl to make indentations at the center points that will guide the drill bit when boring holes. DO NOT DRILL THE HOLES UNTIL THE PENCIL STRIP IS ATTACHED TO IHE BASE. Note: the holes were designed for holding pencils ol slon dard size. You may want to use a drill index or other device to measure your pens and other items in order to determine the sizes of I tie holes needed to accommodate them. The feet should protrude 1/2' beyond the edges of the base. M.easure and mcrk the locations for the feet on the bottom of the base. Apply glue lo crie area. Sel Ihe first foot in place, making sure tc line up the contrasting strips cn the left side of the project, and clamp together or weight dawn until dry. Repeal the procedure lo install all four feet. Next, install the inlay parts inside the opening in the front panel. Use a disc sander (or equivalent) lo adjusl Ihe parts to fit. Apply glue to each part as it is put in place anc' clamp together until dry. Set aside. Illustration 1 View showing bottom side of base with measurement© given for locations of feet |


