Creative Woodworks & crafts 2005-06, страница 62
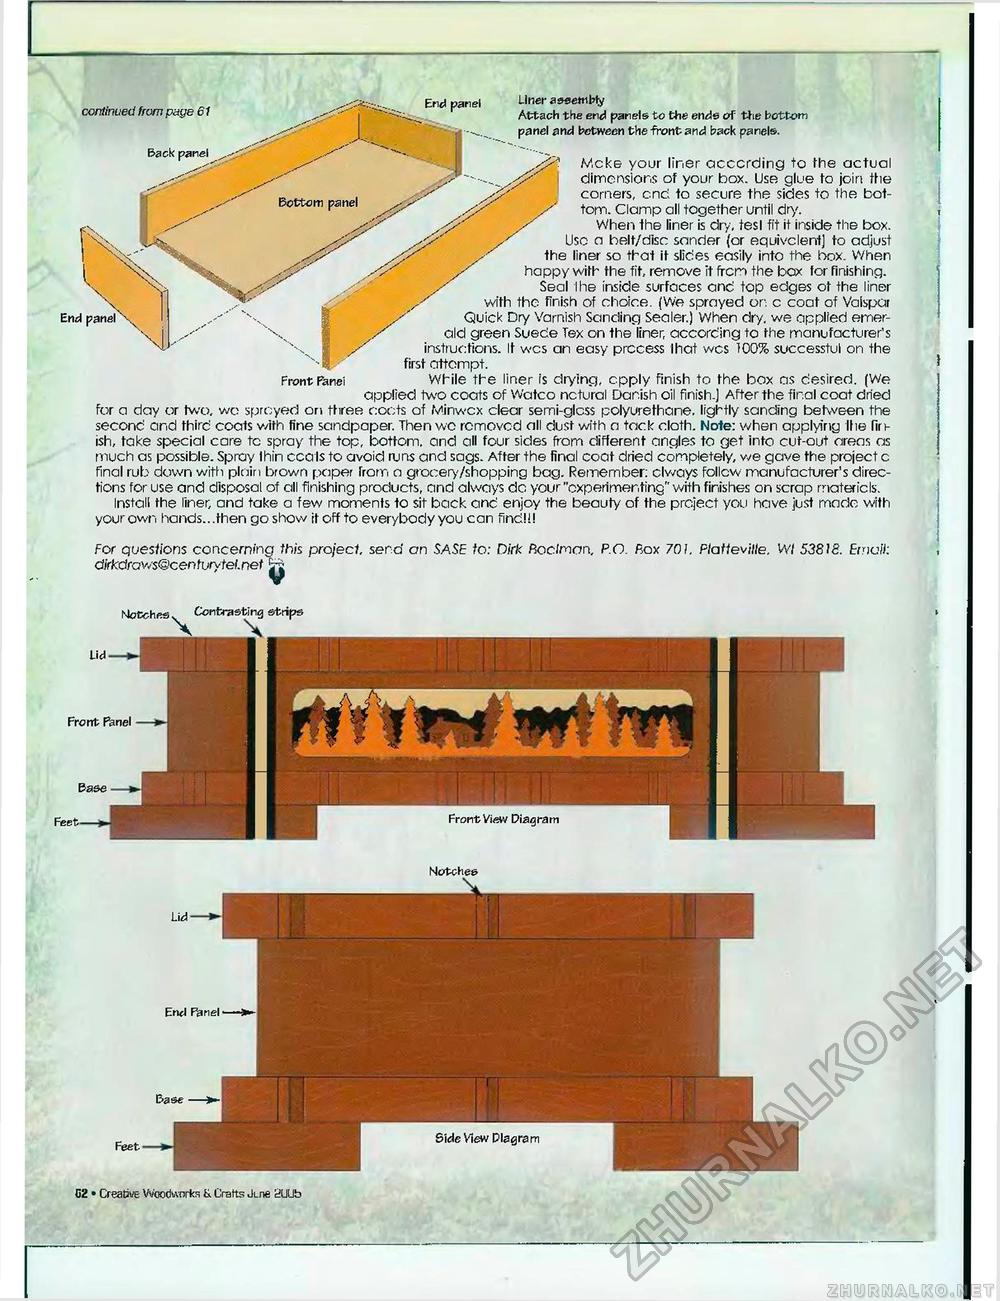
continued from page 61 Back panel End panel Liner assembly Attach the end panels to the ends of the bottom panel and between the front and back panels. Mcke your liner according to the actual dimensions of your box. Use glue to join the corners, end to secure the sides to the bottom. Clamp all together until dry. When the liner is dry, tesl fit it inside the box. Use a belt/disc sander (or equivclent] to adjust the liner so that it slides easily into the box. When happy with the fit, remove it frcn the box tor finishing. Seal Ihe inside surfaces and top edges ot the liner with the finish of choice. (We sprayed on c coat of Vaispar Quick Dry Varnish Sanding Sealer.) When dry. we applied emerald green Suede Tex on the liner, according to the manufacturer's instructions. It wes an easy process lhat wes 100% successful on the first attempt. While the liner is drying, epply finish to the box as desired. (We applied two coats of Watco natural Danish oil finish.) After the final coat dried for a day or two, wo sprayed on three coats of Minwcx clear semi-glcss polyurethane. lightly sanding between the second and third coats with tine sandpaper. Then wo removed all dust with a tack cloth. Note: when applying Ihe firv-ish, take special care tc spray the top, bottom, and all four sides from different angles to get into cut-out areas as much as possible. Spray Ihin cco Is to avoid runs and sags. After the final coat dried completely, we gave the project c final rub down with plain brown paper from a grocery/shopping bag. Remember: always follow manufacturer's directions for use and disposal of all finishing products, and always da your "experimenting" with finishes on scrap matericls. Install the liner, and take a few moments to sit back and enjoy the beauty of the project you have just made with your own hands., .then go show it off to everybody you can find!!! For questions concerning this project send an SASE to: Dirk Rodman. P.O. Box 701. Flattevilte. Wl 53818. Email: dirkdravss©centurytel.net tj Front Fanei Matches Contrasting strips ' X Front Panel Front View Diagram G2 • Creative Woodworks K Grafts Ji_ne 2UUb |


