Creative Woodworks & crafts 2005-08, страница 55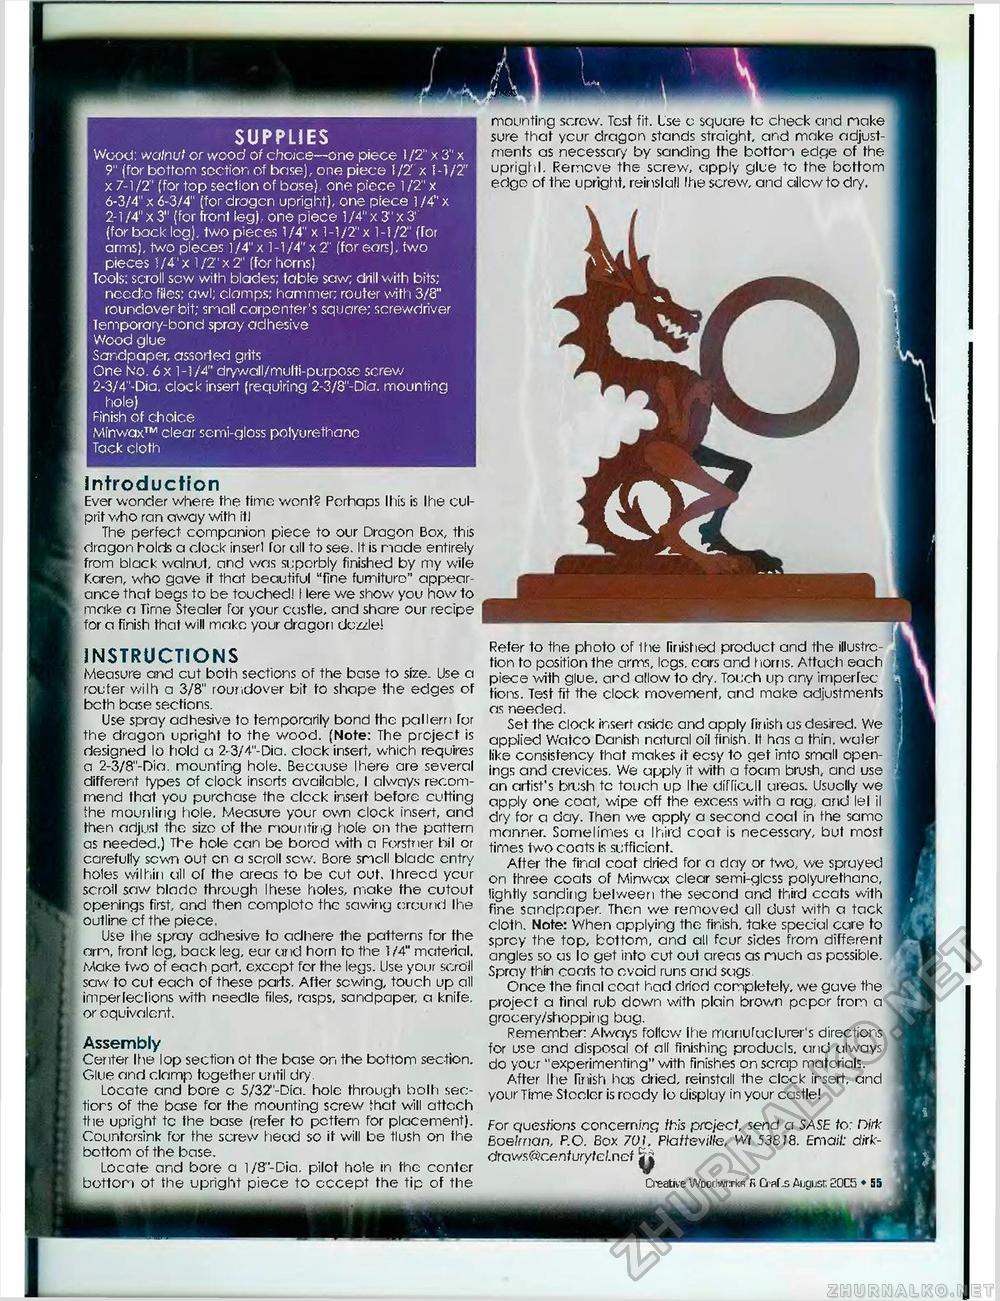
SUPPLIES Wood: walnut or wood of choice—one piece 1/2" x 3" x 9" (for bottom soctior, of base), one piece 1/2' x 1-1/2" x 7-1 /2" (for top section of base), one piece 1 /2" x 6-3/4" x 6-3/4" (fordragcn upright), one piece 1/4" x 2-1/4" x 3" (for front leg), one piece 1/4" x 3" x 3' (for back log), two pieces 1/4" x 1-1/2" x 1-1/2' (for arms), two pieces 1/4" x 1-1/4" x 2" [for ears], two pieces 1 /41 x 1 /2" x 2" (for horns) Tools; scroll sow with blades; tabie saw; drill with bits; necd;o files; awl; clomps; hammer; router with 3/8" roundover bit; small carpenter's square; screwdriver lemporary-bond spray adhesive Wood glue Sandpaper, assorted grits One No. 6 x 1-1/4" drywall/multi-purpose screw 2-3/4"-Dia. clock insert (requiring 2-3/8"-Dia. mounting hole) finish of choice Minwax™ clear semi-gloss polyurethane Tack cloth , Introduction I Ever wonder where the time wont? Perhaps Itiis is Ihe culprit who ran away with itl The perfect companion piece to our Dragon Box, this dragon holds a clock insert for all to see. It is made entirely from black walnut, and was superbly finished by my wile Karen, who gave it that beautiful "fine furniture" appearance that begs to be touched! I lere we show you how to make a Time Stealer for your castle, and share our recipe for a finish that will make your dragon dazzle! INSTRUCTIONS Measure and cut both sections of the base to size. Use a router wilh a 3/8" roundover bit to shape the edges of bcth base sections. Use spray adhesive to temporarily bond the pallerri for the dragon upright to the wood. (Note: The project is designed lo hold a 2-3/4"-Dia. clock insert, which requires a 2-3/8"-Dio. mounting hole. Because Ihere are several I different types of clock inserts available, I always recommend that you purchase the clock insert before cutting the mounling hole. Measure your own clock insert, and then adjust the size of the mounting hole on the pattern as needed.) The hole can be bored with a Forstner bil or carefully sewn out cn a scroll sew. Bore smell blade entry holes wilhiii all of the areas to be cut out. Ihrecd ycur scroti saw blado through Ihese holes, make the cutout openings first, and then complcto the sawing around Ihe outline cf the piece, Use ihe spray adhesive to adhere the patterns for the arm, front leg, back leg, ear arid horn to the 1/4" material. Make two of each part, except for the legs. Use your scroll saw to cut each of these parts. After sowing, touch up all imperleclions with needle files, rasps, sandpaper, a knife, or equivalent. Assembly Center Ihe lop section ot the base on the bottom section. Glue and clamp together until dry Locate and bore c 5/32"-Dia. hole through bolh sec-tiors of the base for the mounting screw that will attach the upright tc the base (refer to pcttem for placement). Countersink for the screw head so it will be flush on the bottom of the base. Locate and bore a l/8"-Dia. pilot hole in the conter bottom ot the upright piece to cccept the tip of the mounting screw. Test fit. Use o square tc check and make sure that ycur dragon stands straight, and make adjustments as necessary by sanding the bottom edge of the uprighl. Remove the screw, apply glue to the bottom edgo of the upright, reinslall Ihe screw, and allow to dry. For questions concerning this project, send a SASE to: Hirk Boelrnan, P.O. Box 701. Platteville, Wl 53818. Email; dirk-draws@ce.nturytcl.not ^ Creative Woodworks R Ci af .s August 20C5 ♦ 55 Refer to the photo of Ihe finished product and the illustration to position the arms, logs, cars and horns. Attach each piece with glue, ard allow to dry. Touch up any imperfections. Test fit the clock movement, and make adjustments as needed. Set the clock insert aside and apply finish us desired. We applied Watco Danish natural oil finish. It has a thin, waler like consistency that makes it ecsy to get into small openings and crevices. We apply it with a foam brush, and use an artist's brush tc touch up Ihe difliccll ureas. Usually we apply one coat, wipe off the excess with a rag, and lei il dry for a day. Then we apply a second coal in the same manner. Somelimes a Ihird coat is necessary, but most times two coats is sufficient. After the final coat dried for a day or two, we spruyed on three coats of Minwax clear semi-glcss polyurethane, lightly sanding belween the second and third ccats with fine sandpaper. Then we removed all dust with a tack cloth. Note: When applying the finish, take special care to sprcy the top, bottom, and all fcur sides from different angles so us lo get into cut out areas as much as possible. Spray thin coats to avoid runs and sags Once the final coat had dried completely, we gave the project a final rub down with plain brown pepor from a grocery/shopping bug. Remember: Always follow Ihe manuluclurer's directions for use and disposal of all finishing producls, and always do your "experimenting" with finishes on scrap materials. After Ihe finish has dried, reinstall the clock irsert, and your Time Stonier is rocdy io display in your castle! |


