Creative Woodworks & crafts 2005-08, страница 76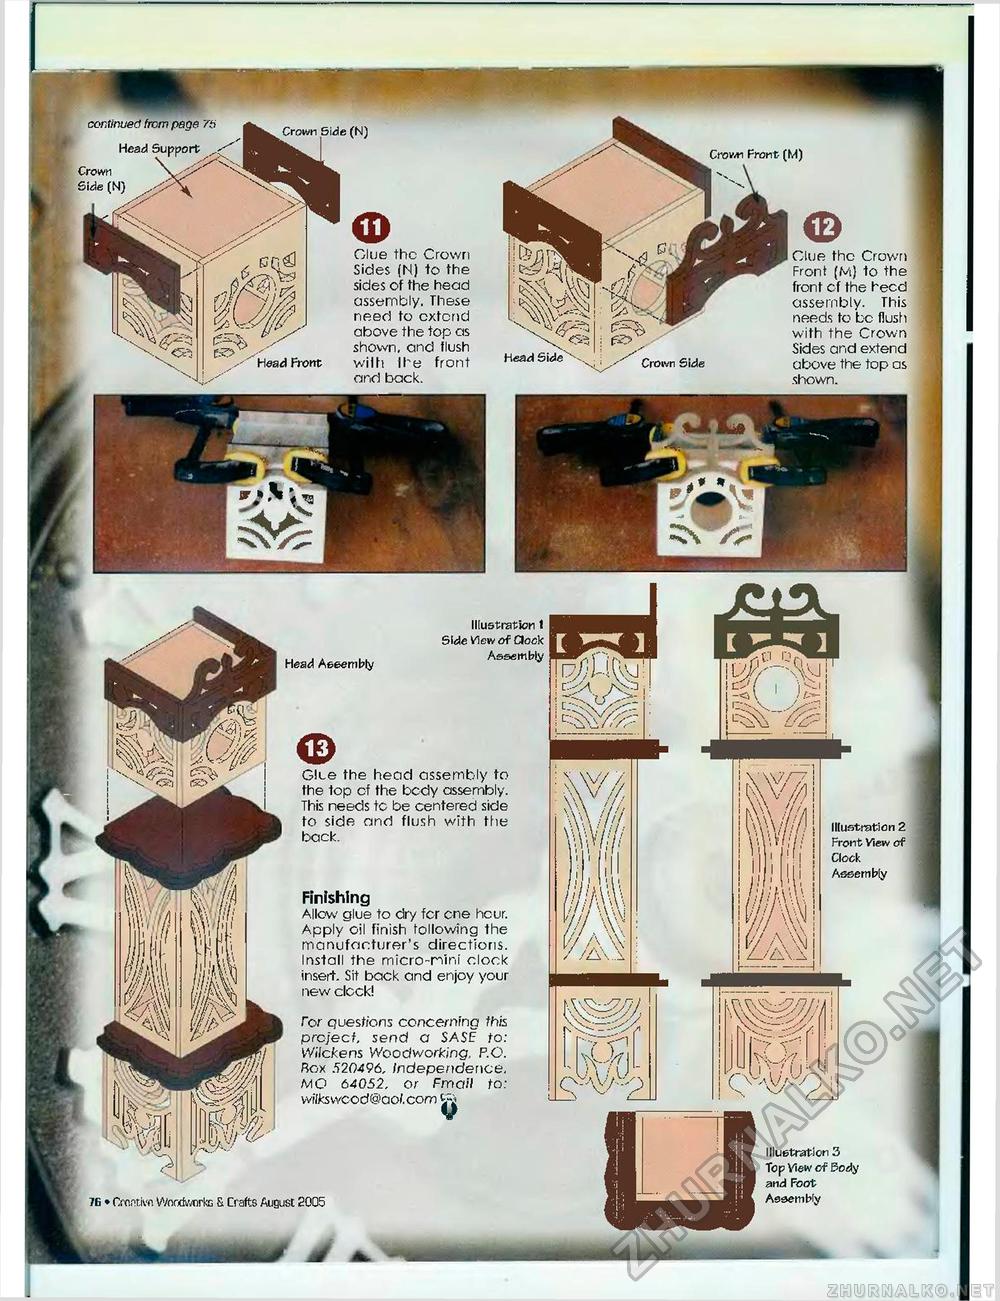
<3* Head Side ' Crown Side Clue the Crown Front (M) to the front cf the heed assembly. This needs to be flush with the Crown Sides and extend above the top as shown. Crown Side
Illustration t Side View of Clock Assembly Glte the head assembly to the top of the bedy assembly. This needs tc be centered side to side and flush with the back. Finishing Allow glue to dry for one hour. Apply oil finish following the manufacturer's directions. Install the micro-nini clock insert. Sit back and enjoy your new clock! /"or questions concerning this project, send a SASE to: Wilckens Woodworking, P.O. Rox 520496, /ndependence, MO 64052, or Fmoil to: vvilksvvood@aof.com ^ Illustration 2 Front View of Clock Assembly Illustration 3 Top View of Body and Foot Assembly ! |
||||||


