Creative Woodworks & crafts 2005-09, страница 61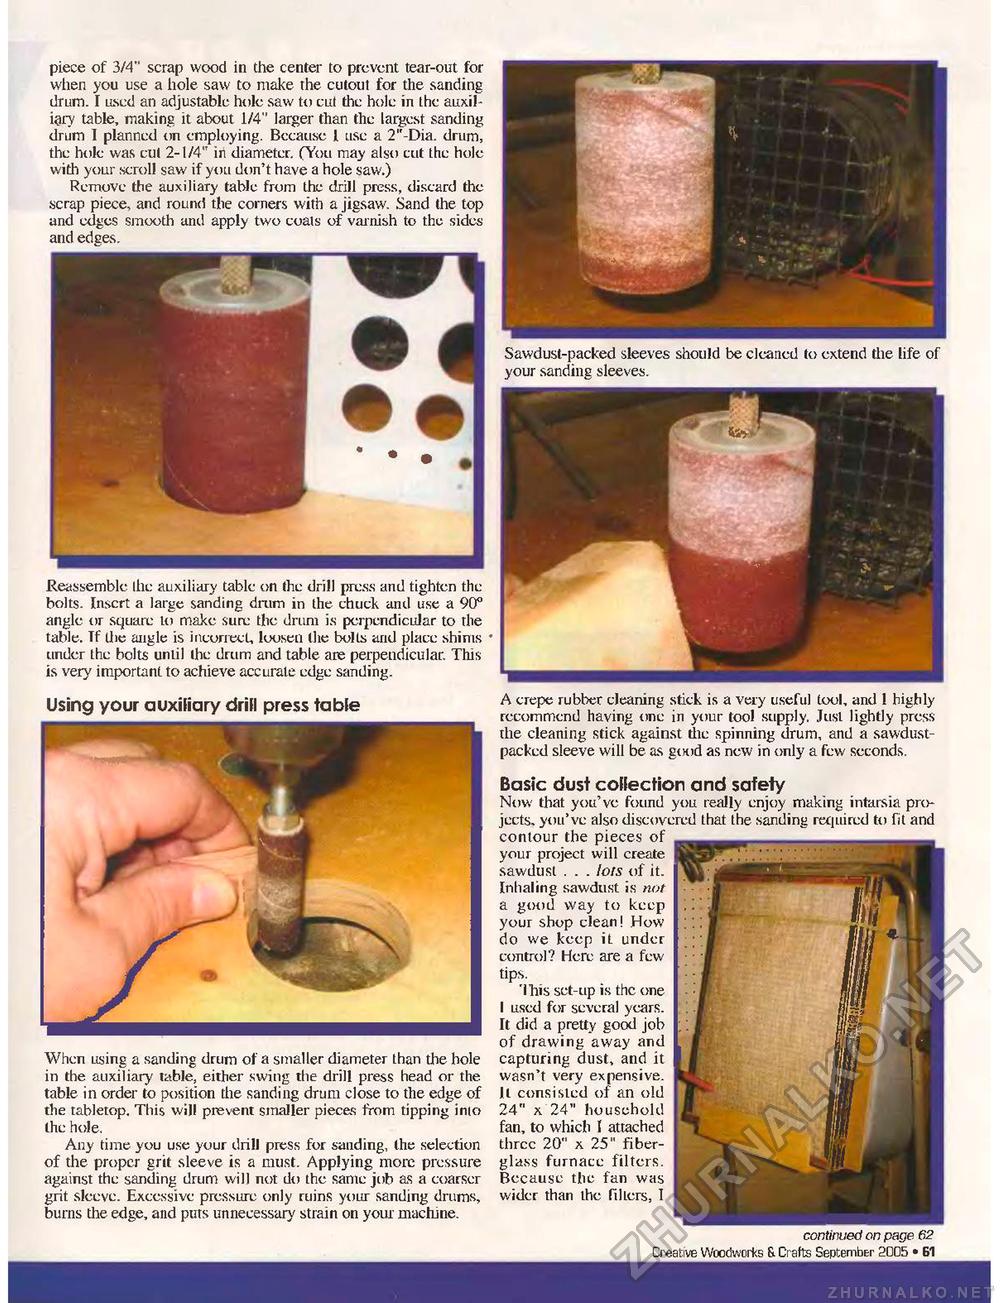
Reassemble the auxiliary table on the drill press and tighten the bolts. Insert a large sanding drum in the chuck and use a 90° angle or square to maJ<e sure the drum is perpendicular to the table. Tf the angle is incorrect, loosen the bolts and place shims • under the bolts until the drum and table are perpendicular. This is very important to achieve accurate edge sanding. piece of 3/4" scrap wood in the center to prevent tear-out for when you use a hole saw to make the cutout for the sanding drum. I used an adjustable hole saw to cut the hole in the auxiliary table, making it about 1/4" larger than the largest sanding drum I planned on employing. Becausc I use a 2"-Dia. drum, the hole was cut 2-1/4" in diameter. (You may also cut the hole with your scroll saw if you don't have a hole saw.) Remove the auxiliary table from the drill press, discard the scrap piece, and round the corners with a jigsaw. Sand the top and edges smooth and apply two coats of varnish to the sides and edges. Sawdust-packed sleeves should be cleaned to extend the life of your sanding sleeves. When using a sanding drum of a smaller diameter than the hole in the auxiliary table, either swing the drill press head or the table in order to position the sanding drum close to the edge of the tabletop. This will prevent smaller pieces from tipping into the hole. Any time you use your drill press for sanding, the selection of the proper grit sleeve is a must. Applying more pressure against the sanding drum will not do the same job as a coarser grit sleeve. Excessive pressure only ruins your sanding drums, burns the edge, and puts unnecessary strain on your machine. Using your auxiliary drill press table A crepe rubber cleaning stick is a very useful tool, and 1 highly recommend having one in your tool supply. Just lightly press the cleaning stick against die spinning drum, and a sawdust-packed sleeve will be as good as new in only a few seconds. Basic dust collection and safety Now that you've found you really enjoy making intarsia projects. you've also discovered that the sanding required to fit and contour the pieces of your project will create sawdust . . . lots of it. Inhaling sawdust is not a good way to keep your shop clean! How do we keep it under control? Here are a few tips. 'ibis set-up is the one I used for several years. It did a pretty good job of drawing away and capturing dust, and it wasn't very expensive. It consisted of an old 24" x 24" household fan, to which I attached three 20" x 25" fiberglass furnace filters. Because the fan was wider than the fillers, I continued on page 62 Creative Woodworks & Cr afts September 2005 • 61 |


