Creative Woodworks & crafts 2005-09, страница 59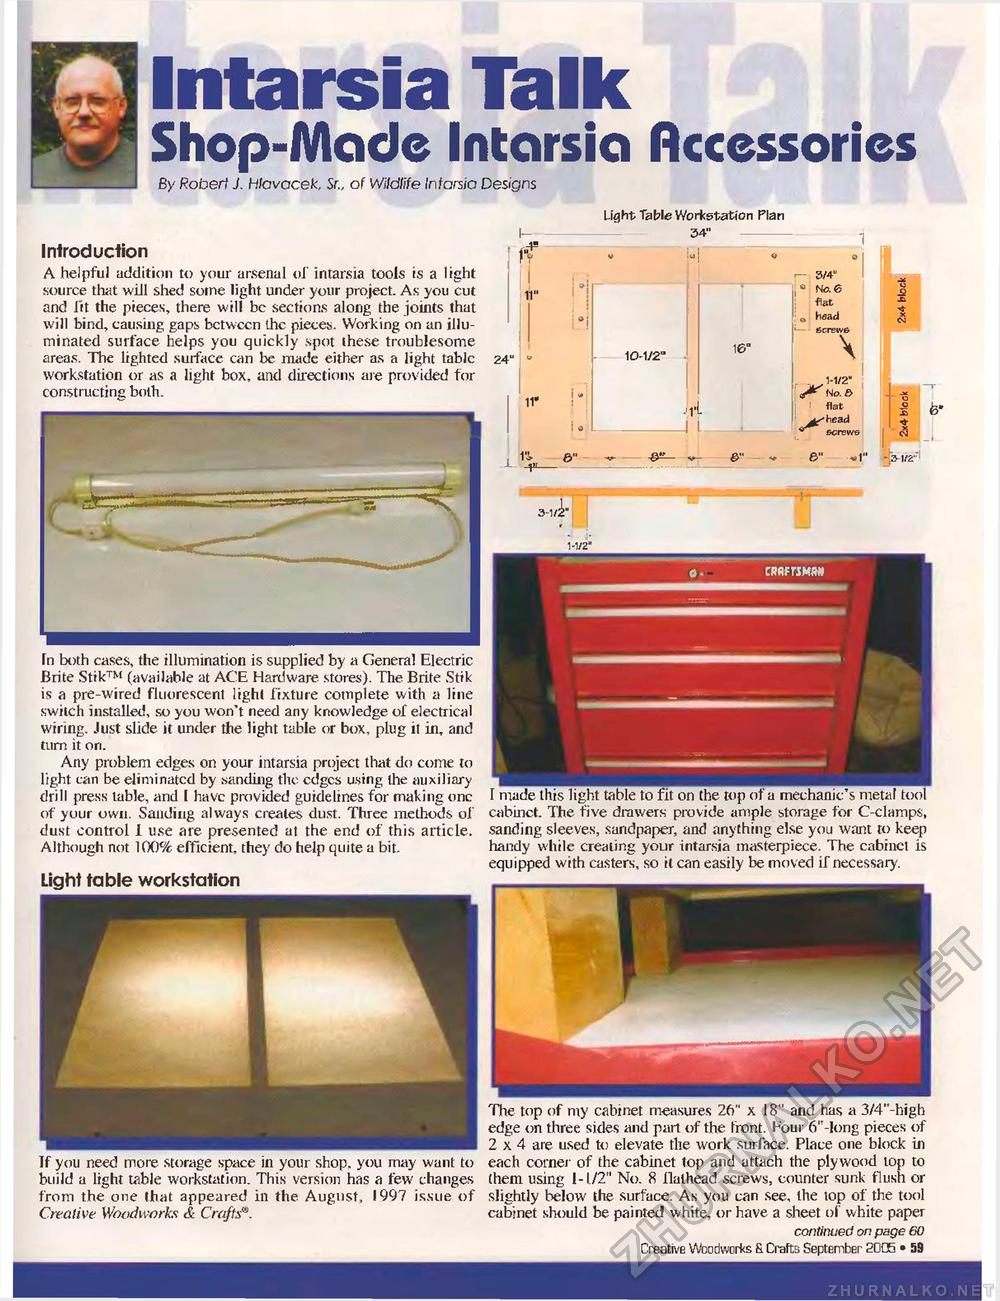
Intarsia TalkShop-Made Intarsia Accessories By Robert J. Hlavacek, Sr., of Wildlife Intarsia Designs Introduction A helpful addition to your arsenal of intarsia tools is a light source that will shed some light under your project. As you cut and Jit the pieces, there will be sections along the joints that will bind, causing gaps between the pieces. Working on an illuminated surface helps you quickly spot these troublesome areas. The lighted surface can be made either as a light tabic workstation or as a light box, and directions are provided for constructing both. fn both cases, the illumination is supplied by a General Electric Brite Stik™ (available at ACE Hardware, stores). The Brite Stik is a pre-wired fluorescent lighl fixture complete with a line switch installed, so you won't need any knowledge of electrical wiring. Just slide it under the light table or box, plug it in, and turn it on. Any problem edges on your intarsia project that do come to light tan be eliminated by sanding the edges using the auxiliary drill press table, and I have provided guidelines for making one of your own. Sanding always creates dust. Three methods of dust control 1 use are presented at the end of this article. Although not 100% efficient, they do help quite a bit. Light table workstation If you need more storage space in your shop, you may want to build a light table workstation. This version has a few changes from the one lhat appeared in the August, 1997 issue of Creative Woodworks & Crafts ff jl 11" Light Table Workstation Plan 34" 24" I I •j 11' 10-1/2" 16° ■R -I L e>"
b-
1-1/2" 1-1/2" I made this light table to fit on the top of a mechanic's metal tool cabinet. The five drawers provide ample storage for C-clamps, sanding sleeves, sandpaper, and anything else you want to keep handy while creating your intarsia masterpiece. The cabinet is equipped with casters, so it can easily be moved if necessary. The top of my cabinet measures 26" x 18" and has a 3/4"-high edge on three sides and part of the front. Hour 6"-long pieces of 2 x 4 are used to elevate the work surl'ace. Place one block in each corner of the cabinet top and attach the plywood top to them using 1-1/2" No. 8 flalhead screws, counter sunk flush or slightly below the surface. As you can see, the top of the tool cabinet should be painted white, or have a sheet of white paper continued on page 60 Creative Woodworks & Crafts September 2005 • 59 |
||||||||||||||||||||||||||||||||||


