Creative Woodworks & crafts 2005-09, страница 57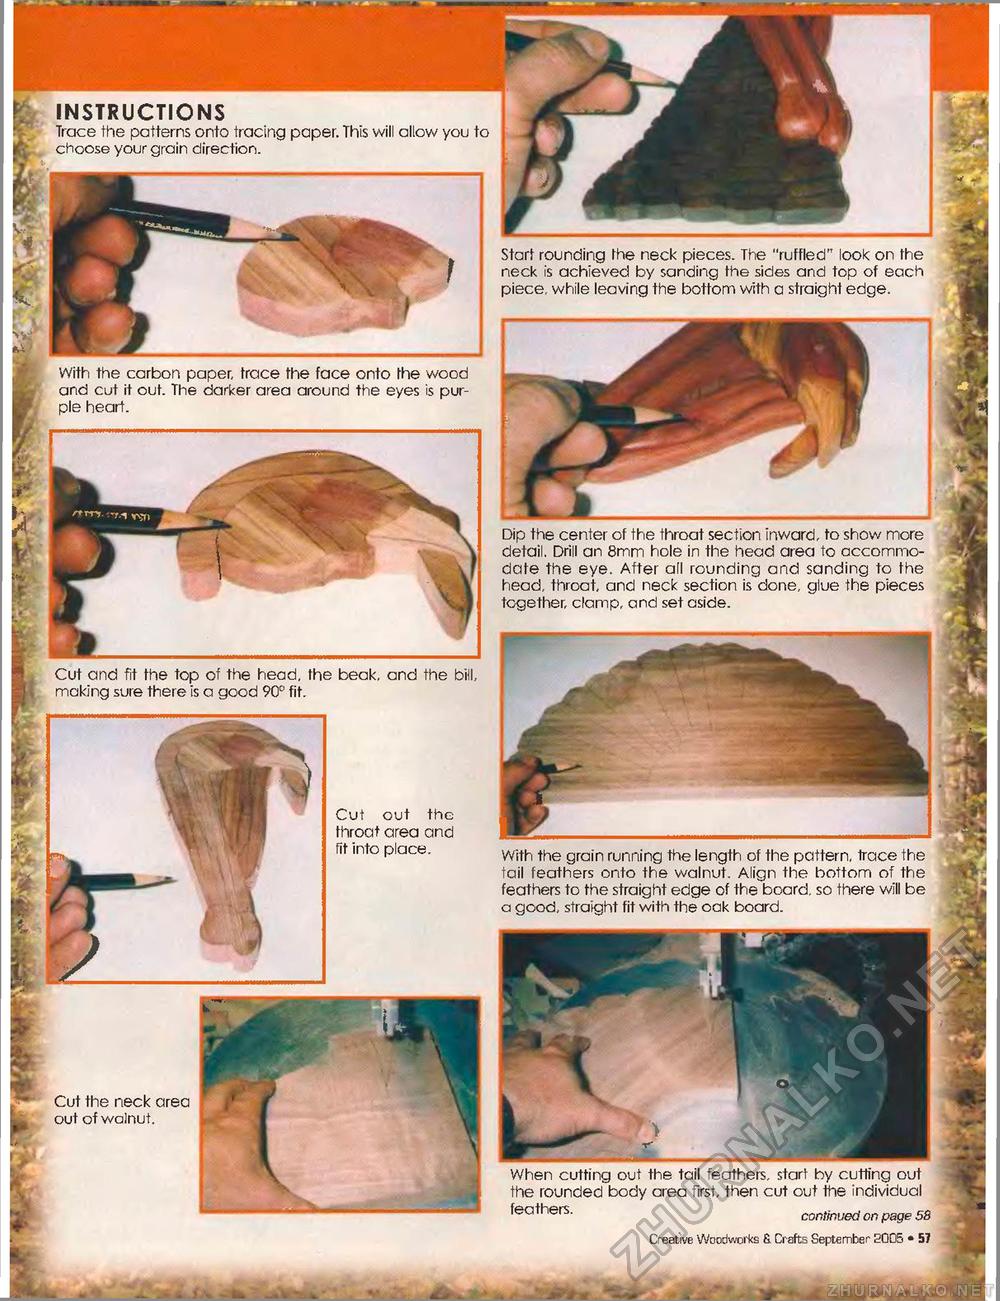
) ft S v' INSTRUCTIONS Trace the patterns onto tracing paper. This will allow you to choose your grain direction. r*r „ A t* Cut the neck area out of walnut. it ML. . Dip the center of the throat section inward, to show more detail. Drill an 8mm hole in the head area to accommodate the eye. After all rounding and sanding to the head, throat, and neck section is done, glue the pieces together, clamp, and set aside. Start rounding the neck pieces. The "ruffled" look on the neck is achieved by sanding the sides and top of each piece, while leaving the bottom with a straight edge. Cut out the throat area and fit into place. With the carbon paper, trace the face onto the wood and cut it out. The darker area around the eyes is purple heart. When cutting out the tail feathers, start by cutting out the rounded body area first, then cut out the individual feathers. continued on page 58 Creative Woodworks fi. Crafts September 2005 • 57 With the grain running the length of the pattern, trace the tail feathers onto the walnut. Align the bottom of the feathers to the straight edge of the board, so there will be a good, straight fit with the oak board. Cut and fit the top of the head, the beak, and the bill, making sure there is a good 90° fit. |


