Creative Woodworks & crafts 2005-11, страница 27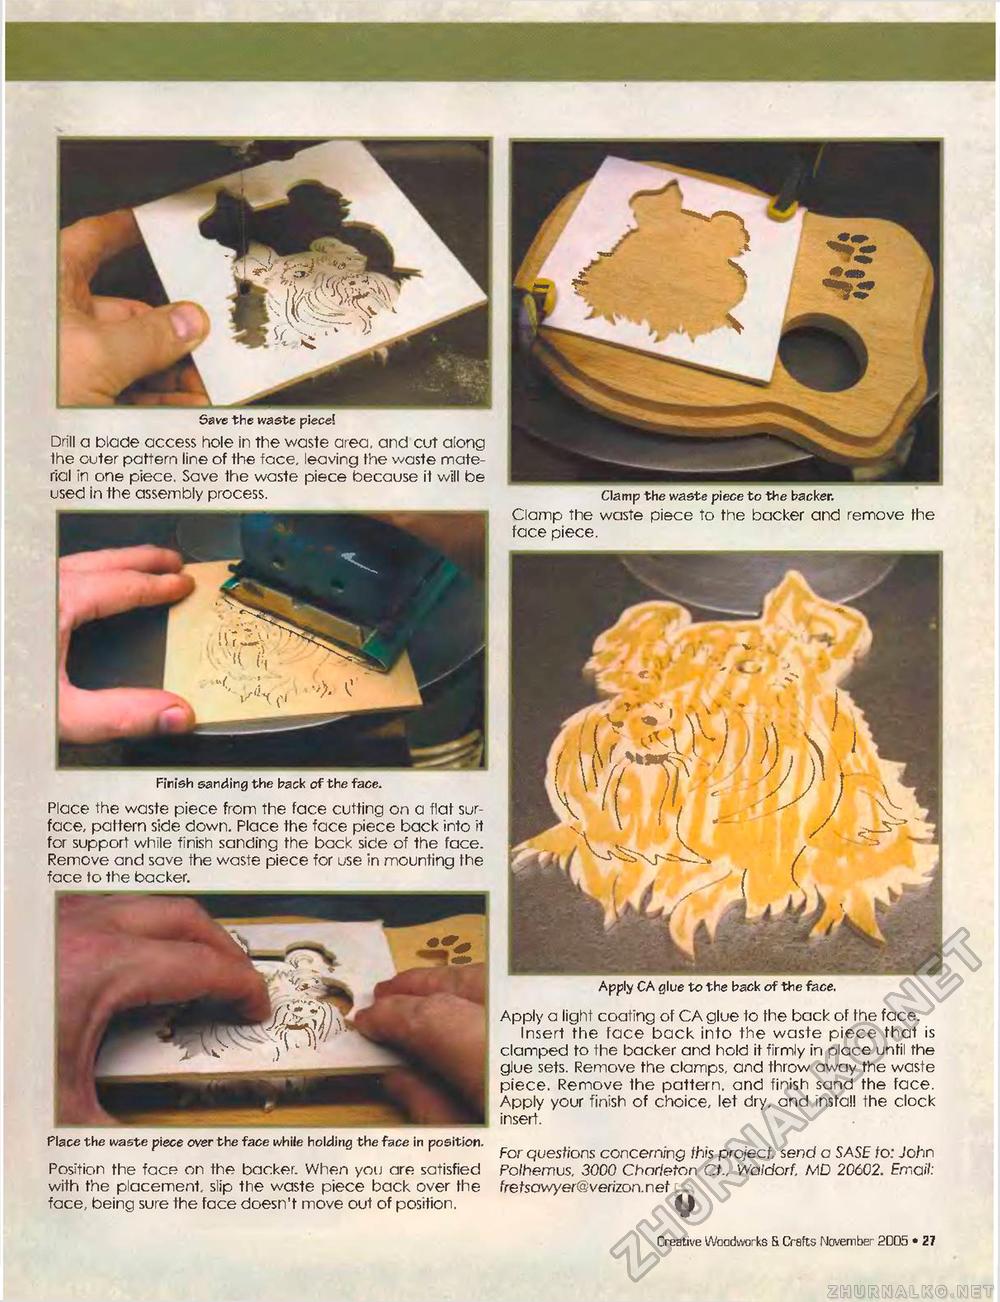
\ Finish sanding the back of the face. Place the waste piece from the face cutting on a flat surface, pattern side down. Place the face piece back into it for support while finish sanding the back side of the face. Remove and save the waste piece for use in mounting the face to the backer. Save the waste piece! Drill a blade access hole in the waste area, and cut along 1he outer pattern line of the face, leaving the waste material in one piece. Save the waste piece because it will be used in the assembly process. Clamp the waste piece to the backer. Clamp the waste piece to the backer and remove the face piece. Apply CA glue to the back of the face. Apply a light coating of CA glue to the back of fhe face. Insert the face back into the waste piece that is clamped to the backer and hold it firmly in place until the glue sets. Remove the clamps, and throw away the waste piece. Remove the pattern, and finish sand the face. Apply your finish of choice, let dry, and install the clock insert. Place the waste piece over the face while holding the face in position. Position the face on the backer. When you are satisfied with the placement, slip the waste piece back over the face, being sure the face doesn't move out of position. For questions concerning this project, send a SASE to: John Po/hemus. 3000 Chorteton CJ., Waldorf. MD 20602. &nafl: fre /"sawyer© verizon. net _ , Creative Woodworks 6. Crafts November 2005 « 27 |


