Creative Woodworks & crafts 2005-11, страница 57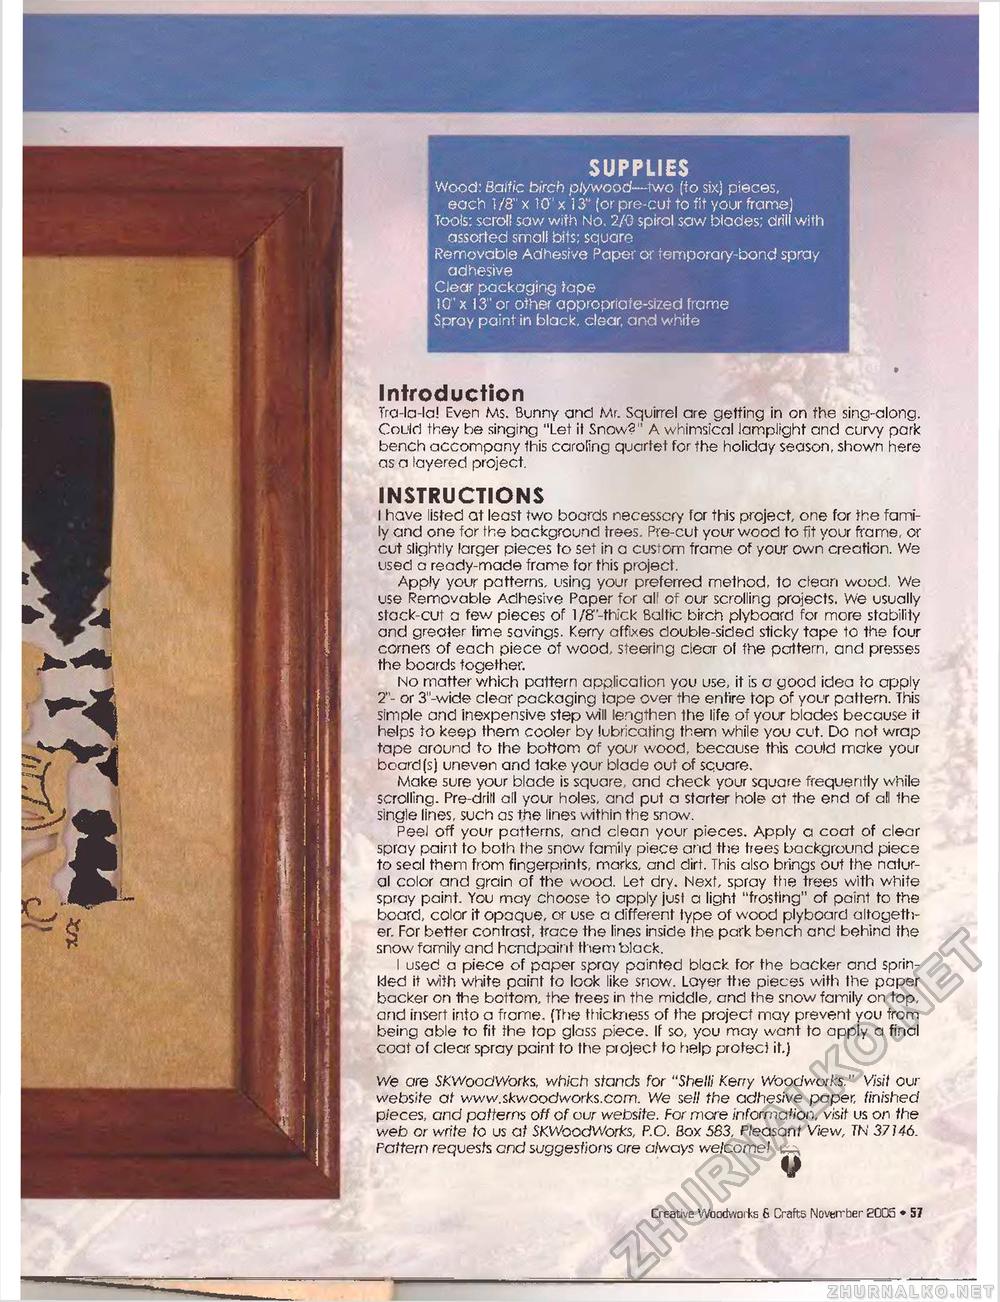
SUPPLIES Wood: Baltic birch plywood—two (to six) pieces, each 1/3" x 10'1 x i 3" (or pre-cut to tit your frame) Tools: scroll sow with No. 2/0 spiral sow blades; drill with assorted small bits: square Removable Adhesive Paper or temporary-bond spray adhesive Clear packaging tape 10" x 13" or other appropriate-sized frame Spray paint in black, clear, and white Introduction Tra-la-la! Even Ms. Bunny and Mr. Squirrel are getting in on the sing-along. Could they be singing "Let if Snow? " A whimsical lamplight and curvy park bench accompany this caroling quartet for the holiday season, shown here as a layered project. INSTRUCTIONS I have listed at least two boards necesscry for this project, one for the family and one for the background trees. Pre-cut your wood to fit your frame, or cut slightly larger pieces to set in a custom frame of your own creation. We used a ready-made frame for this project. Apply your patterns, using your preferred method, to clean wood. We use Removable Adhesive Paper for all of our scrolling projects. We usually stack-cut a few pieces of 1 /S'-thick Baltic birch plyboard for more stability and greater time savings. Kerry affixes double-sided sticky tape to the four corners of each piece of wood, steering clear of the pattern, and presses the boards together. No matter which pattern application you use, it is a good idea to apply 2"- or 3"-wide clear packaging tape over the entire top of your pattern. This simple and inexpensive step will lengthen the life of your blades because it helps to keep them cooler by lubricating them while you cut. Do not wrap tape around to the bottom of your wood, because this could make your board (s) uneven arid lake your blade out of square. Make sure your blade is square, and check your square frequently while scrolling. Pre-drill all your holes, and put a starter hole at the end of all the single lines, such as the lines within the snow. Peel off your patterns, and clean your pieces. Apply a coat of clear spray paint to both the snow family piece and the trees background piece to seal thern from fingerprints, marks, and dirt. This also brings out the natural color and grain of the wood. Let dry. Next, spray the trees with white spray paint. You may choose to apply just a light "frosting" of paint to the board, color it opaque, or use a different type of wood plyboard altogether. For better contrast, trace the lines inside the park bench and behind the snow family and hcndpaint thern black. I used a piece of paper spray painted black for the backer and sprinkled it with white paint to look like snow. Layer the pieces with the paper backer on 1he bottom, the trees in the middle, and the snow family on top, and insert into a frame. (The thickness of the project may prevent you from being able to fit the top glass piece. If so, you may want to apply a final coat of clear spray paint to the project to help protect it.) We are SKWoodWorks, which stands for "Shelli Kerry Woodworks." Visit our website at www.skwoodworks.com. We sell the adhesive paper, finished pieces, and pa/ferns off of our website. For more information, visit us on the web or write to us at SKWoodWorks, P.O. Box 583, Pleasant View, TN 37146. Pattern requests and suggestions are always welcome! Creative Woodworks 6. Crafts November 2005 « 57 |


